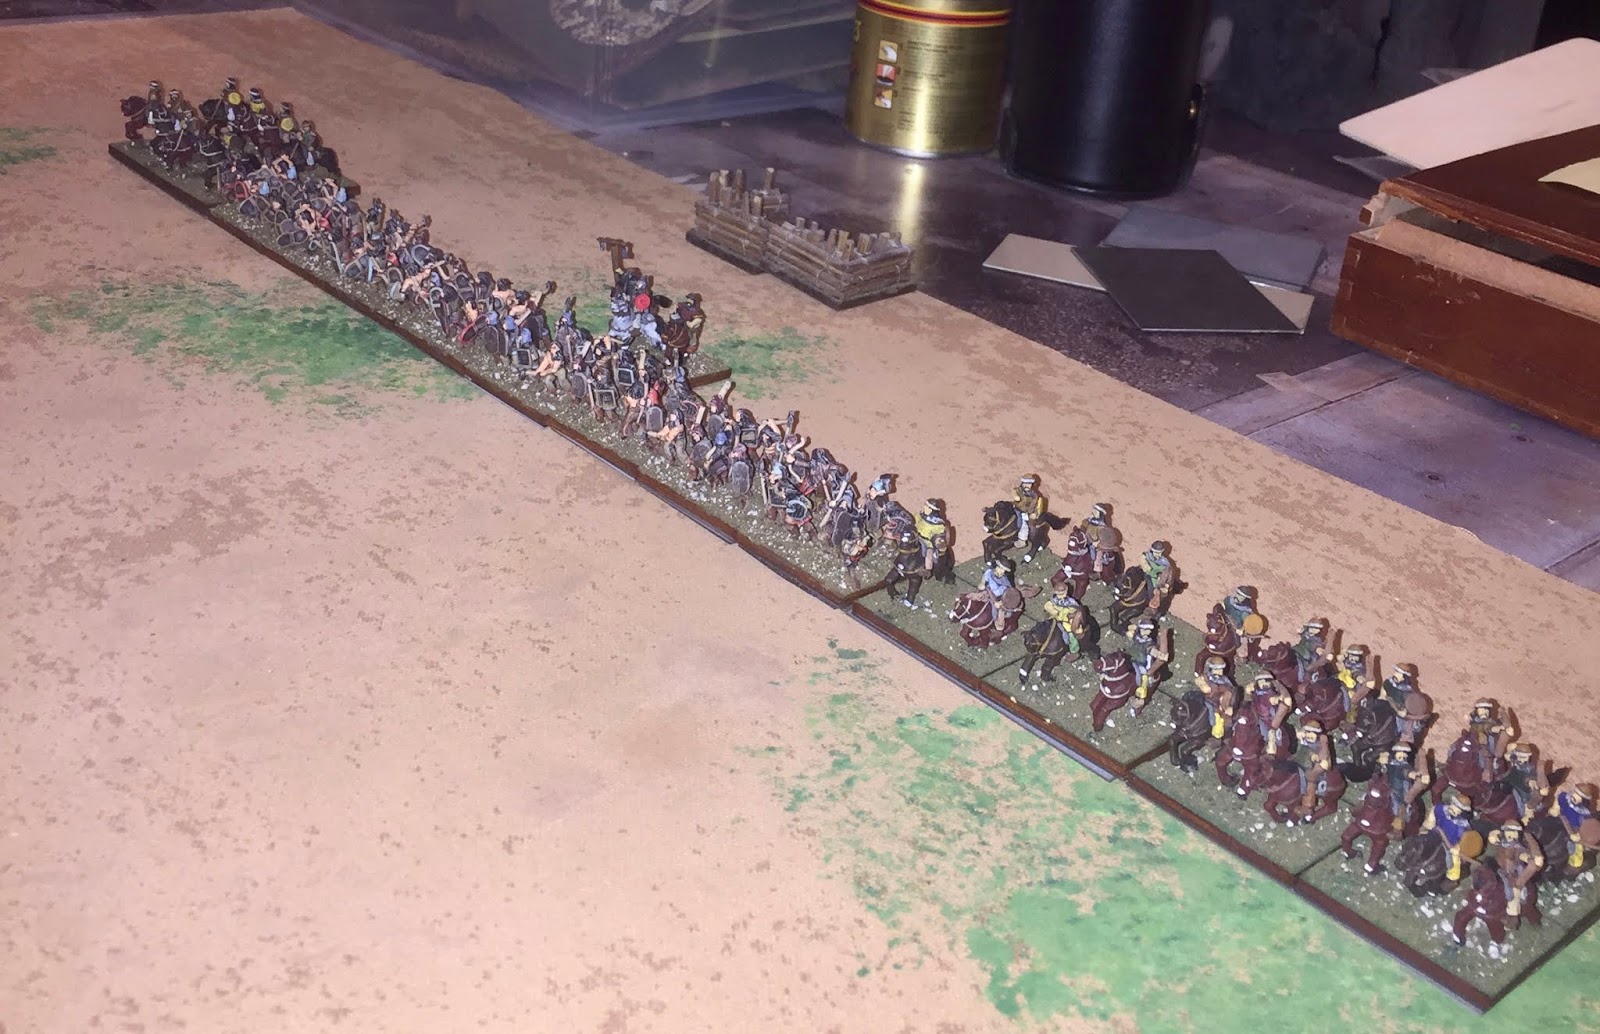
Sassanid List and Host:

Sabir List and Host:

The Sassanids won the initiative and opted to take Steppe from the Sabir terrain. The Sabir took two opens and the Sassanid opted for a Brush. The Sassanid Brush ended up being picked up so the table was an open plain.

The Sassanid host deployed: Blue Average Cavalry at bottom left followed by White Average Cavalry, the Cataphracts and the Orange Superior Cavalry.

The Sabir host deployed: Light Horse Archers at top left, the two Foot Warriors, the second Light Horse Archers and the Superior Cavalry Archers.
The Sassanids moved first and saw the Cataphracts and the Orange Cavalry move forward and slide 1 base left in their first move and then wheel slightly to the left and forward for the 2nd move stopping just outside of 5" from the Sabir line. The Blue and White Cavalry expanded two stands while stationary.

The Sabir 1st turn saw the light horse and cavalry on the Sabir left move 5" forward with a 1 base shift left. The two Sabir foot warrior BGs wheeled 3" to their right as a battle line. The right end Light Horse wheeled right 4" and then wheeled left 3". Shooting was ineffective and the turn ended. (No picture for this turn)
The Sassanid 2nd turn had the Sassanid Cataphracts and Orange Cavalry moving 2" forward. The White and Blue Cavalry individually wheeled to their right staying in line to face the Sabir envelopment on their flank. The Sabir shooting was more effective than the Sassanid as the Orange Cavalry suffered two hits but passed cohesion. With nothing else happening, the Sassanid 2nd turn ended.
For the Sabir 2nd turn, the Light Horse on the Sabir left moved to within 3" of the Blue Cavalry. The Superior Sabir Cavalry moved forward 4" and then wheeled 1" towards the Blue Cavalry. On the Sabir right, the Light Horse failed a CMT to fall back 2" facing the enemy and opted to stay where they were. The Foot Warrior line moved to within 1" of the Cataphracts. In the shooting phase, the Sabir Light Horse on the right was ineffective while the Sassanid Orange Cavalry was split. The Sassanid Blue Cavalry hit the light horse to their front and managed to disrupt them. The Sabirs, meanwhile, hit the Blue Cavalry twice who dropped to Disrupted. With no combat, the turn ended. (No picture for this turn either)
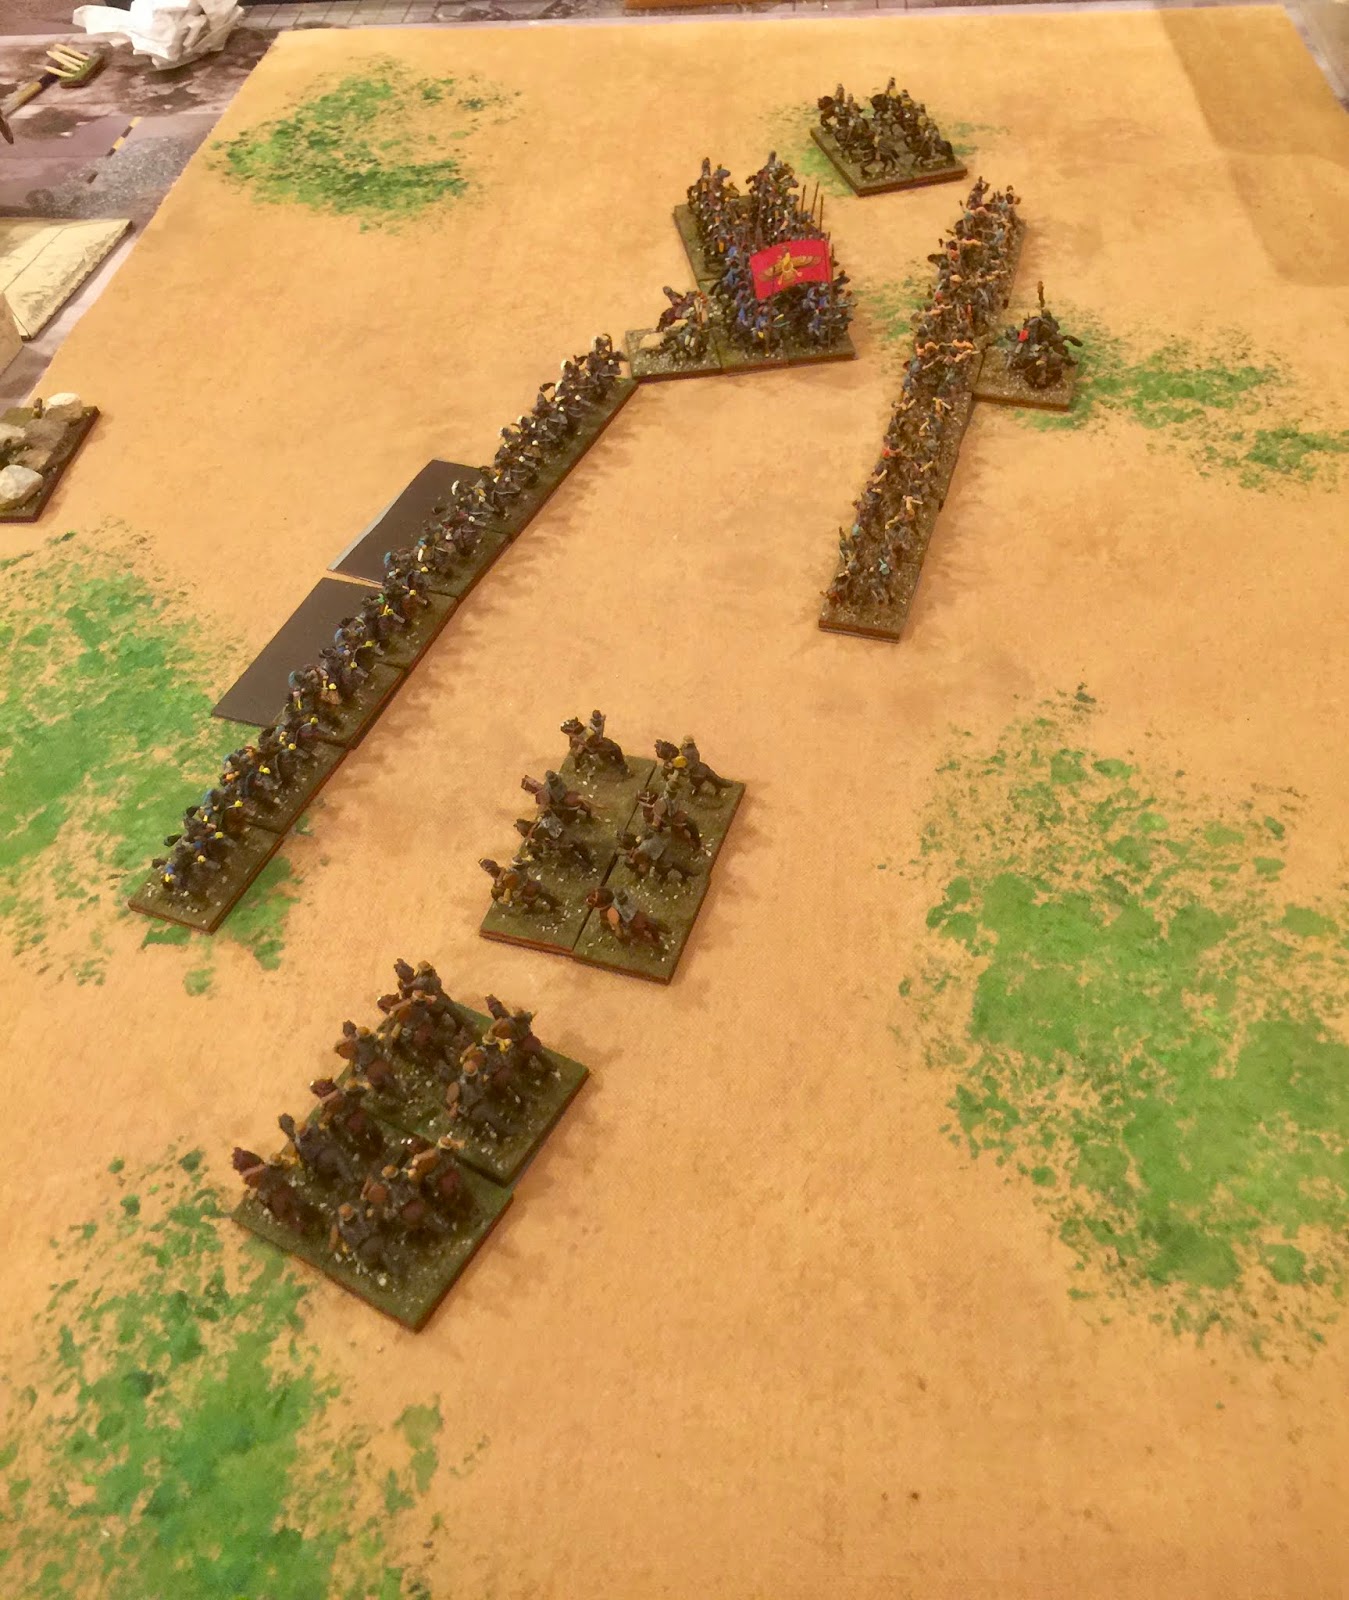
To start the Sassanid 3rd turn, the Cataphracts and the Orange Cavalry charged. The Sabir right flank light horse evaded 8" ending 3/4" from the table edge. The Cataphracts and the Orange Cavalry plowed into the right end Sabir Foot Warrior BG. The Sassanid General led the Cataphracts into the fray while the Sabir Chieftain led his foot warriors into the fight. The Cataphracts and the Orange Cavalry both managed 2 hits to the Foot Warriors but took 3 each in return. Both Sassanid cavalry BGs passed their death roll as the General narrowly dodged a thrown Sabir Axe but both also disrupted. The Sabir Foot Warriors suffered a base loss from the death roll. On the opposite end of the Sassanid line, the Blue Cavalry passed a CMT and charged. The Sabir Light Horse evaded 9" while the Blue Cavalry charged into the Sabir Superior Cavalry. In the ensuing impact, the Sabirs scored 2 hits to none. The Blue Cavalry fragmented on their cohesion test after passing their death roll. In the maneuver phase, the Sassanid Blue Cavalry shifted one stand to cover the existing overlap against the Sabir cavalry and the Sassanid White Cavalry moved to within 3" of the second Sabir Foot Warrior BG. In the shooting phase, the White Cavalry only managed 2 hits to the Foot Warriors to their front to no effect. In melee, the Blue Cavalry scored 2 hits to 1. The Sabir Cavalry suffered no loss from the death roll and passed their cohesion test. On the other end of the line, both the Cataphracts and the Orange cavalry managed 2 hits each while the Sabir foot warriors only managed 2 to the Cataphracts in return. The Sabir Foot passed their death roll and the Sabir Chieftain survived combat again. However, the cohesion test was not kind as the Sabirs double dropped to fragmented. Thus the turn ended.

To start the Sabir 3rd turn, there were no charges to be had. So into maneuver, the turn shifted. The unengaged Sabir Foot Warrior BG passed a CMT and advanced to 0.5" of the White Sassanid Cavalry. The right wing Sabir Light Horse moved forward and wheeled onto the flank of the Orange Sassanid Cavalry. The left wing Sabir Light Horse reversed direction and advanced to towards the fragmented Blue Cavalry. In the shooting phase, the Sassanid White Cavalry scored 3 hits but the Sabir Foot emerged unscathed. In the melee phase, the Blue Cavalry scored 1 hit to the 2, passed their death roll but broke cohesion. In the initial pursuit, the broken Sassanids moved 5", were caught by the pursuing Huns and lost a base. On the other end of the line, the Cataphracts scored 2 hits but the Orange Cavalry missed. The Foot Warriors only managed two hits to the Cataphracts in return. In Joint Action, the Hun Cavalry failed a CMT to stop pursuing the broken Sassanid cavalry who fled off the table while the Huns stopped an inch short of the edge. The Cataphracts rallied from disrupted while the fragmented Sabir Foot rallied to disrupted.

To start the Sassanid 4th turn, no charges to be made so the Sassanid White Cavalry rolled a CMT and moved 2" back and turned to face the Foot Warriors to their front. Sassanid shooting continued its run of ineffectiveness this turn. In melee, the Cataphracts and Orange Cavalry scored 1 hit each but took 2 and 1, respectively, in return. The Cataphracts survived their death roll and cohesion test to end the melee phase. In Joint Action, the Sabir Foot Warriorsin the melee rallied from disrupted to fresh.

To begin the Sabir 4th turn, the Sabir Light Horse charged into the flank of the Orange Cavalry. In the ensuing impact, the Light Horse scored 2 hits to 1 but the Orange Cavalry survived the death roll and passed cohesion. In the movement phase, the center Sabir Foot Warrior BG failed a CMT to advance short on the White Cavalry and remained stationary. The Sabir Cavalry turned 90 and waited. The left wing Sabir Light Horse advanced to within 3" of the Sassanid White Cavalry. In the shooting phase, neither the Sassanids nor the Sabir remembered what a bow was for. In melee, the Cataphracts scored 2 hits but took 3 in return losing a base and disrupting. The Orange Cavalry scored only 1 hit to the Foot to their front and failed to hit the light horse on their flank. The Sabirs managed 1 from the Foot Warriors and 2 from the Light Horse. The Orange Cavalry passed their death roll but dropped to fragmented on cohesion. The Foot warriors lost 1 base from their death roll. In the Joint Action Phase, the Cataphracts were compelled to break off 4".

Vahrez Timr recognized that things were getting desperate for his cavalry and charged back in with the Cataphracts to begin the Sassanid 5th turn. However, impact continued the trend of poor results for the Sassanids as the Cataphracts scored only 1 hit to 3. Luckily, the Cataphracts survived the death roll and the cohesion test. The White Sassanid Cavalry attempted a CMT but failed. In the shooting phase, the White Cavalry scored 3 hits on the Foot Warriors to their front who passed both their death roll and cohesion test. The Sabir Light Horse, however, scored 2 hits on the White Cavalry who did not survive their cohesion test. The shooting phase ended with the White Cavalry disrupted. In melee, the Cataphracts scored 2 hits to 2, the Orange Cavalry scored 1 hit to each of the Foot Warriors and Light Horse. However, the Orange Cavalry took 3 hits in return but luckily passed both the death roll and cohesion test. The Sabir Foot Warriors however lost another base. In Joint Action, the Cataphracts broke off and attempted to bolster once more but failed.

To begin the Sabir 5th turn, the middle Sabir Foot Warriors charged the White Cavalry as did the Sabir Light Horse. The White Cavalry opted to stand. In the impact, the White Cavalry scored 1 hit and 2 hits to the Light Horse and Foot Warriors respectively taking 3 total hits in return from the same. A base was lost by the White Cavalry on their death roll. In the maneuver phase, the Sabir Foot facing the Orange Cavalry shifted a base to cover the open file. The Sabir Cavalry moved 5" to threaten the flank of the White Sassanid Cavalry. As there was no shooting to be had, the turn moved into the melee phase. The White Cavalry scored a single hit to the Light Horse but inflicted none to the Foot Warriors. In return, they suffered 2 hits from the Sabir Light horse and none from the Foot Warriors. The White Cavalry suffered a base lost on their death roll causing them to autobreak. With the routing of the White Cavalry, Vahrez Timr, ordered his broken army from the field.
25-0 to the Huns in old money.


No comments:
Post a Comment
Due to spambots making inappropriate comments, all comments are currently moderated. My apologies for the inconvenience.