Showing posts with label Classical India. Show all posts

Sunday, July 21, 2024

India 320 BC

 Keeping focus when no gaming is actually occurring is always a challenge.  As such I have drifted back to ancients after dabbling in ACW for a minute or two and then revisiting AK47 for about half a minute.

Consequently, I have updated and uploaded the campaign rules for From the Indus to the Ganges 320 BC.  The Campaign page can be found here.

I am working again on a scratch build of two bullock carts for the Republican Indians and maybe I'll have them finished by Christmas 🤦  I'll post pictures when they are done.

Saturday, September 3, 2022

Reinforcements for the Classical Indians

 Had a bit of inspiration to paint lately and finished up 4 stands of Indian Clubmen.  The figures are Khurasan 15s and look a bit cartoonish to me but I think they paint up nicely.  Although, the top of their turban reminds me of Dr. Seuss.  Anyway they will be part of a random event in one of my Classical Indian campaigns under development.


Sunday, March 29, 2020

Social Isolation Week 2

Been working on updating the Broken Rays of the Sun Campaign scenario this week.  Christopher Parker of Day of Battle Games has developed a very interesting vehicle for doing campaigns and the Spring 2020 version of the Broken Rays of the Sun Campaign has incorporated some of his thoughts while combining parts of the original design.  I hope some of you find it of interest.

Spring 2020 Broken Rays of the Sun

Painting continues this week.  Last week I updated everyone on the Mountain Indian Light Horse I completed.  This week I have been working on odds and ends while fleshing out my Scythian Horse Archers and finishing a few odd figures for my Classical Indians.


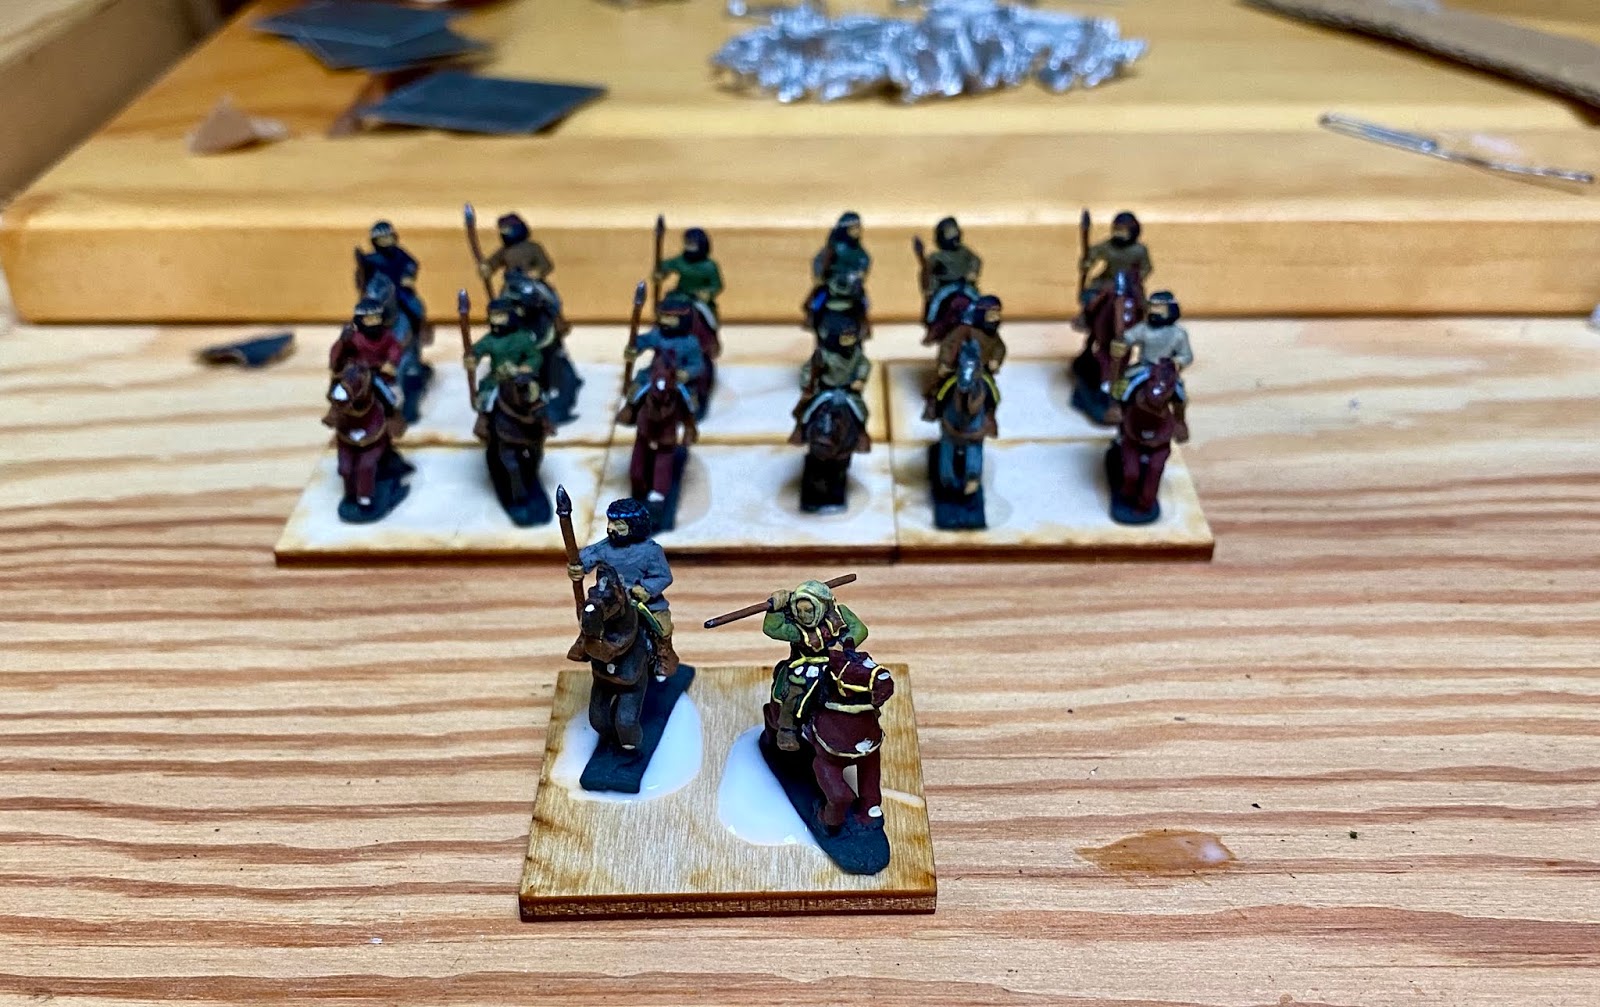
On the left, we have the Mountain Indian Cavalry from last week (my son added the palm tree).  In the back, the beginnings of two 4-stand BGs of Old Glory Skythian Horse Archers (OG pack SK03).  The two horses in front of the Skythians will be part of a steppe army camp using the FIB SK06 Skythian 2 horse Wagons.  In front of them, is a single base of cattle.  I am sometimes induced to play ADLG with the Birmingham Bunnies and my other friends in the GCC and the Classical Indians are allowed a stand of stampeding cattle.  These work as a scythe chariot of sorts in ADLG.  The cattle are from Khurasan (from their West Sudanese Range - no pack #) and the two herders are Essex.  In front of the cattle, there are 8 bases laid out with the first few figures painted of the FIB WEPS09 Daylami Hillmen.  I have another pack of these waiting to be primed as well.  I think these will work well as generic hillmen for anywhere in the Persian East.  Down front on the right, you see 4 stands of Classical Indians.  The two stands on the left are a mix of foot from OG IN04 & IN05 with an extra officer from IN01A thrown in.  The two stands on the right have figures from the OG IN06.  In the far right you can see a single finger from a Skythian foot archer BG I am working on.

I hope to have some finished stands to roll out for next week and maybe even an AAR.

Until next time, keep rolling high (unless you need low).

Friday, March 20, 2020

Gateway to the Ganges II

During this time of Social Isolation, I have also had some time to complete a map for a campaign spanning Northern India.  It is not drawn to scale nor is it 100% historically accurate but it serves my needs.  Originally, my goal was for a map to be used primarily for the Into-Greek period but I think it will also work for the Mauryan Empire through the Kushan Empire.

Social Isolation Update 2

A couple oof weeks ago, I posted a query online about the figures to use for Mountain Indians.  I wanted to use figures that are more Afghan looking than Indian and wanted to use Old Glory 15s to be compatible with my Indians.  I did not want to use Xyston figures if at all possible due to their scale creep.

Scrounging through the mountain o'lead, I found I had quite a few of the MC08 Hippakantistai pack.  these are from the Macedonian line and have a bit of the Afghan look that I was looking for.  The maximum allowed in the Mountain Indian Ally list is 6 stands so I opted to go for all 6.


I found I had some odd figures from the LA02 Later Achaemenid Heavy Cavalry pack and I thought a local warlord might make use of some archaic armour of one of the great empires around them.  One of these figures would work nicely for the local chief then.  I had a few of these figures that I had to replace their javelins due to breakage so I opted for one of them.  I added another of the Hippakantistai to complete the general stand.  Flocking will be next. I am not sure how I am going make it look yet.  Some thing between the solid green of my Classical Indians and the burnt earth color I like for my Parthian/Sassanid/Saka.


I have a code to use for the Mountain Indian archers as well as one for the Mountain Indian spearmen.  In the coming weeks, I hope to post some more updates as the painting continues.


Social Isolation Update I

With schools closed and the crackdown on social activities, I have had quite a bit of time on my hands to work on unfinished projects.  So to start the ball rolling,  the first set of pictures is the Classical Indian army I finished up to get ready for Cold Iron V.  Sadly, we did not have enough players for it to reach the table but I have a feeling it will get trotted out soon for some FOG 300 action in the coming days and weeks...

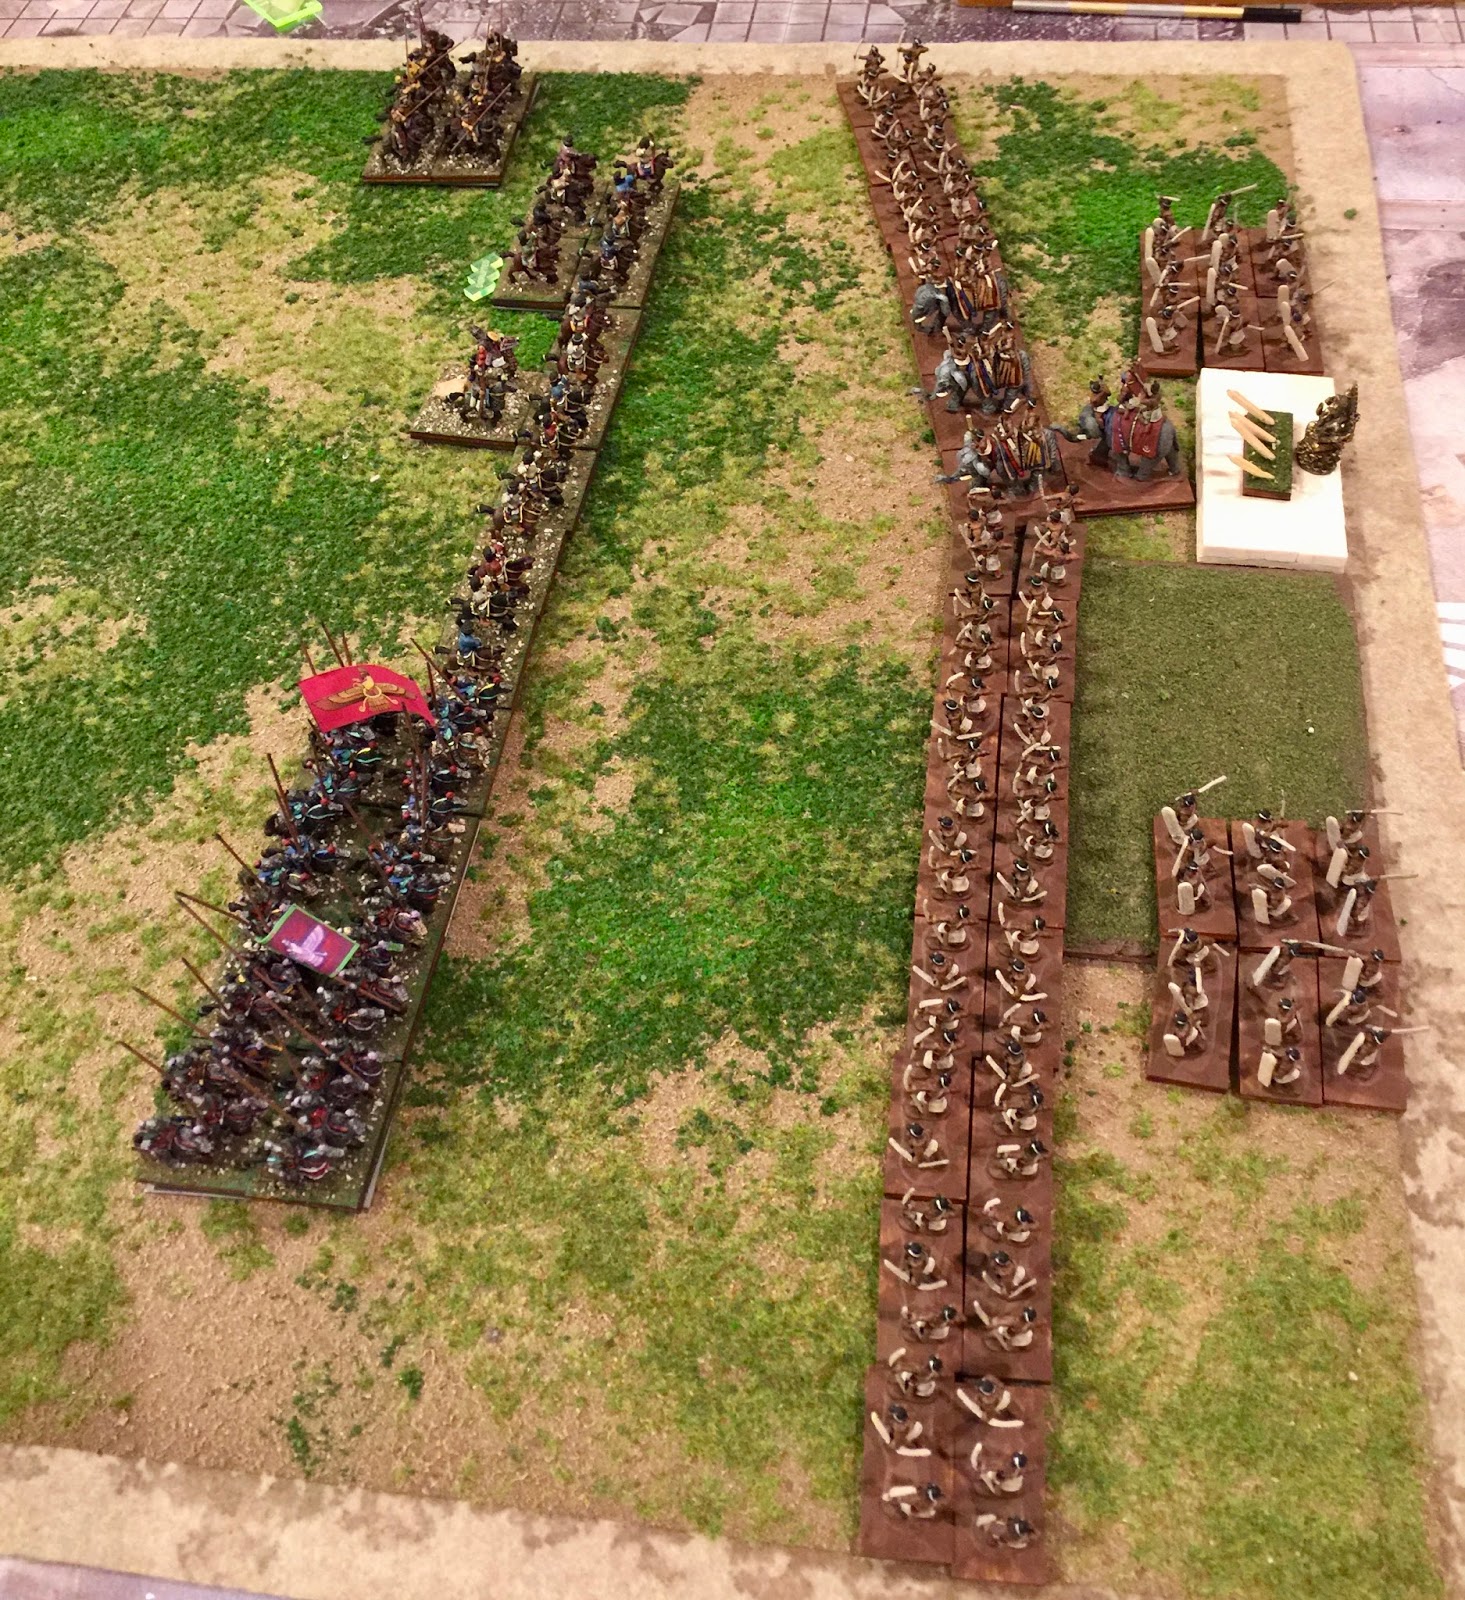
The current Classical Indian Horde.  Generals in front on the left and on the right infant of the Republican Indian contingent.  Ambush markers are in the forefront on the right.
The main body of the Indian army:  Two elephant generals and the CinC in a heavy chariot, 2 2-packs of Elephants and 2 3-packs of Elephants, 2 8-stand BGs of Archers, 1 6-stand BG of Archers, 2 8-stand BGs of Javelinmen, 1 6-stand BG of Forest Tribesmen, a camp.  Another Elephant general is on order but did not come in on time for Cold Iron.
The Republican Indian Ally: Light Chariot general, 8-stand BG of Archers, 6-stand BG of Javelinmen, 4-stand BG of Cavalry
The Camp.  Originally, I had planned on having two Xyston Elephants on the base but they are too heavy to stay on the base without significant reinforcement.  I will add a single base of camp followers in the future and can add bases of portable defenses to it when I need to show it as fortified.


Sunday, June 9, 2019

FOG 3.0 at Bayou Wars

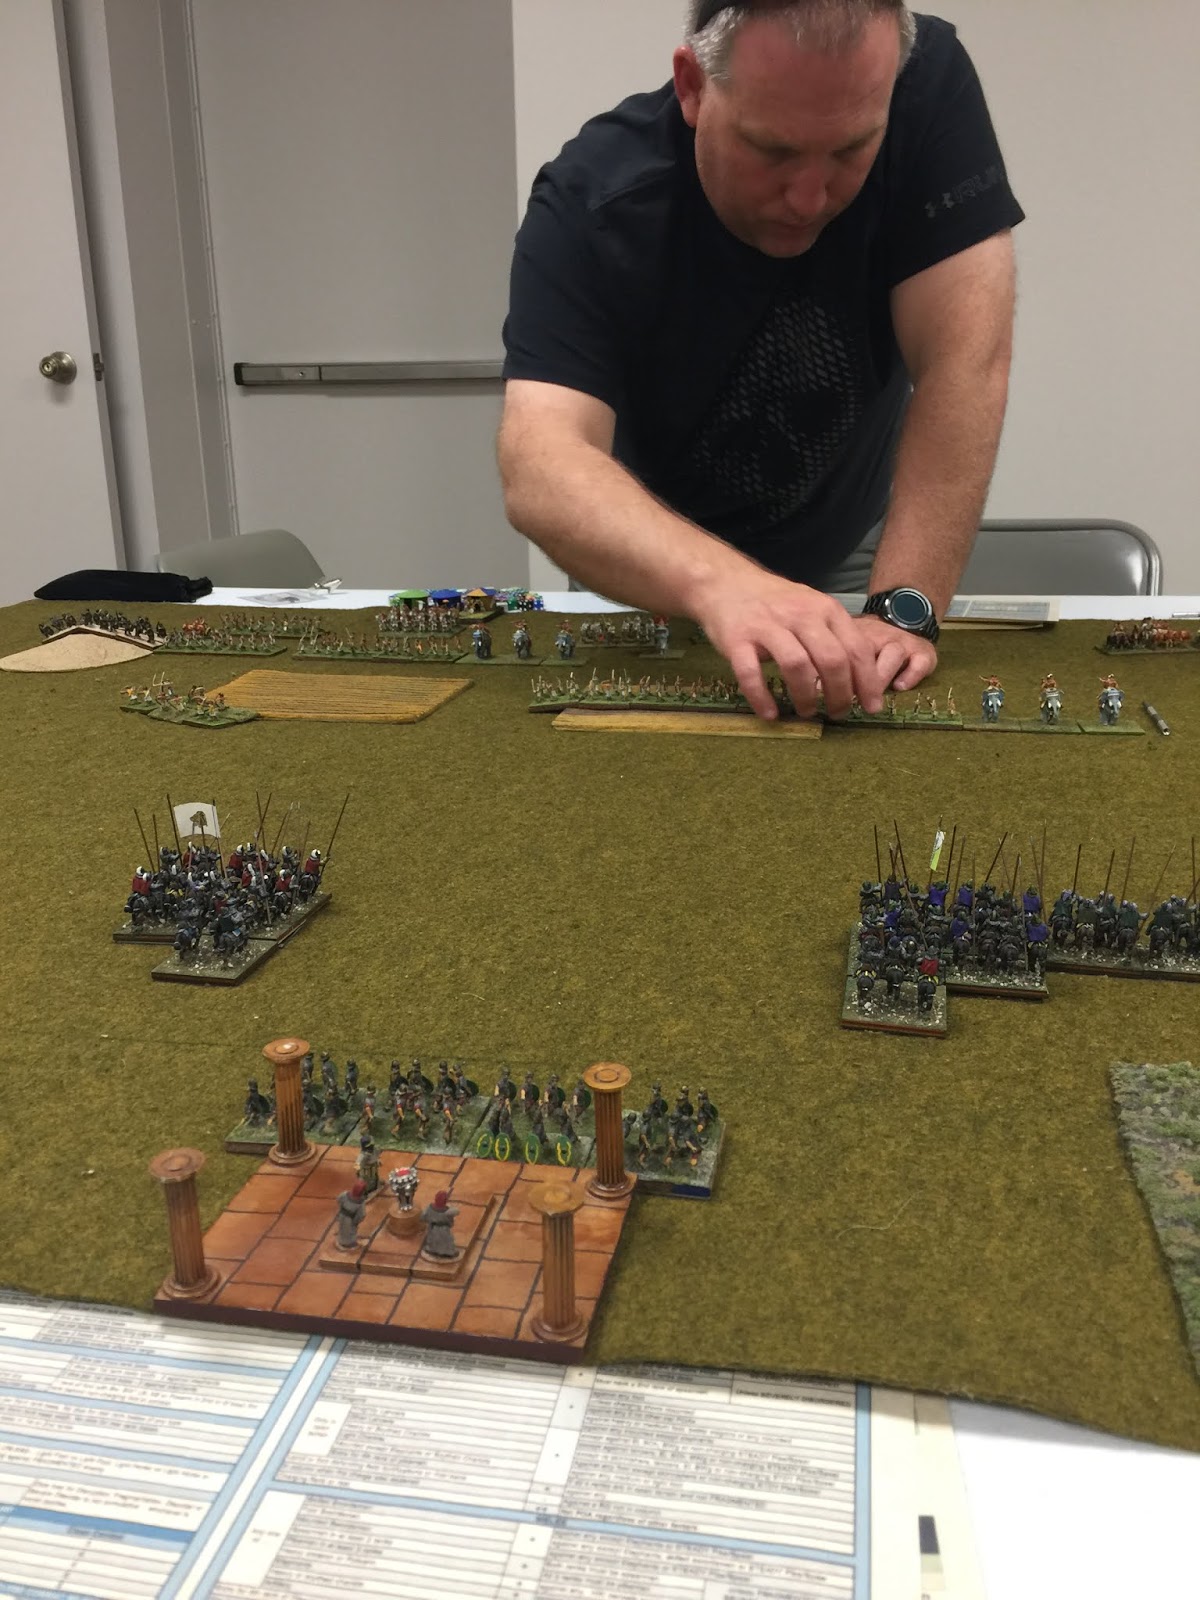
Rich Olier trotted out Classical Indians to face off against my Parthians in a semi-historical fight.  Unfortunately, my Parthian dice were their typical abysmal selves against Rich and managed to lose pretty much every combat possible.  Here are some pictures of the early part of the game.  Enjoy.


Monday, May 6, 2019

FOG 300 E. Successor vs Classical Indian c. 321 BC

No time for a formal AAR this week but it was still good to push some lead on the table.  This time I offer up Early Successors vs Classical Indians circa 321 BC.  Below are the pictures from the game in order.  Maybe next week I will get to do a proper AAR.  enjoy...


Saturday, March 31, 2018

FOG 300 Early Sassanids vs Classical Indians II circa 282 AD

After his victory over the local Indian magnate east of the Indus, Hormizd, son of Shapur Mishanshah, governor of Sakastan and claimant to the Immortal Throne, has been forced to turn back to the west and face the false king, Bahram II.  Determined not to loose the impetus of his victory across the Indus, Hormizd has left his wife's sister's cousin, Yormrizd the Short in control of the local forces with orders to push east into the subcontinent.

Unfortunately for Yormrizd, Bhartrdaman, Saka lord of the Kshaharatas, has ordered Samanadra the Fatty One to lead his Indian subjects to the edge of the Thar Desert and turn back the Persian hordes from the west.

Sassanid list and host:


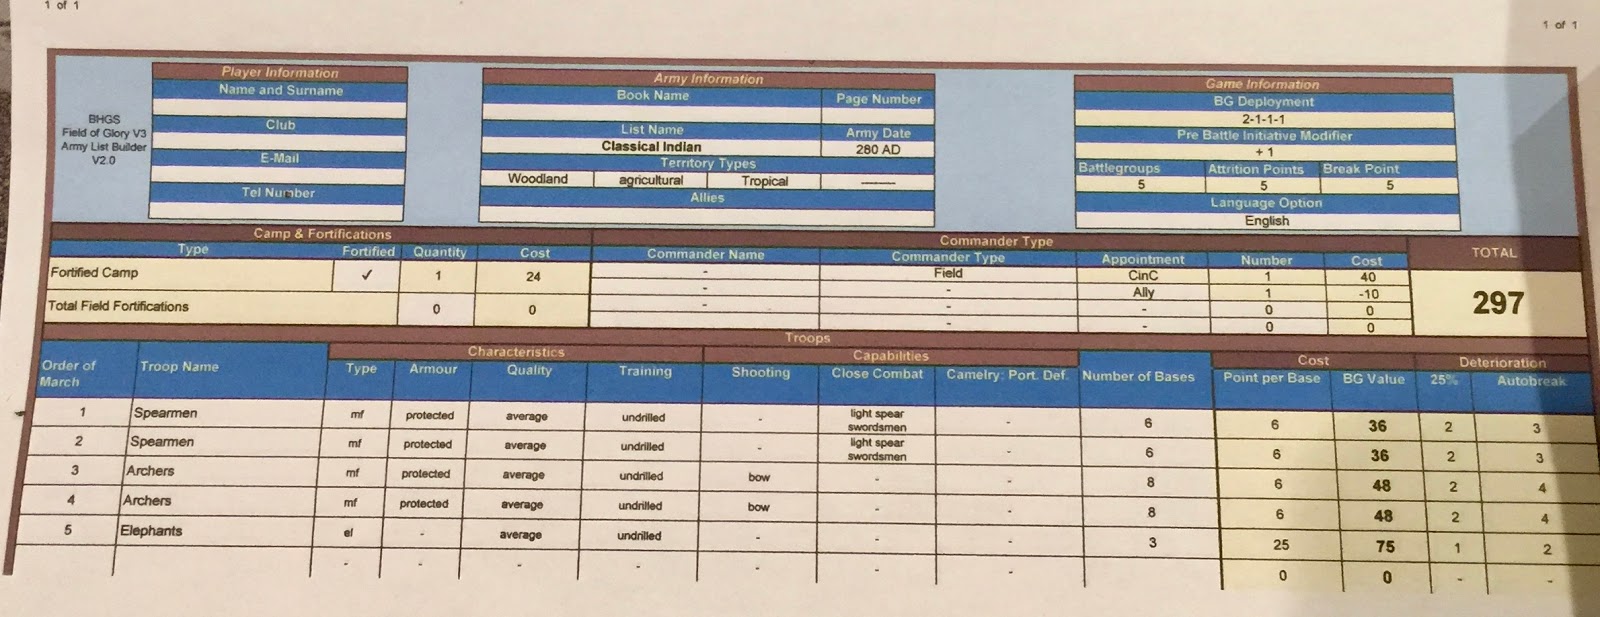
Classical Indian list and host: 


For this playtest, I will be using some of the suggestions put forth by Terry Shaw and Paris Papadopouos such as a 3'x2' table (the green lines you see in the pictures on the matt is where I cut 6" off each side of the 3x3 matt to get to 3x2) and deploying in quarters instead of halves.

The Sassanids won the initiative and opted for Agriculture.  The Indians took the compulsory open field, a second open field and the gully.  The Sassanids took the open.  The compulsory open field landed on the Indian left side edge and was moved 2" towards the middle by the Sassanid player.  The Sassanid open landed on the other Indian side edge and was not adjusted.  Both the 2nd open field and the gully landed on the Indian side edges but would not fit on either side and were discarded (Steppe by proxy).

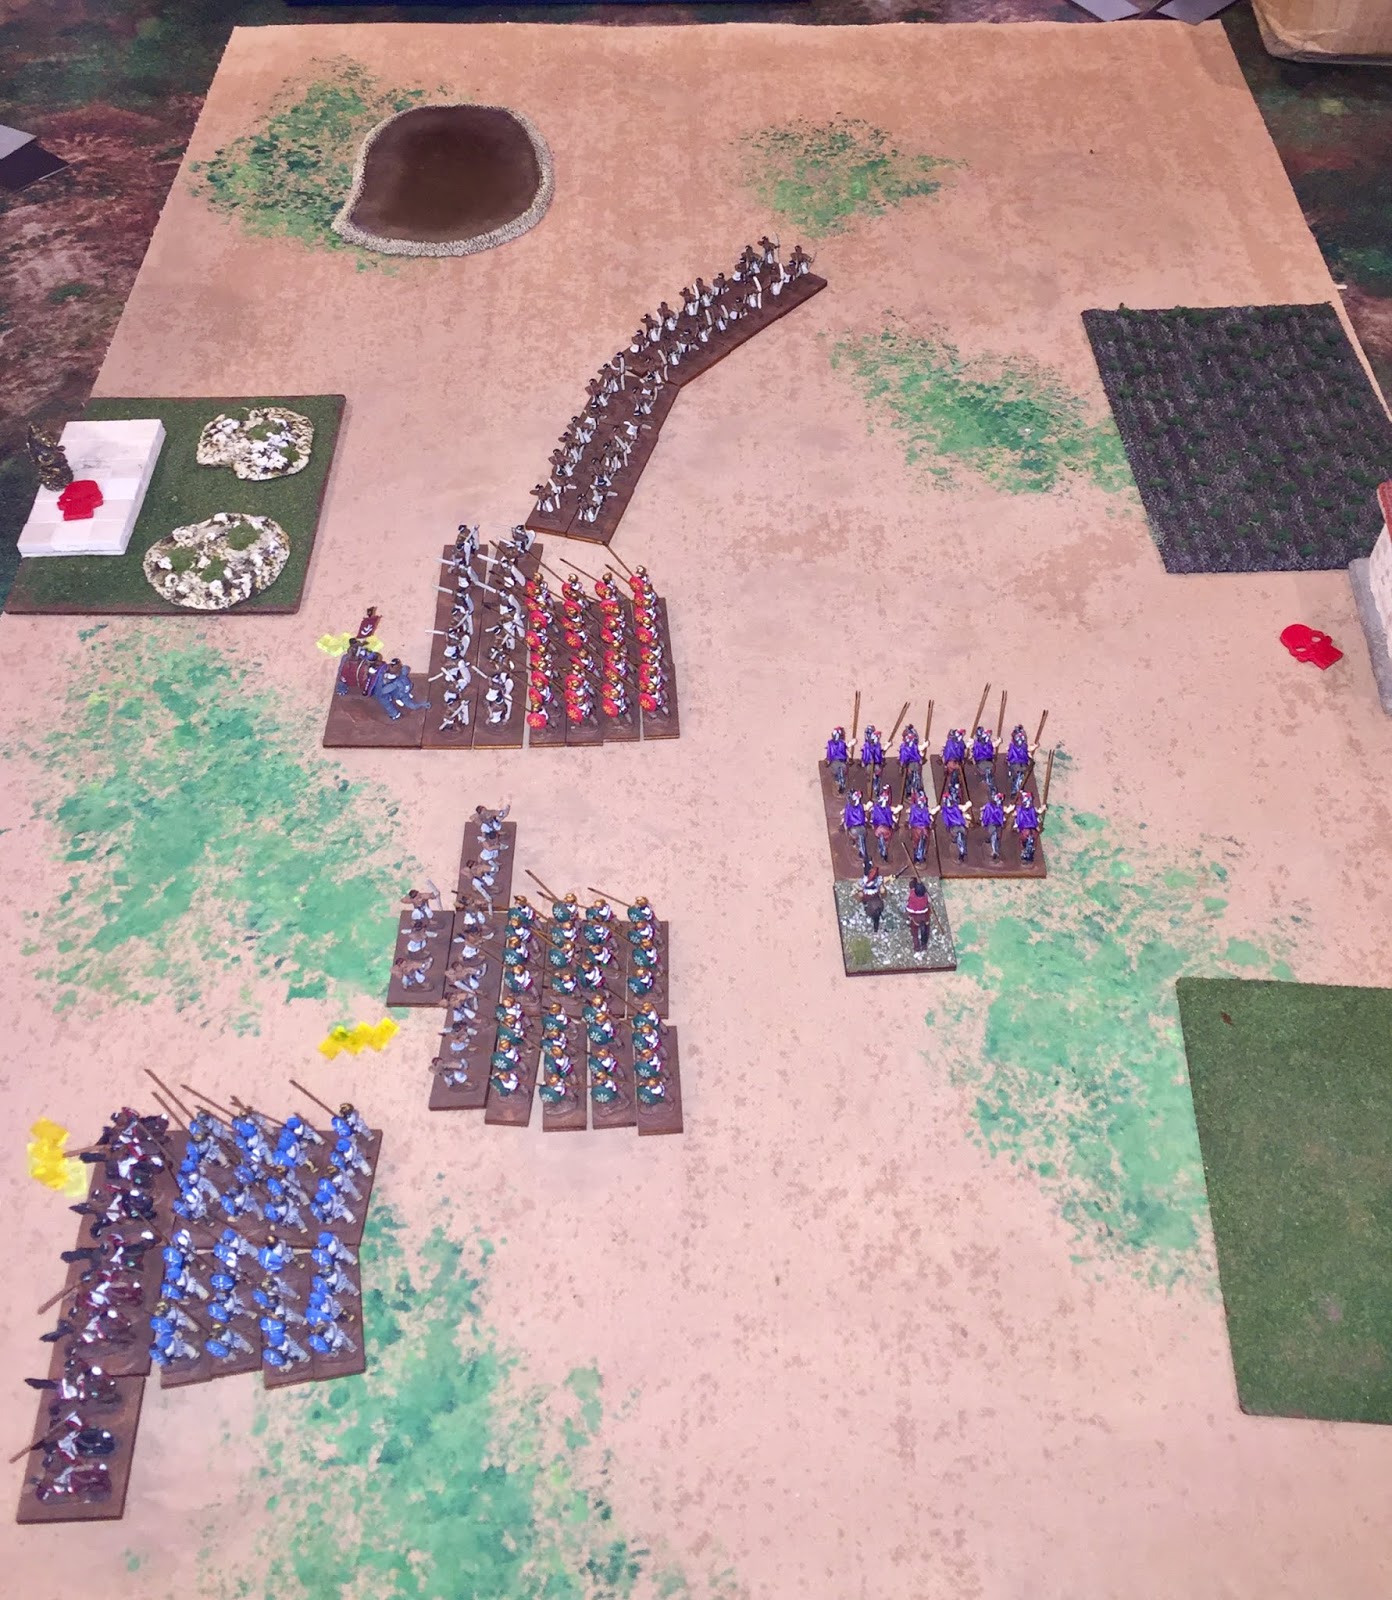
First two shots of the Sassanid host deployed:  left is the 6 stand light horse bow, then the two cataphracts (the Purples and the Reds), the bow cavalry and then the 4 stand light horse bow.


The first two shots of the Indian host deployed:  1st archer BG then two elephants and the 2nd archer BG in the field, the two medium foot spear BGs deployed on each side of the camp.


The Sassanids rolled high and moved first.  The main host (6 pack of LH, both cataphracts and the bow cavalry) did a double move straight ahead with a one base shift to their left in the first move and stopped just outside of 5" of the Indian line.  The 4 pack of light horse move a full 7" forward and did a one base shift to come up beside the bow cavalry but slightly behind.  The Indians attempted some long range bow shots but they were ineffective.  Nothing happened in Joint Action so the Sassanid turn ended.


For the Indian 1st turn, the elephants wheeled towards the Sassanid line.  The right end archer BG maneuvered with them as part of the battle line.   The left end archer BG conducted a 4" move straight ahead.  Both medium spear BGs maneuvered to come parallel to the main Indian line.  Indian bow fire was abysmal in the shooting phase.  Both elephant BGs were forced to take cohesion tests by the Sassanid fire but to no effect.  Neither side had anything going on in Joint Action so the Indian 1st turn ended.


To  begin the Sassanid 2nd turn, the Red cataphracts charged into the Indian bow BG to their front.  The Purple cataphracts did not have to charge as they would have hit elephants. The Sassanid bow cavalry did not have to charge as along with their lance they are Bw*.  On impact both the cataphracts and the Indian archers scored 2 hits to no effect.  In the Maneuver Phase, the Sassanid bow cavalry moved up to the left of the Red cataphracts.  The 4 pack of light horse moved to the left of the cavalry.  The 6 pack of light horse wheeled to parallel of the elephants and stopped at 1".  In the Shooting Phase, the Indians had no effective shots and the Sassanids forgot what a bow was for.  In the Melee Phase, the Red cataphracts used their double POA to advantage and scored 4 hits.  The  Indians managed 3 in return.  The Sassanids passed their death roll and while the Indians lost a stand they passed cohesion.  The Red cataphracts subsequently broke off in Joint Action and the Sassanid 2nd turn ended.


To start the Indian 2nd turn, the left Indian elephant BG charged straight ahead forcing the Sassanid light horse to their front to evade.  The right elephant BG wheeled the maximum of 1" allowed (the Sassanid light horse started 1" away) towards the Purple cataphracts and struck with one base.  The Sassanid light horse evade 6" and the Indian left elephant BG trundled forward 2".  In Impact, both sides committed their generals.  The Indians scored a single hit while the Sassanids failed to hit at all.  The Sassanid cataphracts passed both the death roll and cohesion test.  In the Maneuver Phase, the right elephant BG conformed to the Purple cataphracts and the left archer BG wheeled 4" towards the center.  In the Shooting Phase, Indian bow fire proved ineffective while the Sassanids caused the right spear BG to disrupt.  In the Melee Phase, the Sassanids and the Indians both scored two hits for  a draw.  There was nothing to be done in the Joint Action Phase so the Indian 2nd turn ended.


To begin the Sassanid 3rd turn, the Sassanid Red cataphracts charged the bow to their front and the Sassanid bow cavalry charged the spearmen to their front.  The Red cataphracts score 3 hits to none on the archer BG while the Sassanid cavalry score 2 hits to none on the spear BG.  While neither Indian BG loses a base due to the death roll, both fail cohesion.  The archer BG but the spear BG double drops and breaks.  This in turn causes the archer BG to fragment for seeing friends break.  The pursuit takes the spear off the table and the Sassanid bow cavalry to the table edge.  The Maneuver Phase sees the 6 pack of Sassanid light horse turn around and close to bow range on the elephant BG to their front.  The 4 pack of Sassanid light horse turn around and conduct a full move back towards the center.  In the Shooting Phase, the Sassanid light horse score 2 hits on the elephants to their front who disrupt.  In moving to get within shooting range, the Sassanid light horse also came into extreme range of the left Indian archer BG who score 2 hits on the light horse who also disrupt.  In the Melee Phase, the Red cataphracts score 4 hits to 0 on the Indian archers to their front who suffer no death roll loss but break on cohesion.  In their initial route the Indian archer BG rolls long and plows through the remaining spear BG as it cannot shift enough bases to miss the spear and the camp.  Consequently, the spear BG disrupts.  The Red cataphracts roll normal on pursuit and stop just short of the camp.The Purple cataphracts score only 1 hit to 3 on the center elephant BG which causes them to lose a base but more importantly Yormrizd the Short is killed.  The Purple cataphracts double drop to fragmented.  The neighboring units (the 6 pack of light horse and the Red cataphracts) both fail cohesion with the Red cataphracts disrupting and the 6 pack of light horse fragmenting.  The center Indian elephant BG passes their cohesion test for seeing the right Indian archer BG break.   Thus what started out as a promising Sassanid 3rd turn has turned sour with the death of the general.


The Indians, sensing blood, start their 3rd turn with the disrupted left elephant BG declaring a charge on the fragmented Sassanid light horse.  The elephants pass their CMT and the Sassanid light horse fail their cohesion test for being charged while fragmented.  The Elephants charged forward 4" as the Sassanid light horse fled long to the table edge.  in the Maneuver Phase, the remaining Indian spear BG attempted a CMT to when onto the flank of the Red cataphracts but failed.  There was no shooting to be had and in Melee, the center elephant BG scored 2 hits to 0 on the Purple cataphracts who broke on cohesion without losing a base.  With the Purple cataphracts breaking, the Sassanid army broke.

Unfortunately for Hormizd, son of Shapur Mishanshah, governor of Sakastan and claimant to the Immortal Throne, his rebellion against the rightful King of Kings, Bahram II, would prevent him from returning to the Indian subcontinent.  In the following year (283 AD), he would face Bahram, himself, in open battle and die a horrible death on the tusks of one of Bahram's war elephants (okay I made that up but he did die in 283).

Total time pushed to one hour and twenty six minutes.  Before I decide on if this caused by the increased table size or deployment sequence.  I will try a few more playtests.  Very enjoyable game, nonetheless.


Sunday, February 25, 2018

FOG 300 Early Sassanids vs Classical Indians Circa 281 AD

With his victory over the Kushans on the plains of Farah and the suspicious death of the governor of the neighboring province of Turan, Hormizd, son of Shapur Mishanshah, governor of Sakastan, has moved to seize control of Turan itself.  He has made it clear that he plans to push over the mountains and the River Indus to add those lands to his control and also gain access to that which has historically only been the purview of the King of Kings, elephants.  

Contact with the local Indian magnate was not long in coming and Hormizd'z attempts to overawe the locals came to naught.  Somewhere on the plains east of the Indus, Hormizd and his host met the Indian forces.

Sassanid List and Host:


Classical Indian List and Host:


The Sassanids won the initiative and opted for Agricultural.  The Indians took the compulsory open field, a gully and an enclosed field.  The Sassanids wanted an open table and took an open as their single terrain piece.  The open field ended up on the Indian base line just left of center.  The gully ended up on the Sassanid base line in the center.  The enclosed field was picked up on a six as was the open.

After deployment, the Sassanid host looked like so with the two cataphracts deployed on the left (in the picture), the 4 pack of light horse deployed one deep in front of the gully followed by the six pack of light horse and then the cavalry unit on the right.  The Sassanid camp was behind the six pack of light horse.


After deployment, the Indians showed a solid line across the table with an 8 pack of archers, the elephants and two more eights of archers.  The two units of spearmen were deployed in double wide columns  in support.  The fortified camp was behind the elephants.


The Classical Indians rolled to move first but opted to remain stationary and make the Sassanids come to them.

The Sassanid 1st turn had the cataphracts and both light horse BGs move as a battle line 8" forward.  The cavalry on the Sassanid left moved 5".  The Sassanids had no shooting but the Indians scored 3 hits on the 6 pack of light horse and disrupted them.  In the Joint Action Phase, the Sassanid general moved to touch the 6 pack of light horse.  At the end of the turn, the field looked like below:


In the Indian 2nd turn, the Indians wheeled the right end bowmen with the Elephants to angle towards the Sassanid middle but remained just outside of 5" of the Sassanid cavalry.  The Sassanid light horse remained out of shooting range but the Indians managed 3 hits on the Sassanid 6 pack of light horse.  A base was lost to hits but the cohesion test was passed.  2 hits were also scored on the Purple Cataphracts on the right end of the Sassanid line but they passed their cohesion test.   In the Joint Action Phase, the Sassanids attempted to rally the 6 pack of light horse but to no avail.  At this point, the 2nd Indian turn ended.
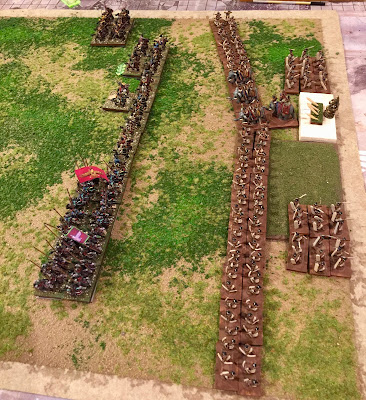

The Sassanid 2nd turn opened with the cataphracts and both light horse BGs moving as a group to 3" of the Indian line.  The Sassanid cavalry moved a full 5" forward.  In the shooting phase, Sassanid shooting was completely ineffective.  The Indians managed 2 hits on the 6 pack of light horse (who passed cohesion), 2 hits on the Red Cataphracts (who passed cohesion) and 3 hits on the Purple Cataphracts (who passed both the death roll and cohesion).  In the Joint Action Phase, the 6 pack of Sassanid light horse rallied back from disrupted as the turn ended.


To start the Indian 3rd, the elephants wheeled an inch and charged towards the cataphracts.  Both Sassanid light horse BGs were forced to flee (the 6 pack went 5" back and the 4 pack went 9" back).  The Elephants rolled down and only trundled forward 3".  The right flank Indian bowmen passed a CMT and wheeled forward to be parallel of the Sassanid cavalry.  The remainder of the Indian line stayed in place.  In the shooting phase, only the Red Cataphracts were hit enough to matter and they easily passed cohesion.  In the Joint Action Phase, the Sassanid general moved to the Sassanid cavalry.


To start the Sassanid 3rd turn, both cataphracts and the Sassanid cavalry charged.  The Sassanid general joined the impact with the cavalry but as both sides scored 3 hits it was a draw.  The Red Cataphracts scored 3 hits to 3 as well but the Indians in the open field lost a base to the death roll.  The Purple Cataphracts, however, scored 4 hits to 2.  The Indians on the left end of the line lost a base to hits and disrupted.  In the maneuver phase, the 6 pack of light horse turned and stopped just out of 3" of the right flank Indian bow.  The 4 pack turned and moved to within 3" of the Elephant line.  In the shooting phase, all was for naught except the hit on the elephants, who subsequently rolled an unmodified 3 on their cohesion test and dropped to disrupted.  In the melee phase, the Sassanid cavalry only managed 1 hit to 3 but luckily survived both the death roll and the cohesion test.  The Red and Purple Cataphracts both scored 3 hits to their opponents and only took 1 each.  The center bow BG dropped another base but passed cohesion.  The right flank bow BG survived the death roll but double dropped on cohesion breaking.  Both the center bow BG and the spearmen behind them passed their cohesion for seeing a friend break.  The broken bowmen fled off the table while the pursuing cataphracts plowed into the spearmen behind.  In the Joint Action Phase, the Red Cataphracts and the Sassanid cavalry broke off.  The Purple Cataphracts remained in place to fight the next impact.  (I know this was discussed on the forum but as I could not find it readily during the game, could not remember what the consensus was and it just seemed wrong to break off, they remained stuck in).  No picture survived this turn so on to the Indian 4th we went.

The Indian 4th saw no Indian charges to resolve but the Purple Cataphracts scored 3 hits to 0 on the spear BG who lost a base and managed to disrupt.  In the maneuver phase, the spear BG expanded one base so that all stands would fight against the cataphracts.  The Elephant BG wheeled to get in position to charge the Red Cataphracts on the next Indian turn.  In the shooting phase, the Sassanid cavalry took 3 hits and disrupted.  The Red Cataphracts took 2 hits and also disrupted.  The Elephants took 1 hit but passed they cohesion.  In melee, the Purple Cataphracts scored 2 hits and took 2 hits so a draw.  In the Joint Action Phase, the Elephants rallied back to steady.


To begin the Sassanid 4th turn, both the Sassanid cavalry and the Red Cataphracts rolled successfully not to charge.  In maneuver, the Red Cataphracts rolled a CMT and wheeled forward to prevent a flank charge by the elephants.  The 4 pack of Sassanid light horse contracted to a 2 wide frontage (outside of elephant restricted zone).  The Sassanid cavalry successfully passed a CMT to move short.  In the shooting phase, both the Indian and Sassanid archery proved ineffective.  In melee, the Purple Cataphracts scored 2 hits to 0 on the spear BG who suffered no death but fragmented on cohesion.  In the Joint Action Phase, the Sassanid general moved to the cavalry who rallied back from disrupted.  With that, the Sassanid 4th turn ended. (Yet another turn in which no picture survived.)

To start the Indian 5th turn, the Indian elephants charged the Red Cataphracts.  The Indian general joined the fight and saw the Elephants core 5 hits to 3.  The Red Cataphracts lost 1 base and fragmented.  In the maneuver phase, the center bow BG turn into the flank of the Purple Cataphracts who turned one base to face.  In the shooting phase, Sassanid archery was awful and the two hits on the 6 pack of Sassanid light horse inflicted by the Indians were shrugged off.  In the melee phase, the Red Cataphracts only managed 1 hit to 2 from the elephants and broke on cohesion but did not lose a base.  The Purple Cataphracts scored 1 hit on the Indian bow and 3 on the spearmen and took 2 in return from the bow BG and none from the spear.  The spear BG followed up their stellar performance by losing a base and breaking.  The bow BG in the field disrupted as a result of seeing friends break.  The Purple Cataphracts passed cohesion for seeing the Red Cataphracts break.  The elephants lost contact with the Red Cataphracts in the pursuit.  (And we have another turn in which there is no picture.)

The Sassanid 5th turn saw the Sassanid cavalry charge the bow unit to their front.  The Indian bowmen managed only 1 hit on the cavalry while throwing 8 dice.  The Sassanid cavalry, however, hit 4 times causing the Indian Archers to lose a base and double drop to fragmented.  At this point, the Impact Phase ended with a Sassanid victory at 5 - 2 attrition points.


Not sure where Hormizd will show up next.  Historically, in 282 AD, he would rebell against Bahram II so his next appearance might be in a Sassanid Civil War.  Until next time...

FOG Update

 FOG version 3.3 has dropped.  See the FOG 3.3 resources page.  I have added links to the rules and the books plus the ReadMe doc.  I will a...