Saturday, December 9, 2017

FOG V3 Game - NKE vs Akkadians 600 Points - December 3, 2017

Worked in a FOG 3.0 600 point game with New Kingdom Egyptians of Ramses III vs the Scrubby Akkadian raiders from Mesopotamia.  Thanks to Gino Agnelly for bringing his boys up to play.  I forgot to start the clock before set-up but after set-up it took one hour and eleven minutes to fight to conclusion.  Game was very bloody and my dice rolls were their typical abysmal selves.  My Sea People mercenaries flubbed every impact so it mattered not that they were three ranks deep.  I did not take notes during game play so all I have to offer is the pictures.  One of my Egyptian Archer units were gods though as they stood and took a charge from some Amorite Mercenaries and saw them off after several rounds of melee.  Unfortunately, the Akkadians were still victorious.  Ramses III will have to wait for another chance to redeem his honor. Here are the pics for your enjoyment.


The matt and the army box is a Dan Henderson original I had made three years ago along with the NKE army and a special army box for the US FOG Team Tournament.  The matt is 5x3, rolls up and fits inside a plastic roll case that can be picked up at Hobby Lobby.  Unfortunately, the team tournament date and venue was changed and I could not attend so they have been sitting collecting dust until now.


Saturday, November 25, 2017

FOG 300 V3 Playtest - LRR vs Hill Tribe Gallic circa 58 BC Part II

After two days rest in Tolosa, our march continues towards our rendezvous with the army of the governor of the province, Gaius Julius Caesar.  Our illustrious Pilus Prior, Calus Otacillus Pansa, has chosen for us to follow local guides on a shortcut through the lands of the Volcae.  He assures us that supplies will be plentiful and that by using this route we will be given the opportunity to show the Volcae that Rome protects its friends.  He has stated that the Ruteni have been sending raiding parties across the border and plundering the Volcae villages.  If our luck holds, he says, we just might meet one of their parties.  Right on cue, a week out of Tolosa, we happen to find one of those parties of Ruteni for us to chastise.  Seems rather convenient.
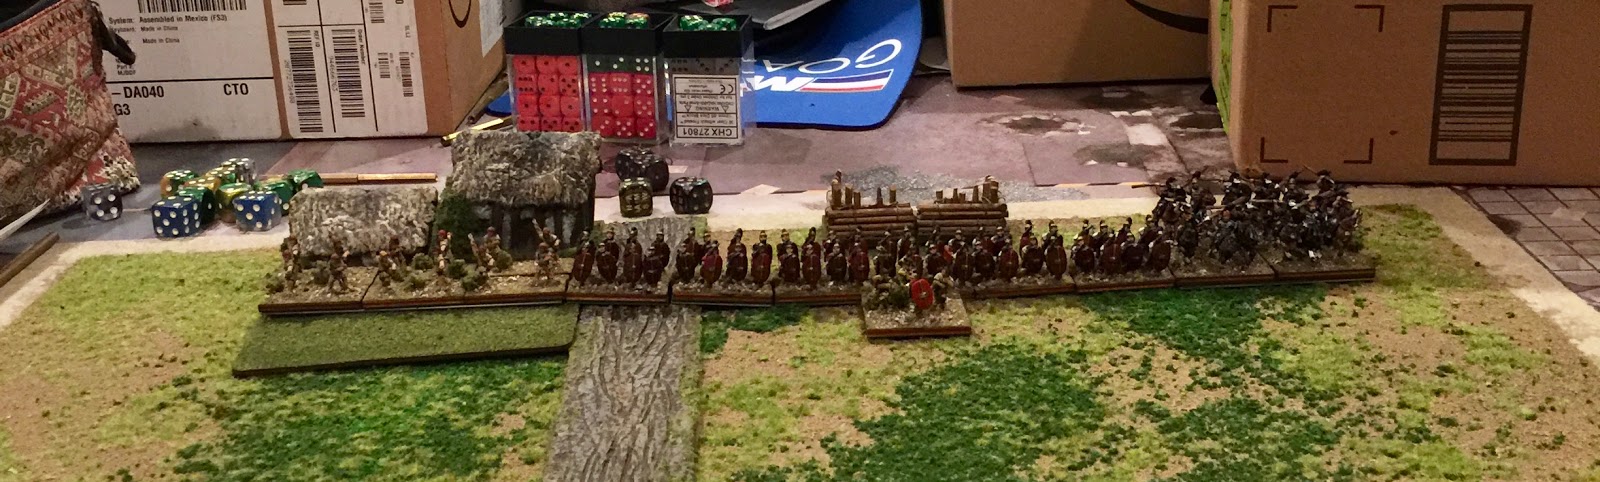

The Roman list:

The Gallic OB was adjusted for this playtest and instead of three BGs of 8s, 2 BGs of 12 were chosen.


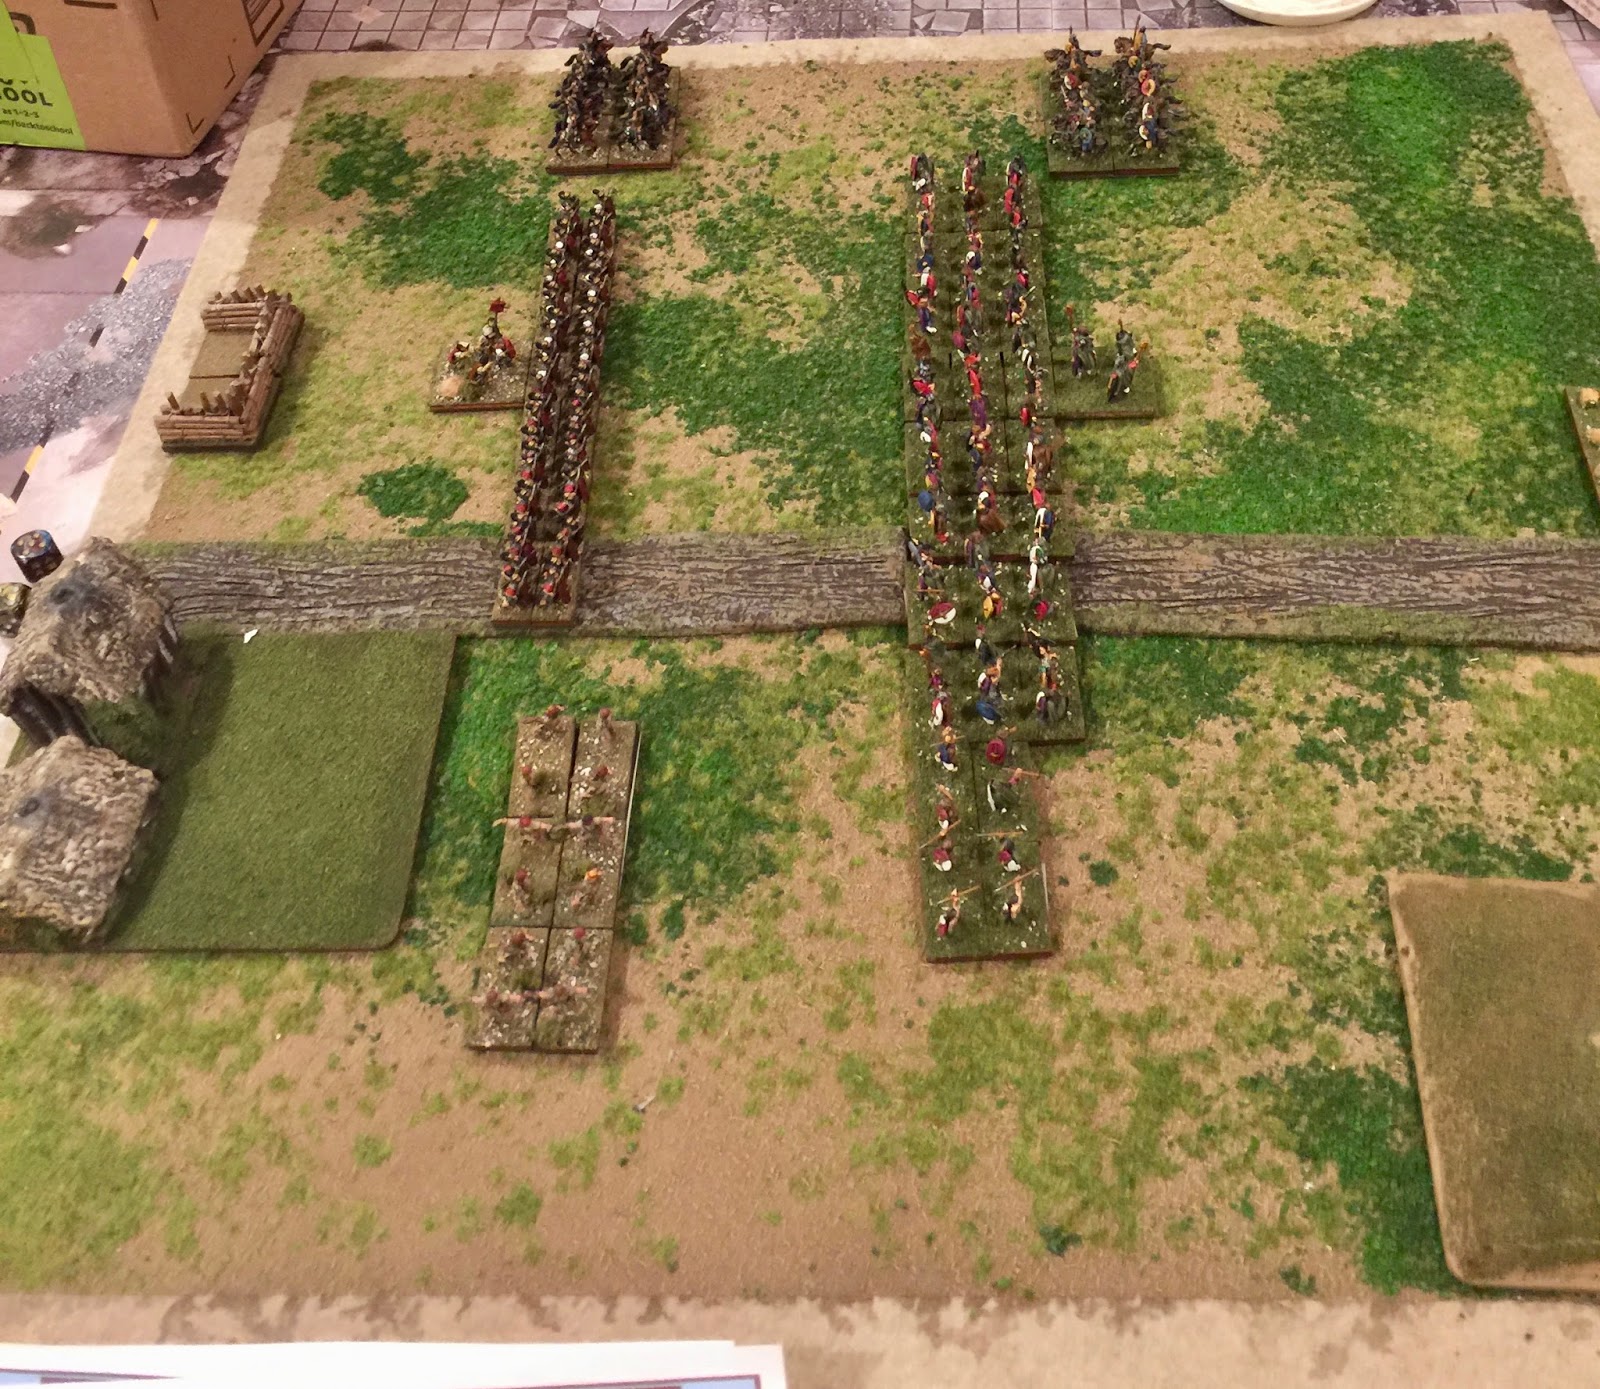
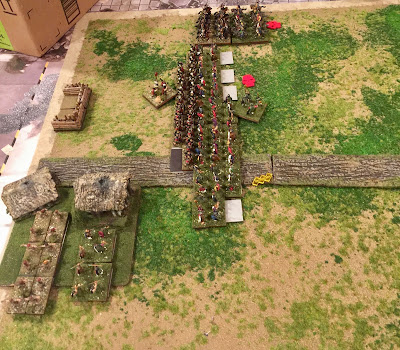
The Gallic Chieftain wins the initiative for this game and opts to play in Hilly terrain.  The Roman Pilus Prior takes the compulsory gentle hill and an impassable.  The Gallic Chieftain takes a village, a forrest and a broken.  On placement, the impassable, the broken and the forrest are all discarded with rolls of 6s.  The village lands just left of the center of the Roman baseline.  The hill lands on the right flank of the Gallic baseline.  The Gallic Chieftain also places a road across the table.

From atop the hill on the Gallic side, the Romans deployed the slingers inside the village with one legionnaire BG across the road and the second to its right.  The Roman cavalry is on its flank.


The Gallic Ruteni deploy with the cavalry on their left followed by the two 12 packs of warriors (4 files of 3 ranks each) and the javelinmen on the hill.


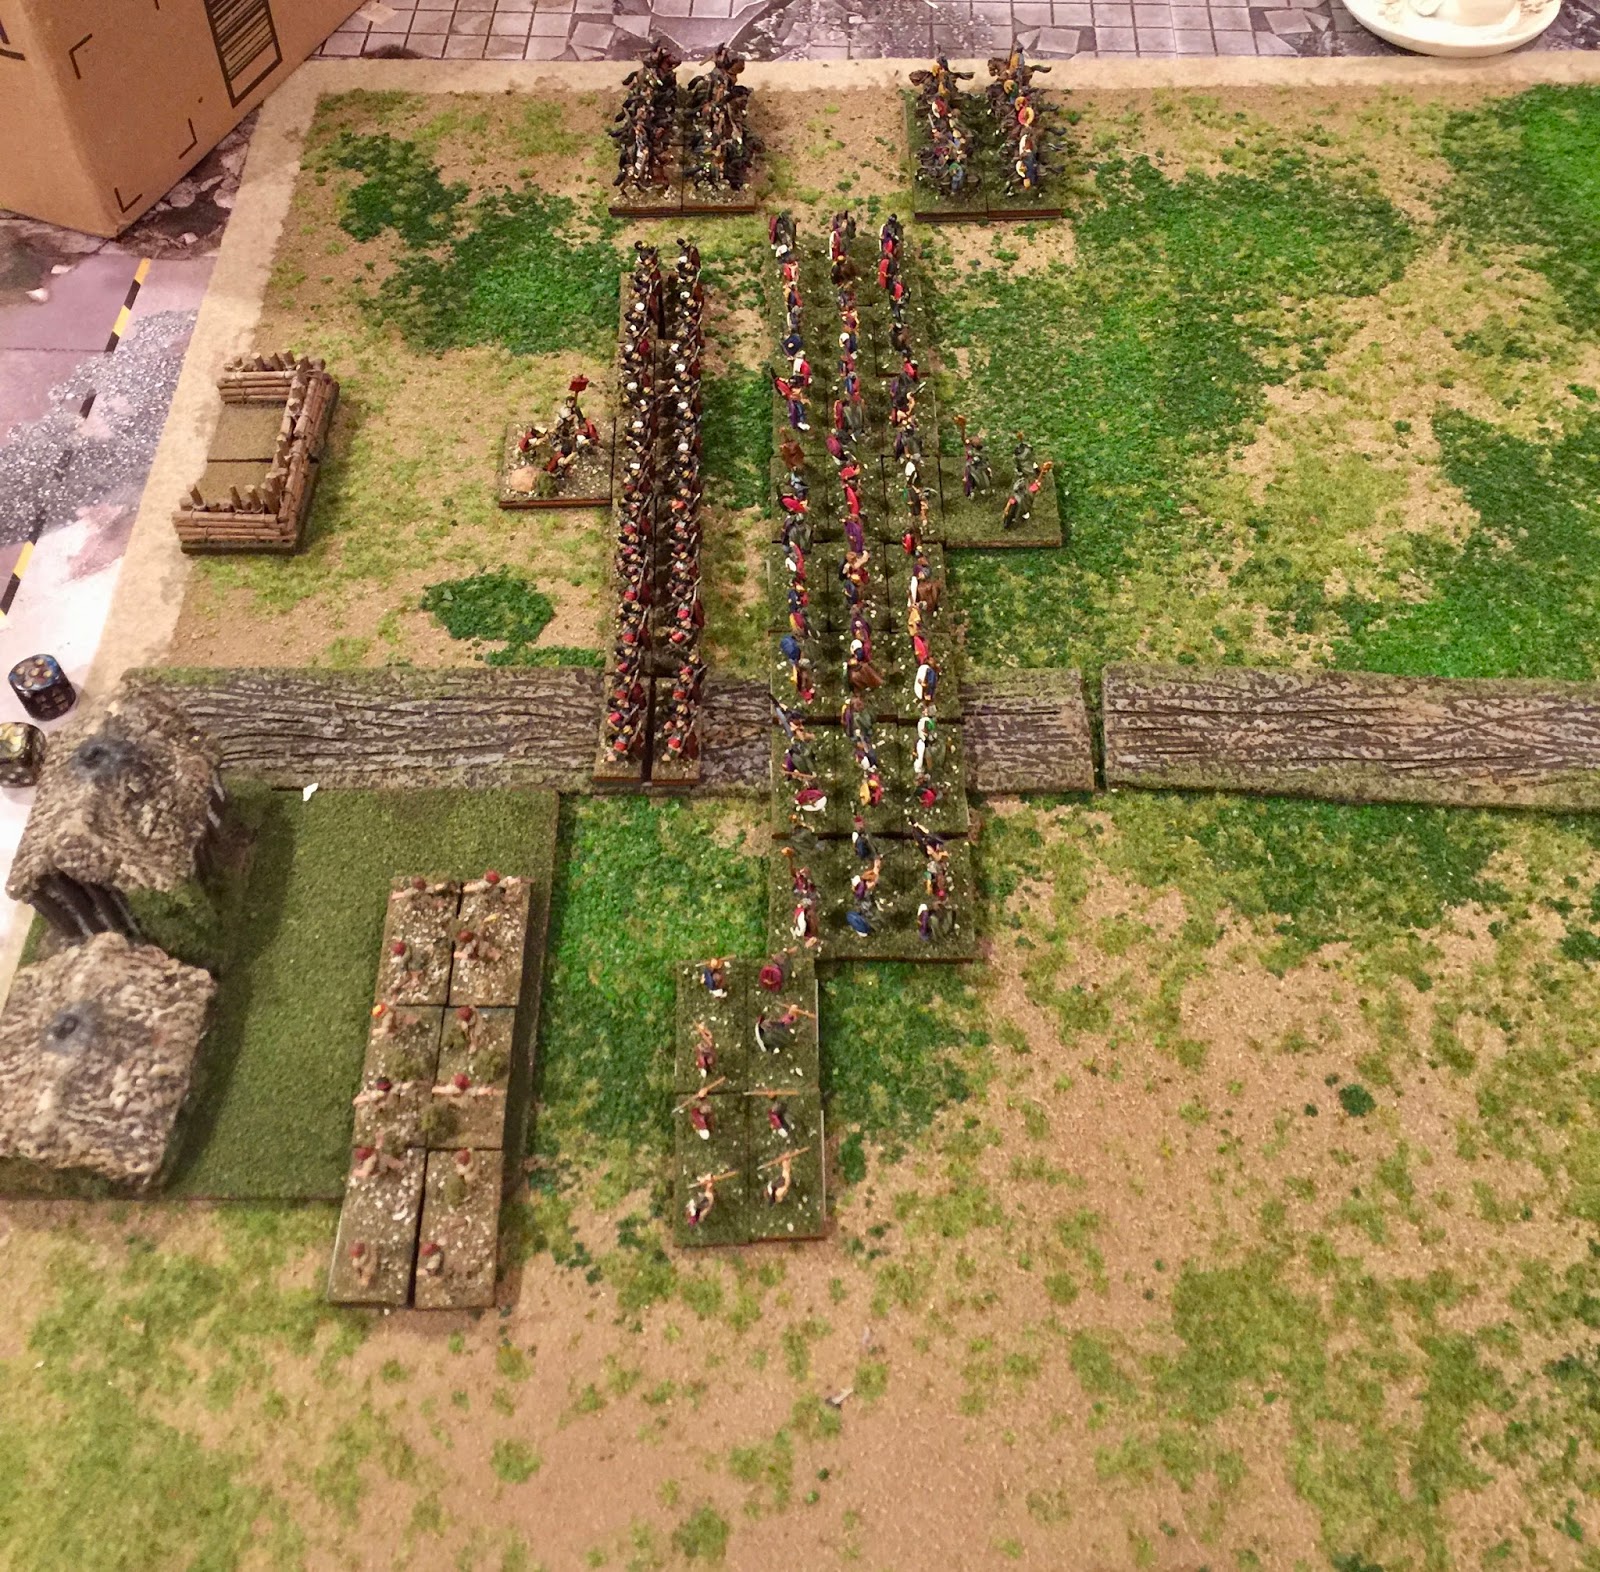
The Gallic player moves first and orders a general advance across the table (there really is no terrain to hide in after all).  The Gallic warbands move 8" and shift one base to their right.  The Gallic cavalry move a full 5" and shift 1 base right.  The Gallic javelins move with the warband.  As there is no shooting to be had, the Gallic 1st turn ends.


For the Roman 1st turn, the legionnaires move 3" straight ahead.  The Roman slingers move 4" straight ahead and shift 1 base to their right.  The Roman cavalry wheel right 1", move forward 3" and wheel 1" left to come more in front of their Gallic counterparts.  Again there is no shooting and the Roman 1st turn ends.


For the Gallic 2nd turn, the Gallic Chieftain opts to maneuver but fails to realize that the Roman slingers are within 4" of his left warband.  The left Gallic warband fails it's CMT not to charge and charges.  The Roman slingers evade back into the village. The warband ends up charging 4" forward.  In the maneuver phase, the right warband moves in line with the left warband.  The javelinmen move 5" forward.  The Gallic cavalry do a double wheel to end up square in front of the Roman cavalry.  In the shooting phase, the Gallic javelinmen score no hits on the slingers.  The Gallic 2nd turn thus ends.


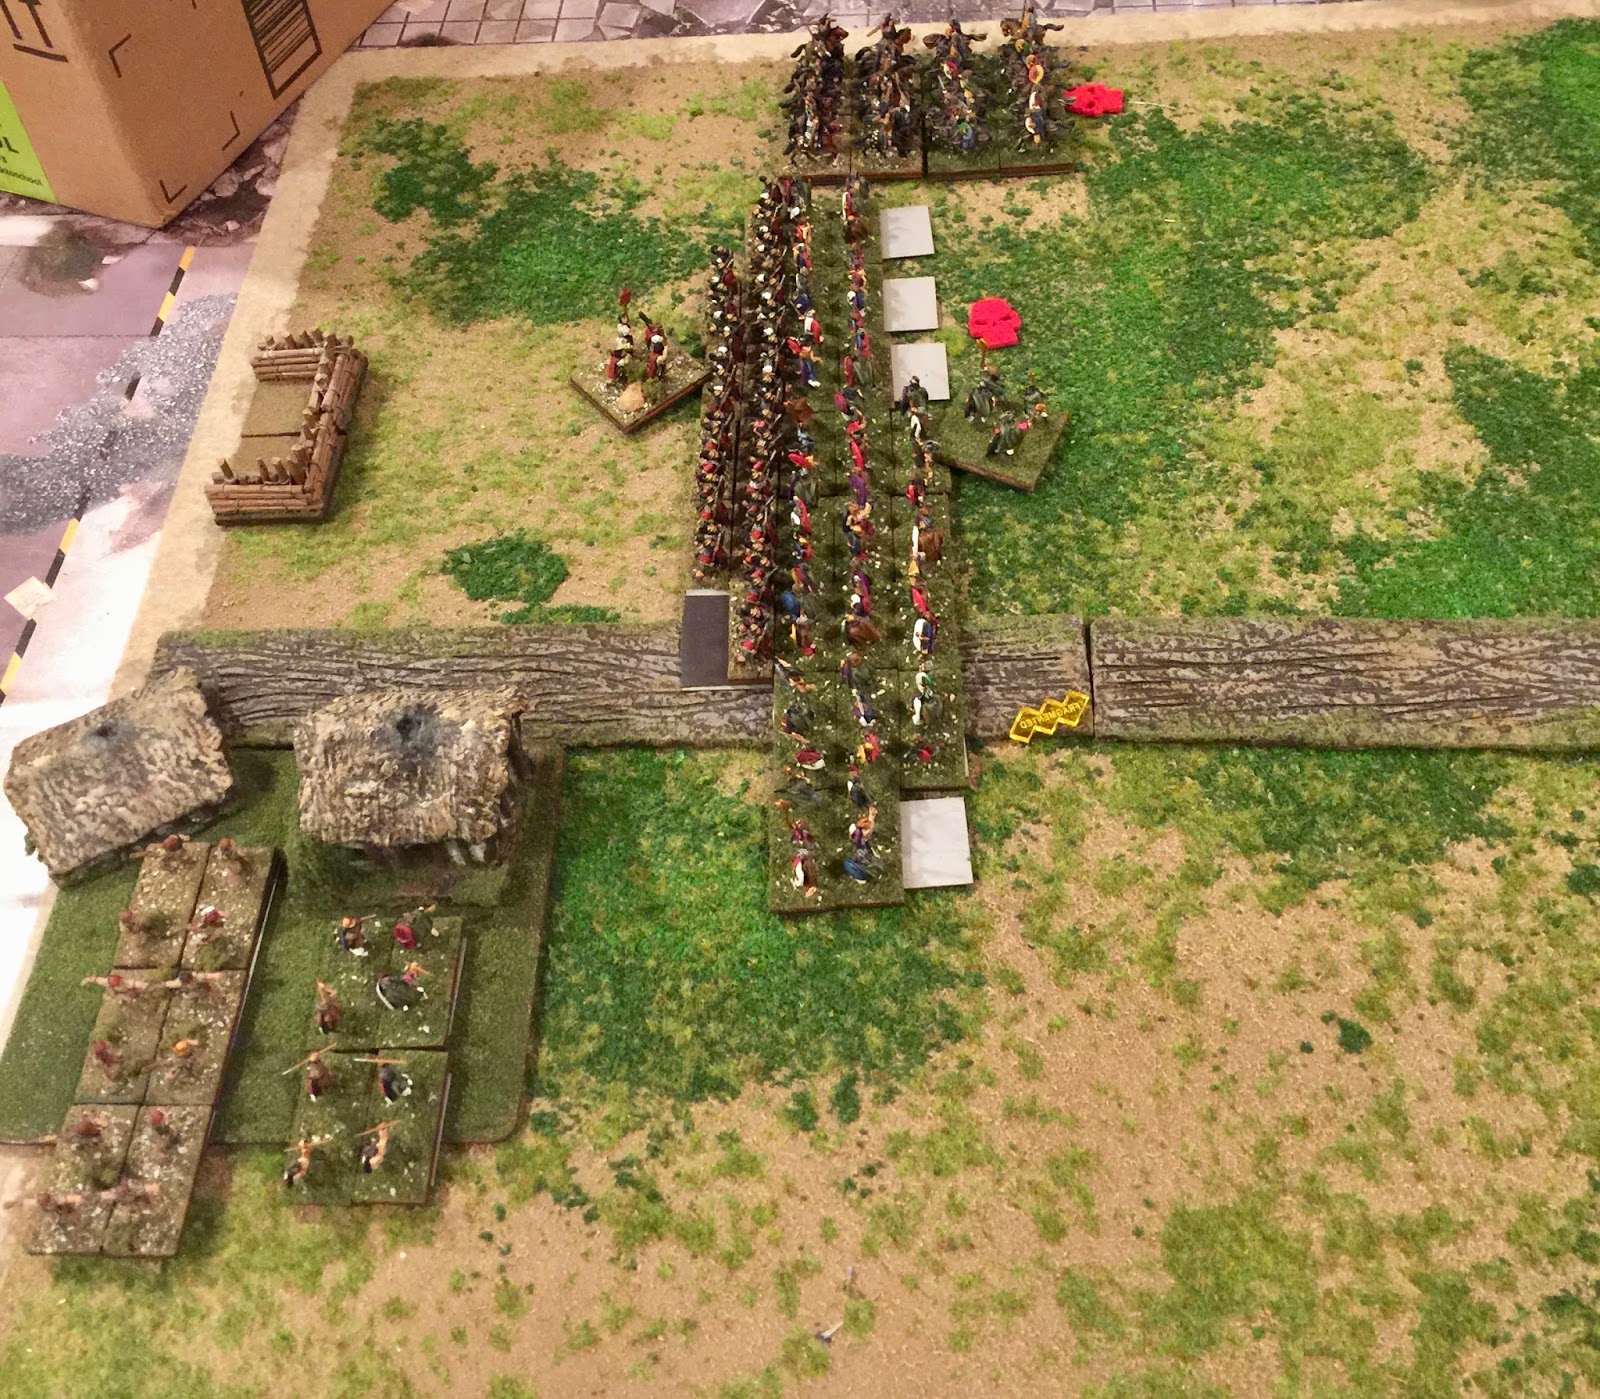
To start the Roman 2nd turn, the Pilus Prior launches the legions and the cavalry forward into the Gallic hordes.  The Gallic Chieftain pitches in to support the right warband and the Pilus Prior joins his own left legion.  In the impact, the left legion gives out 4 hits and takes 4 in return.  The Pilus Prior survives but the legion loses a base on the death roll.  The right legion scores 1 hit on the Gallic right warband (from the Gallic perspective) and 1 on the left warband.  In return, it takes 2 from the right warband and 5 from the left warband.  The right legion loses a base to hits but passes its cohesion test.  The Gallic Chieftain survives the impact and neither warband suffers from death rolls. The Roman cavalry score 3 hits on the Gallic cavalry who give 2 in return.  The Gallic cavalry survive their death roll and pass cohesion.  After conforming for the upcoming melee, the only maneuver the Romans have left is to move the slingers another 1" into the village and turn around.  This movement ensures there is no shooting this phase.  In melee the Roman cavalry scores 2 hits to none.  The Gallic cavalry, however, pass both their death roll and cohesion test.  The left Roman legion scores 3 hits to 3 on the right warband.  The right Roman legion scores 1 hit on the right Gallic warband and 2 on the left warband.  In return, it takes 3 from the left warband but none from the right.  Both generals survive the melee.  Neither legion loses a base on their death rolls.  The right warband loses a base to the death roll and disrupts on its cohesion.  There is nothing to be done in joint action at this time so the Roman 2nd turn ends.


For the Gallic 3rd turn, there are no charges, so the javelinmen move to within 2" of the slingers.  In the shooting phase, the javelinmen score no hits.  The slingers can only muster 1.5 dice which is not enough to effect the javelinmen so the shooting phase ends.  In melee, the Gallic cavalry score 1 hit to 3 and disrupt on their cohesion test after passing their death roll.  The right warband manages 1 hit versus the left legion and none versus the right legion.  The left warband also fails to score a hit.  The left legion scores 2 hits on the right warband while the right legion scores 2 on the left warband.  The Gallic Chieftain survives and the right warband survives its death roll.  It does not, however, survive its cohesion test and fragments.  The left warband surfers a base loss from hits and disrupts.  There is nothing that either side can do in joint action so the turn ends.


For the Roman 3rd, the slingers move back 2" into the village and turn around.  After the move, there is no shooting to be had so the phase ends.  In melee, the Roman cavalry score 2 hits to 1 on the Gauls.  The Gallic cavalry survive the death roll but fragment.  The left legion scores 4 hits on the right warband and takes 2 in return.  The right legion fails to hit the right warband but scores 2 hits on the left warband.  The left warband fails to hit the legion in return.  Both generals survive this round of melee.  The right warband loses a base to the death roll but passes its cohesion.  The left warband passes its death roll but fragments on its cohesion test.  Neither side has anything they can do in joint action so the Roman 3rd turn ends.


The Gallic 4th turn begins with no charges.  The javelinmen move into the village.  Neither side has enough dice for effective shooting so the phase ends.  In melee, the Gallic cavalry manages 1 hit to 3.  While they survive the death roll, they break on cohesion.  The Gauls have lost at this point with 4 attrition points lost but the phase must be finished. The right warband scores 3 hits on the left legion while taking 4 in return.  The right warband also scores 1 hit on the right legion who suffers 2 from the left warband.  The right legion matches the warband hits on it to draw the combat.  Both generals survive the melee.  Both legions survive their death rolls.  The left warband survives its death roll while the right warband suffers a 1 base loss.  The right warband breaks on its cohesion test.  The left warband somehow survives its post battle cohesion test for seeing friends break but the game is over nevertheless.


Probably missed some quality rerolls in the melee for this game which would really have only made the game end much quicker.  As it was, the game was over from set-up to finish in under an hour (approx. 55 minutes).

Hopefully, we have cowed the hostile Gauls in our path and we should arrive in Vienne within the week.  The Pilus Prior has done nothing but sing his praises since the victory.  It will be nice to get back with the army...

Lines from the journals of Hastatus Posterior Lucius Lutatius Calvus

Friday, November 24, 2017

FOG 300 Playtest V3 - LRR vs Hill Tribe Gallic 58 BC


The morning after the defeat of the Iberians, the Pilus Prior had us on the road early.  The march through the mountains was arduous to say the least.  While most of the winter snows are gone, the trail we follow is narrow.  Luckily, we brought no carts or wagons with us but the mules are struggling in the thin air.  More importantly, the rations are beginning to fail.  The few miserable mountain villages we encounter provide little grain for making bread but some stringy goat to add to our pots to keep the men going.  It is with some relief when we begin the descent into the hills north of the mountains.  Until the scouts return and reveal the trail is blocked by the Convenae of the Aquitani.  Pansa seems to relish the prospect of another fight.  Some of us are beginning to believe that Pansa has taken us along this route for his own personal glory...

For your reading pleasure, I give you another FOG 300 V3 playtest as my LRR continue their march to join Caesar.  This time you get LRR vs Hill Tribe Gallic circa 58 BC.

The Roman list and host:


The Gallic list and host:


The Gallic Chieftain won the initiative and opted for Hilly from the Roman list.  The Roman general selected the compulsory gentle hill and 2 brokens.  The Gallic Chieftain took the gully and a forrest. The Gallic gully landed on the Roman baseline and was picked up on a 6.  The 2nd Roman broken landed on the Gallic base line and would not fit.  All other terrain fell on the Gallic side.

After deployment, the Roman line looked as below from atop the gentle hill on the left of the Gallic line:  Gallic Allied Cavalry, two legions and the slingers.


From the ramparts of the Roman camp, the Pilus Prior observes that the Gallic Chieftain has deployed his light foot behind the forrest on the Gallic right, three BGs of medium foot war band stretching from behind the forrest and the broken ground in the center to almost the hill on their right.  The Gallic cavalry covers the Gallic left from partially atop the hill. 


The Gallic Chieftain gives the order for a general advance.  Four inches later the Gallic foot stop inside the terrain.  The Gallic cavalry move just under 4" to remain on the hilltop but to be in position to support the war band on the Gallic left flank.  All missile troops are still out of range at this time so the turn ends.


The Pilus Prior orders the legionaries forward on the quick march.  Eight inches and a one base shift right later their movement grounds to a halt.  The Roman slingers move a full move forward with a one base shift right as well.  The Roman cavalry move a full move ahead and shift right one base right to remain in position to support the right flank of the legionnaires.  Once more the missile troops are out of range of each other so the turn ends with the Pilus Prior moving to the right most legionnaire BG.

The Gallic 2nd turn sees the Gallic javelins move to just over 3" from the Roman slingers as they stay within the forrest.  The Gallic warbands move so that the front of their line stays 1/2" within the broken ground in the center.  The Gallic cavalry remains in their position on the hill.  With no shooting, the Gallic 2nd turn ends.


The Roman 2nd turn opens with no charges from the Roman troops.  The Roman slingers move a full move including a double wheel to come on line facing the Gallic javelinmen hiding in the woods.  The legionnaire line moves 2" straight forward.  The Roman cavalry moves 5" straight ahead to face the Gallic cavalry on the hill.  The missile fire from the Roman slingers is ineffective against the Gauls hiding in the woods.  


To open their 3rd turn the Gallic Chieftain orders his troops to hold the line, unfortunately the warband he is personally leading does not hear his orders and charges pell-mell into the Roman legionnaires to their front (CMT roll of 3 + 2 for the general = fail).  The Pilus Prior jumps into the front rank of the legionnaires and the Gallic Chieftain follows suit.  The resulting impact sees the Romans lose 4 hits to 5.  The leaders on both sides survive but 1 base of Romans do not not survive the 5 hits while the Gauls escape the death roll unscathed. The following cohesion test also does not go the Roman way and the legionnaires disrupt.  In the maneuver phase, the Gallic light foot move into the face of the Roman slingers and the right end Gallic warband moves to in front of the slingers and into side edge contact with the left legionnaire.  Neither the Gallic javelinmen nor the Roman slingers demonstrate any understanding of the effective use of missile weapons.  In melee, the Gauls score 3 hits to 4 (3 + 1 from overlap).  Neither general is hurt.  The Gauls lose a base but survive their cohesion test.  The Romans survive their death roll.

In the Roman 3rd turn, the Roman cavalry charge the Gallic cavalry on the hill.  Both cavalry units score 2 hits to no effect.  By this point their is no maneuver to be had.  Again the two light foot units demonstrate they do no know what a missile weapon is for and on to melee the turn proceeds.  The Roman legionnaires score 3 hits plus 1 from overlap while the Gallic war band manages 1 hit in return.  The Gallic Chieftain is struck down by a sword thrust through the gullet.  The warband suffers another base loss but somehow manages to survive the cohesion test by rolling a "12."  The Roman cavalry score 3 hits to 1 from their counterparts (even with the hill POA).  The Gallic cavalry lose a base and disrupts.  The middle warband does not seem to bemoan the death of their glorious leader and shrug off his death will no ill effects. In the joint action, the Romans attempt to rally the right end legionnaire but to no effect.

To start the Gallic 4th turn, The Gallic javelinmen and center warband charge.  The Roman slingers opt to stand again the Gallic lights.  The Gallic javelinmen score 3 hits to 2 on the Roman slingers who lose a base and then disrupt.  The charging warband score 4 hits to 5 on the legionnaires who pass their death roll.  The warband is not so lucky and suffer a base loss and disrupt.  In the maneuver phase, the right flank warband passes a CMT and turns into the flank of the left end Roman legionnaire [This turn should not have happened as the Roman BG was in front edge contact with enemy making the warband a legal overlap.  Missed that last sentence of the first paragraph on page 76].  There is no shooting to be had so the shooting phase gives way to melee.  The Roman cavalry score 4 hits to 2 on the Gallic cavalry who lose a base to the death roll and break cohesion.  The right legionnaire trades 1 hit with the opposing warband.  The other legionnaire, however, scores 5 hits to the warband to their front while taking 0 from their frontal opponents and the overlap.  The warband to their front loses a base and fragments.  The Roman slingers score 3 hits to 1 on the Gallic javelinmen who in turn lose a base and disrupts.  In the post battle cohesion tests, the warband on the left end of the Gallic line disrupts for seeing the Gallic cavalry break.  The Roman cavalry pursue the Gallic cavalry (both move 4") catches them and kills another base.  In joint action, the Roman cavalry stop pursuing while the Gallic cavalry disintegrates.  The Roman right legionnaires rally back from disruption as the end faces the Gallic army.

To start the Roman 4th turn, there are no charges.  The only maneuver is for the Roman cavalry who fail a CMT to turn and move and opt to turn 90.  Again, there is no shooting so the melee phase and the end game arrives.  Both Roman legions score 3 hits against their opponents while on the right end of the Gallic line, the overlap warband scores the only hit to the Roman legions.  Both skirmishers whiff in melee at their end.  The left end warband loses a base to the death roll and double drops to fragmented.  The middle warband loses a base as well but breaks on its cohesion test.  The resulting post battle cohesion test sees the left warband also break making the Roman victory complete.


Even with four turns per side, this playtest seemed to go a little faster than the LLR vs Ancient Spanish one.  There will be another Roman vs Gallic playtest as the adventures of this detachment of the Legion VI under Pilus Prior Caius Otacillus Pansa continues.

Our victory is complete and the subsequent sack of the Gallic camp and surrounding villages ensure that our men do not starve.  We continue our march to Tolosa where we are granted a few days rest as the Pilus Prior gathers intelligence and supplies for our next part of the march.  There are rumors that he will march us through the lands of the friendly Volcae in hopes of raiding the lands of the Ruteni.  Only time will tell...

Lines from the journals of Hastatus Posterior Lucius Lutatius Calvus

Thursday, November 23, 2017

FOG 300 Playtest V3 LRR vs Ancient Spanish 23 Nov 2017

After spending the winter months in the hills around Pompaelo in the province of Hispania Citerior, our detachment of Legio VI has been summoned by the new governor of Gallia Transalpina, Gaius Julius Caesar, to the wilds of Gaul.  Our leader, Pilus Prior Caius Otacillus Pansa of the IX Cohort, has ordered us to cross the mountains to our north and join the road to Narbo Martius at Tolosa.  This seems foolhardy at best but as the Hastatus Posterior of the cohort, I am in no position to question the Pilus Prior.

Within a week, we are in the foothills of the mountains but our luck does not hold.  The Iberians here are not warm to our arrival and the road (and I am being generous to this two-horn goat trail we are on) through the hills is blocked.  We must fight here or go back the way we came.  We will fight...

This will be the first roll-out of FOG 300 for V3.  I hope to add a playtest versus Hill Tribe Gauls and Early Germans later this week.  

The Roman list and host:


The Ancient Spanish list and host (note the change in points.  The spreadsheet does not charge the correct points for LF javelinmen at this time):


The Spanish won the initiative and chose Hilly.  Th Roman player took the compulsory gentle hill, the impassable and a broken.  The Spanish player took a forrest and the gully.  The gentle hill ended up on the left corner of the Spanish side and was adjusted 2".  The forrest ended up in the center of the Spanish baseline with no adjustments allowed.  The impassable landed in the left corner of the Roman baseline but was picked up on a 6.  The gully landed on the right side of the Spanish baseline and was adjusted 2" into the middle.  The broken would not fit on the Spanish baseline so was discarded.

After deployment, the two sides looked like the picture below with Romans on the left.  I opted to swap out the two large camps in the original host layouts and replaced them with 40mm x 80mm camps.


The Roman lines as they appeared from the hilltop from the Spanish lines:  the Gallic mercenary cavalry on the left with both BGs of legionaries in the center and the slingers on the right end of the line.


The Spanish lines as they appeared from atop the ramparts of the Roman camp:  the caetrati on the left partly in the gully, a scutarii stretching from the forrest to the edge of the gully, the select scutarii extending through the forest to in front of the camp, the last scutarii stretching from in front of the camp to the crest of the hill, the Spanish light horse covering the Spanish right. The Spanish scutarii all deployed 3 stands wide with two files at 3 deep and 1 at 2 deep. The original plan was to advance to within 1/4" of the edge of the forrest in a line and make the Romans come to them.


The Romans roll high and move first.  The legionaries move as group and do a double move forward with a single base shift to their right.  The Roman cavalry do a full move forward and a single base shift right.  The Roman slingers do a full move forward and a single base shift right.  There is no shooting to be had and in joint action, the only adjustment sees the Spanish Chieftain move to the top scutarii unit to keep the Spanish light foot within command range.

The Spanish 1st turn sees the Spanish light horse move forward but stop outside of 5" of the Roman cavalry.  The Spanish light foot do a full move forward.  The Spanish scutarii line move forward as group under the Spanish Chieftain and stop 1/4" from the edge of the woods just as they planned.  Again there is no shooting so the turn ends.


For the Roman 2nd turn, the Roman cavalry move at an angle towards the Spanish light horse.  The Roman slingers move to within 3" of the Spanish light foot.  The Roman legions move a full 3" straight forward.  The Spanish light horse only have one file within range of the Roman cavalry so their shooting is to no effect.  The Roman slingers score 3 hits to the Spanish caetrati but the gods were with them and they pass both the death roll and cohesion test.  The turn ends with the stage set for the next round.  The question to be answered is...who will charge first?


The Spanish 2nd turn opens with the scutarii on the hill failing to hold their charge and into the right flank legionaries they go.  Only one base of each battle group ends in contact for Impact but the Romans score 2 hits to 1.  Subsequently, the Spanish lose a base and disrupts.  In the maneuver phase, the Spanish conform and opt not to move a base to the right end of their line, hoping to keep at least one file of the Romans in front of the select scutarii.  The Romans, as anticipated, shift a file to cover an existing overlap of the scutarii to ensure all legion bases will fight.   The Spanish light foot move to within 2" of the slingers and the light horse move to within 2" of the Roman cavalry.  In the shooting phase, the Spanish light horse score 2 hits on the Roman cavalry who conveniently disrupt.  The Spanish and Roman light foot both score only 1 hit apiece to no effect.  In the melee phase, the Roman legionaries score 4 hits to 1 and the scutarii fragment.  In the joint action phase, the Pilus Prior opts to remain where he is and the Spanish Chieftain moves to the select scutarii.


To start the Roman 3rd turn, the Pilus Prior orders the Gallic cavalry to charge but they look disdainfully at the legionnaire who runs up speaking some foreign tongue and stay where they are.  Believing his orders are being followed, he orders the remaining legionaries to charge into the woods against the Spanish battle line.  The front two ranks of legionaries are severely disrupted by the forrest but with the Pilus Prior leading the way, they score 6 hits on the scutarii on the right end of the Spanish line.  The Spanish manage 5 hits in return.  The Spanish attempt to kill the Pilus Prior comes to naught and the Romans shrug off the hits from the Spaniards.  The Spanish, however, are not so lucky.  One base of the scutarii fled back into the woods which effects the rest of the line...they fragment with a double drop. [This was an error as you cannot double drop when only beaten by 1 hit.  It takes at least two more to get the double drop]  The only maneuver to occur sees the Roman cavalry square up on the Spanish light horse.  In the shooting phase, the Spanish light horse manage only 1 hit to no effect.  The Roman slingers score 3 hits to 1 but the Spanish shrug over the hail of stones to no effect.  In the Melee phase, the left Roman legionaries score 3 hits on the scutarii who mange 1 hit on their own and another from the overlapping select scutarii.  The Pilus Prior again avoids the Spanish attempts to kill him as the legionaries shrug off the Spanish assault with no ill effects.  The Spanish, however, roll a natural 2 on their cohesion test after passing their death roll and decide to flee from the meat shredder that is to their front.  The right most legionnaire BG scores 6 hits on their Spanish opponents who manage only 3 in return.  The legionaries shake off the death roll but the Spanish are no so lucky.  They lose another base, dropping them to 25%, and fail their cohesion test to flee towards the mountains.  The select scutarii thumb their noses at the fleeing scutarii but the Spanish light foot and light horse both lose heart and disrupt.  With the breaking of the two scutarii BGs, the Spanish army breaks and the Romans can continue on their march.

Night is falling as the remaining Spanish troops began to flee the field, the Pilus Prior orders a halt to the pursuit and a withdrawal to our camp.  With a screen of slingers and cavalry, select contuberniums from each century are released to scour the field.  The spoils will be divided evenly within each century union their return.  Meanwhile, our illustrious Pansa has ordered all centurions to attend him for our evening planning session.  Tomorrow, we will continue our march through the mountains.  In a few days, we will descend into the lands of the Convenae, a tribe of the Aquitani.  I suspect they will not be any too happy with our arrival.  But that, that is another story...

Lines from the journals of Hastatus Posterior Lucius Lutatius Calvus

Wednesday, November 22, 2017

New Page

I have added a FOG 3.0 page to the blog and will post resources for playing the new version there.  A new Set-Up and Turn-Sequence chart is there already (Look here).  I have heard through the internet that an official QRS for FOG 3.0 is in the works.  I have played around with one but cannot seem to get it down to something manageable. Lets hope the official one comes out sooner than later.

Between family commitments, I hope to post a few FOG 300 playtests for FOG 3.0 this week.   Until then, may your dice roll high.

Saturday, November 4, 2017

Off Line

Sorry for the lack of posts lately but I was without internet services at home for almost 2 weeks as we transitioned from DSL to U-Verse.  In the meantime I managed to update the FOG 300 base rules to be FOG 3.0 compliant and to get quite a bit of reading done.

Here are 4 books I have read since the beginning of September:


Also just finished Simon MacDowall's book:  The Vandals.  I am not a huge fan of his writing style but I will pick up a copy of his book The Goths to add to the collection anyway.


Currently, I am reading a novel by Jose Gomez-Rivera pictured below left about Aetius.  There is a second book pictured below right.  The first book I am over halfway through with but is quite interesting and describes, among other things, Aetius' time as a hostage with the Goths and a supposed relationship with Gallia Placida.


All of these continue to feed my painting of Foederate/Patrician Roman era troops for FOG.  I have an army of barbarians being painted by Paul Potter that should add quite a contrast.  I'll post pictures when the troops are closer to being finished.

Sunday, October 15, 2017

FOG 300 Playtest Sassanid Persian vs Chionite Huns 375 AD

I managed to work this playtest in last weekend but today is the first chance I have had to share.  This time you get Sassanid Persian vs Chionite Huns circa 375 AD.

Sassanid List and Host (Disregard the date on the list):


 Chionite List and Host (Initiative was actually +2, I used Hephthalite Hunnic Terrain Options):


The Chionites won the initiative and opted for Steppe.  The Sassanids took the compulsory steppe plus another steppe and a broken.  The Chionites opted for a gentle hill and a broken.  All the terrain fell on the Chionite side which resulted in the Chionite hill and broken not fitting.  Once the camps were deployed the terrain looked like this (Sassanid board edge to the left):


Once deployed the Sassanid host looked like so with a LH on the left then an armoured horse archer followed by the cataphracts and the LF archers with a second armoured horse archer in reserve.


The Chionites deployed with one cavalry archer on the left flank with the lancers next to them with the general attached.  Three LH archers were deployed in the center.  The last cavalry archer was deployed in the broken on the right flank.


The Sassanids moved first and moved the LH a full move angled to the right.  The LF did a full move forward and slid one base width to the right to get in front of the cataphracts.  The cataphracts wheeled to their left to get completely behind the LF.  The armoured cav on the Sassanid right did a full move forward.  The left wing armoured cavalry did a full move angled towards the left.  Everyone was out of arrow range so the turn ended.


The Chionite 1st turn witnessed the the LH line making a short move forward.  The left wing cavalry moved as far as they could to get on the left of the LH line.  The Lancers passed a CMT for their first move and expanded two bases.  For their second move they moved up behind the extreme right end of the LH line.  The right wing Chionite cavalry moved up to stay in line with the lancers.  In the shooting phase, 3 hits were scored on the Sassanid LH but the arrow storm had no effect.  The Sassanid LH scored 0 hits in return.  The Sassanid armoured cav on the right scored 2 hits on the middle Chionote LH who in turn failed their cohesion test.  The Sassanid LF scored 2 hits on the Chionite LH on the right end of their line who passed their cohesion test.  The turn ended with the table as below:


Sassanid 2nd Turn:  The Sassanid Cavalry on the right flank of their line charged at the Chionite LH.  The middle Chionite LH and the right end LH evaded full.  The cavalry pursued full.  The right LH was forced to collapse into a single wide column to avoid the lancers behind them and the LH in the center.  The Sassanid LH squared up with the last Chionite LH.  The Sassanid LF moved a full move angled toward the Chionite Lancers.  The Cataphracts moved up behind the LF.  The Sassanid cavalry on the left flank moved a full move towards the right end of the Chionite cavalry.  In the shooting phase, the Sassanid LH used their bow strings to pick their teeth instead of shooting arrows while the Chionite cavalry and LH facing them scored 3 hits,  The Sassanid LH passed their cohesion and death rolls.  The Sassanid LF scored 2 hits on the Chionite Lancers who passed their cohesion test.  The Sassanid Cavalry on the left scored 3 hits on the right flank Chionite cavalry who passed their cohesion test but lost a base to the death roll.   The turn ended with the table looking like below:


The Chionite 2nd turn began with both ends of the Chionite line charging.  The Chionite LH and cavalry on the left end of their line both moved 5" while the Sassanid LH in front of them also evaded 5".  The Sassanid LF evaded from the Chionite Lancers and ended just behind the cataphracts. The Chionite Lancers crashed into the left flank Sassanid cavalry and the cataphracts (2 bases hit each).  The Chionite cavalry on the right end of the Chionite line also charged into the fray.  In the impact phase, the cataphracts inflicted 3 hits on the Chionite lancers but took 3 in return.  The Chionite lancers and the cavalry on their right managed 0 hits between them on the Sassanid cavalry.  The Sassanid cavalry scored 2 hits on the lancers and 1 on the cavalry.  The cataphracts passed their death roll while both the Chionite units passed all of their rolls.  The Sassanid general, however, was not so lucky and died in the impact phase.  The cataphracts and the Sassanid LF both disrupted due to the death of the general.  In the maneuver phase, the cataphracts conformed to the lancers while both Chionite LH turned to face the Sassanid cavalry in the center and moved to within shooting range.  In the shooting phase, no one remembered how to use a bow.  In melee, the cataphracts, the Chionite lancers and the Chionite cavalry all failed to score a hit.  The Sassanid cavalry, however, scored 1 hit on the lancers and 2 on the Chionite cavalry.  The Chionite cavalry failed their cohesion test and fragmented.  The Chionite lancers passed their cohesion and death rolls.  The field looked like so when the turn ended:


The Sassanid 3rd turn saw the Sassanid cavalry in the center charge the two Chionite LH units.  Both LH units evaded off the table.  The cavalry rolled short and advanced only 3".  In the maneuver phase, the Sassanid LH turned around and moved up to outside of the 4" arrow range of the Chionite cavalry.  The Sassanid LF turned 90 and moved 3" to be within shooting range of the sole Chionite LH left on the table.  The Sassanid lights scored 2 hits on the Chionite LH who passed their cohesion test.  The Chionite LH bow fire was ineffectual.  In melee, the Chionite cavalry and lancers scored 0 hits.  The cataphracts scored 2 hits on the lancers while the Sassanid cavalry scored 1 more hit on the lancers and 2 on the Chionite right flank cavalry.  The lancers disrupted and lost a base.  The Chionite right flank cavalry lost a base and broke.  This caused the lancers to fragment.  The turn ended with the table like so:


The Chionite 3rd turn began with the Chionite left wing cavalry and LH charging the Sassanid LH.  The Sassanid LH evaded off the table.   In the maneuver phase the right flank Sassanid cavalry conformed to the Chionite lancers.  There was no shooting in this turn.  In melee, the cataphracts scored 2 hits on the Chionite lancers while the Sassanid cavalry scored 3 hits.  The Lancers only managed 1 hit on the cataphracts.  The lancers failed their cohesion test and were caught by the cavalry and cataphracts in the pursuit.  The Chionite general also died.  The game ended at this point with 6 Chionite points to 1 Sassanid point.


This game was very fast and the shallow table definitely had an effect.  I will have to think about the table size going forward as it impacts mounted armies signifcantly.


A Boy's Oath Update

 I am continuing to add to the Selected References page for the "A Boy's Oath" scenario.  I have begun going through past Slin...