Saturday, June 30, 2018

Later Sassanids vs Sabir Huns circa 575 AD Round 2

In the reign of the Illustrious King of Kings, Shahanshah of all Aryans and Non-Aryans, Khusrow I, the loyal subjects of the Immortal Soul in the region of Darband petitioned the light of Mazda for relief from the depredations of the wicked huns who had crossed the Northern sea of grass and practiced unspeakable acts against the loyal subjects of the eternal light.  In his grace, Khusrow I, the Immortal Soul, sent his most loyal servant, Vahrez Timr, brother of Vahrez Boes, with a small force of dedicated Asvarhan cavalry to bend the northern barbarians to the will of Mazda.  The ensuing battle, failed to bring the Northern Huns to heel and Vahrez Timr, loyal servant of the Eternal Fire, was forced to withdraw to the outskirts of Durban and rebuild his shattered army. Transferring his best Asvarhan to refill the ranks of his battered Immortals, Timr vigorously recruited numerous deqhans to swell his numbers for the inevitable second confrontation with the Huns of Sabir.  His story continues...

Sassanid List and Host:


Sabir List and Host:


The Sabir Huns won the initiative and opted for Agriculture from the Sassanid terrain choices.  The Sassanids took an open field (compulsory), a gentle hill and an enclosed field.  The Sabir opted for the open and an open field.  With the execution of the gentle hill, all of the terrain fell on the Sassanid side of the table.  One open field was on the extreme right of the Sassanid long edge and would not play a part in the battle.  Another open field fell in the center of the Sassanid deployment area 4" from the long edge.  The enclosed field fell on the extreme left of the Sassanid line approximately 2" from the side and base line.  The gentle hill ended up in the center of the Sabir base line touching the table edge.


The Sassanid host deployed with the Blue Cavalry to the left followed by the White Cavalry then the Cataphracts and then the 6-pack of Cavalry deployed in the enclosed field (dismounted as Medium Foot, Armoured, Average, Undrilled, Bow, Swordsmen, of course).  Vahrez Timr started attached to the Cataphracts with the Sassanid camp behind the junction between the Cataphracts and the White Cavalry.


The Sabir host deployed with the Superior Cavalry on the outside left followed by the Average Cavalry and then the two Foot Warrior battlegroups and then the Light Horse.  The Sabir Chieftain started attached to the leftmost of the two foot battlegroups with the fortified camp deployed on the back side of the gentle hill.


The Sassanids moved first and in their first turn the entire host moved 4" forward.  In Joint Action, the Sassanid general moved to the Blue Cavalry on the right end of the line.  


In the Sabir first turn, the Light Horse moved 6" forward and wheeled 1" on an angle towards the Blue Sassanid Cavalry.  The Foot Warrior Battlegroups moved a little over 4" forward stopping just outside of 5" of the Sassanid line.  The Average Cavalry moved up next to the foot battlegroups.  The Superior Cavalry passed a CMT to turn 90 and wheeled 3" towards their right.  In the Joint Action, the Sabir Chieftain moved to the Average Cavalry.


In the Sassanid 2nd Turn, the Blue Cavalry passed a CMT to turn 90 and move 2".  The Medium Foot attempted a CMT to move short but failed and remained in place.  The other BGs opted to stay put and in Joint Action the Sassanid General moved to the White Cavalry.
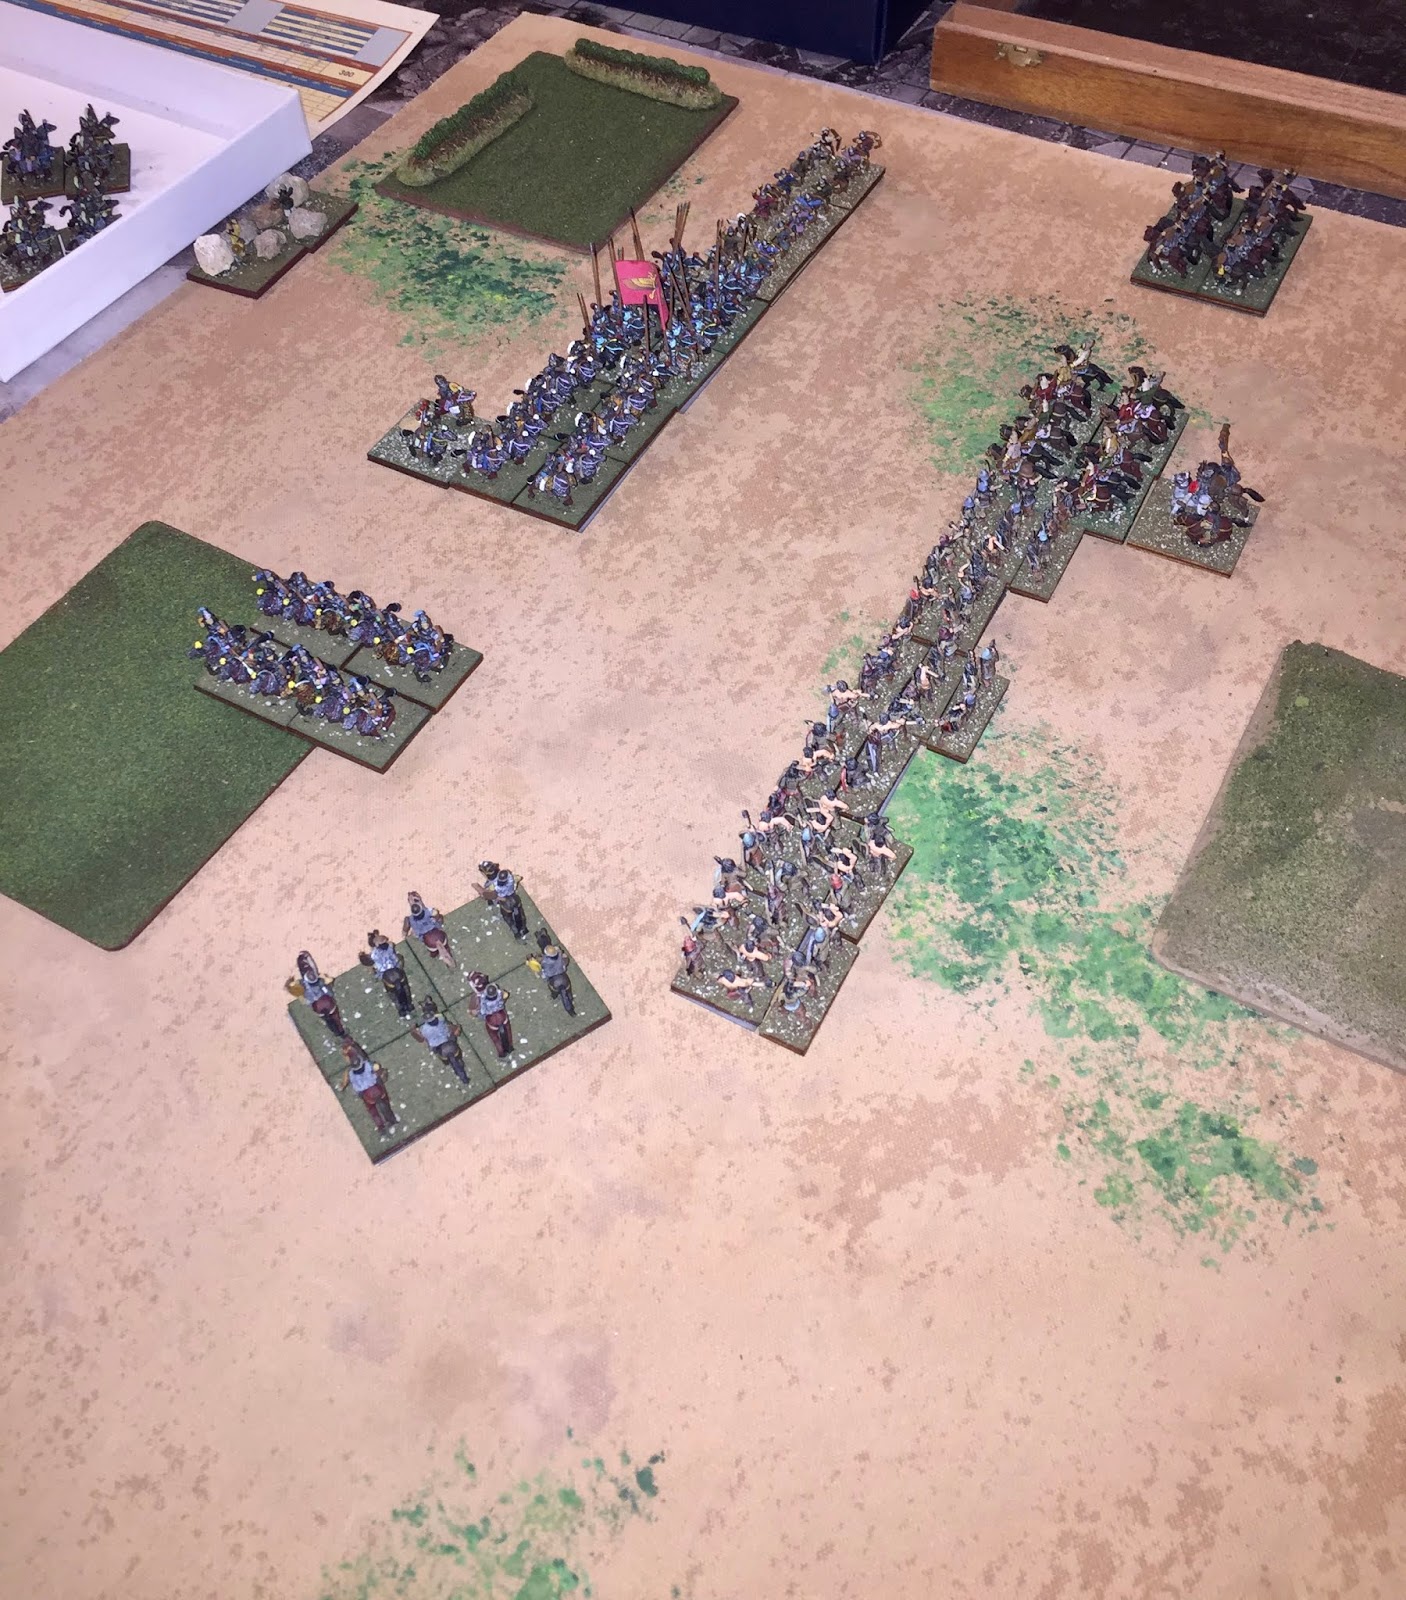

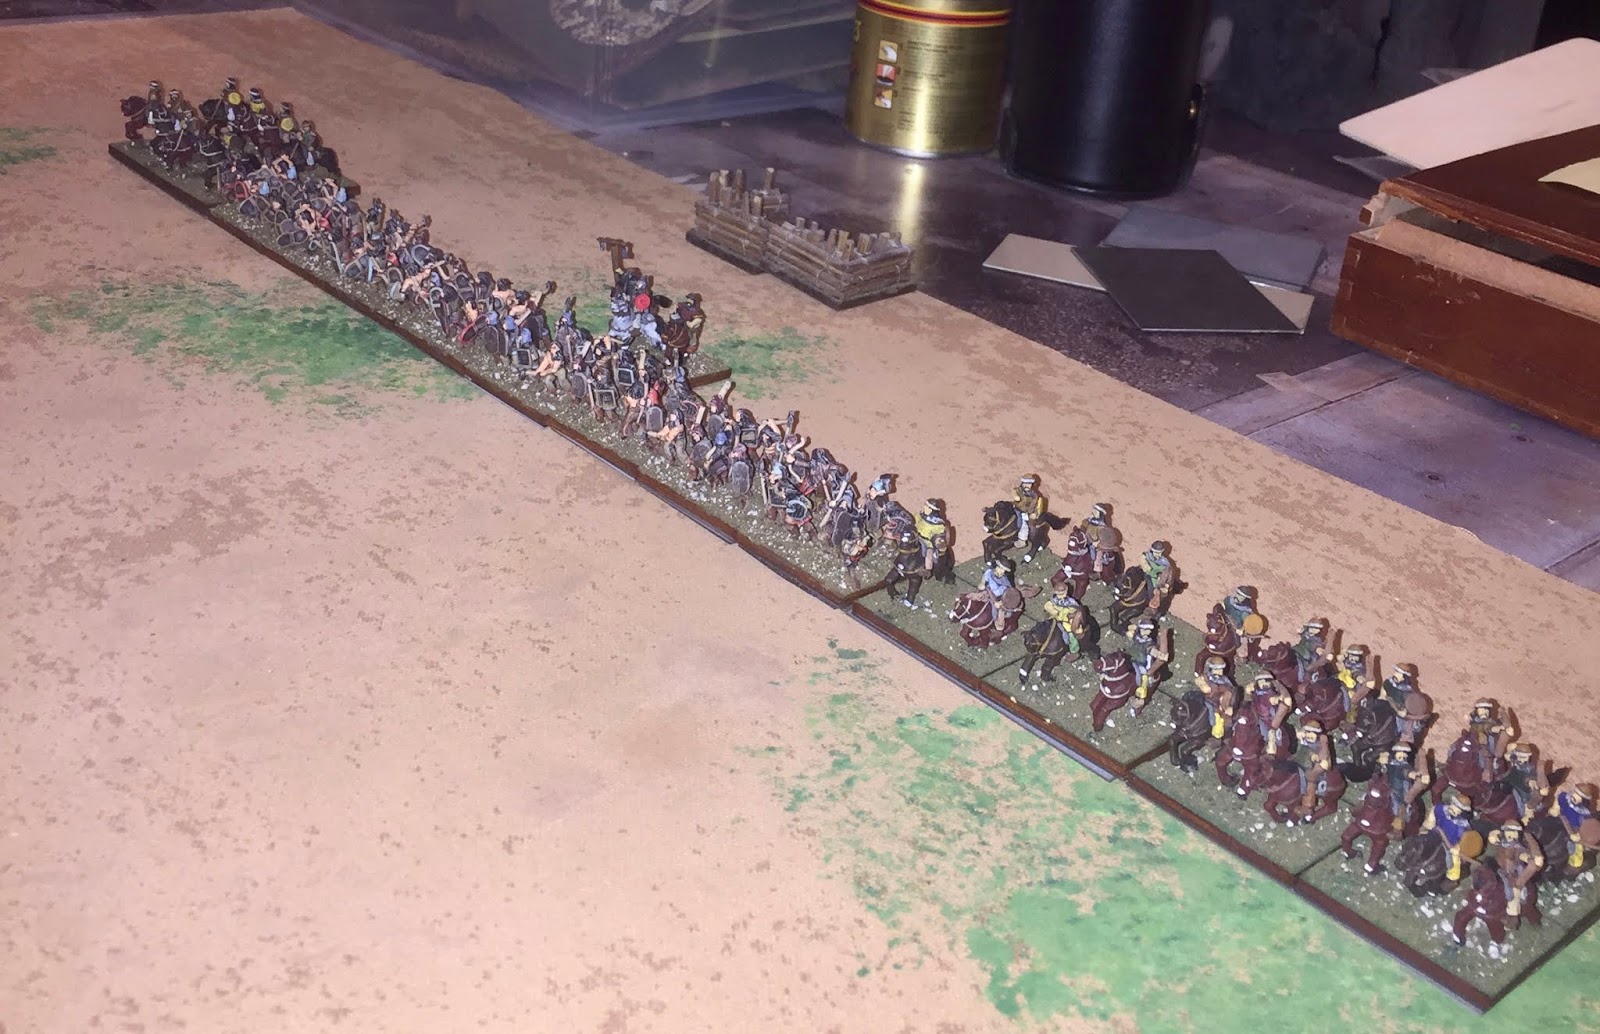
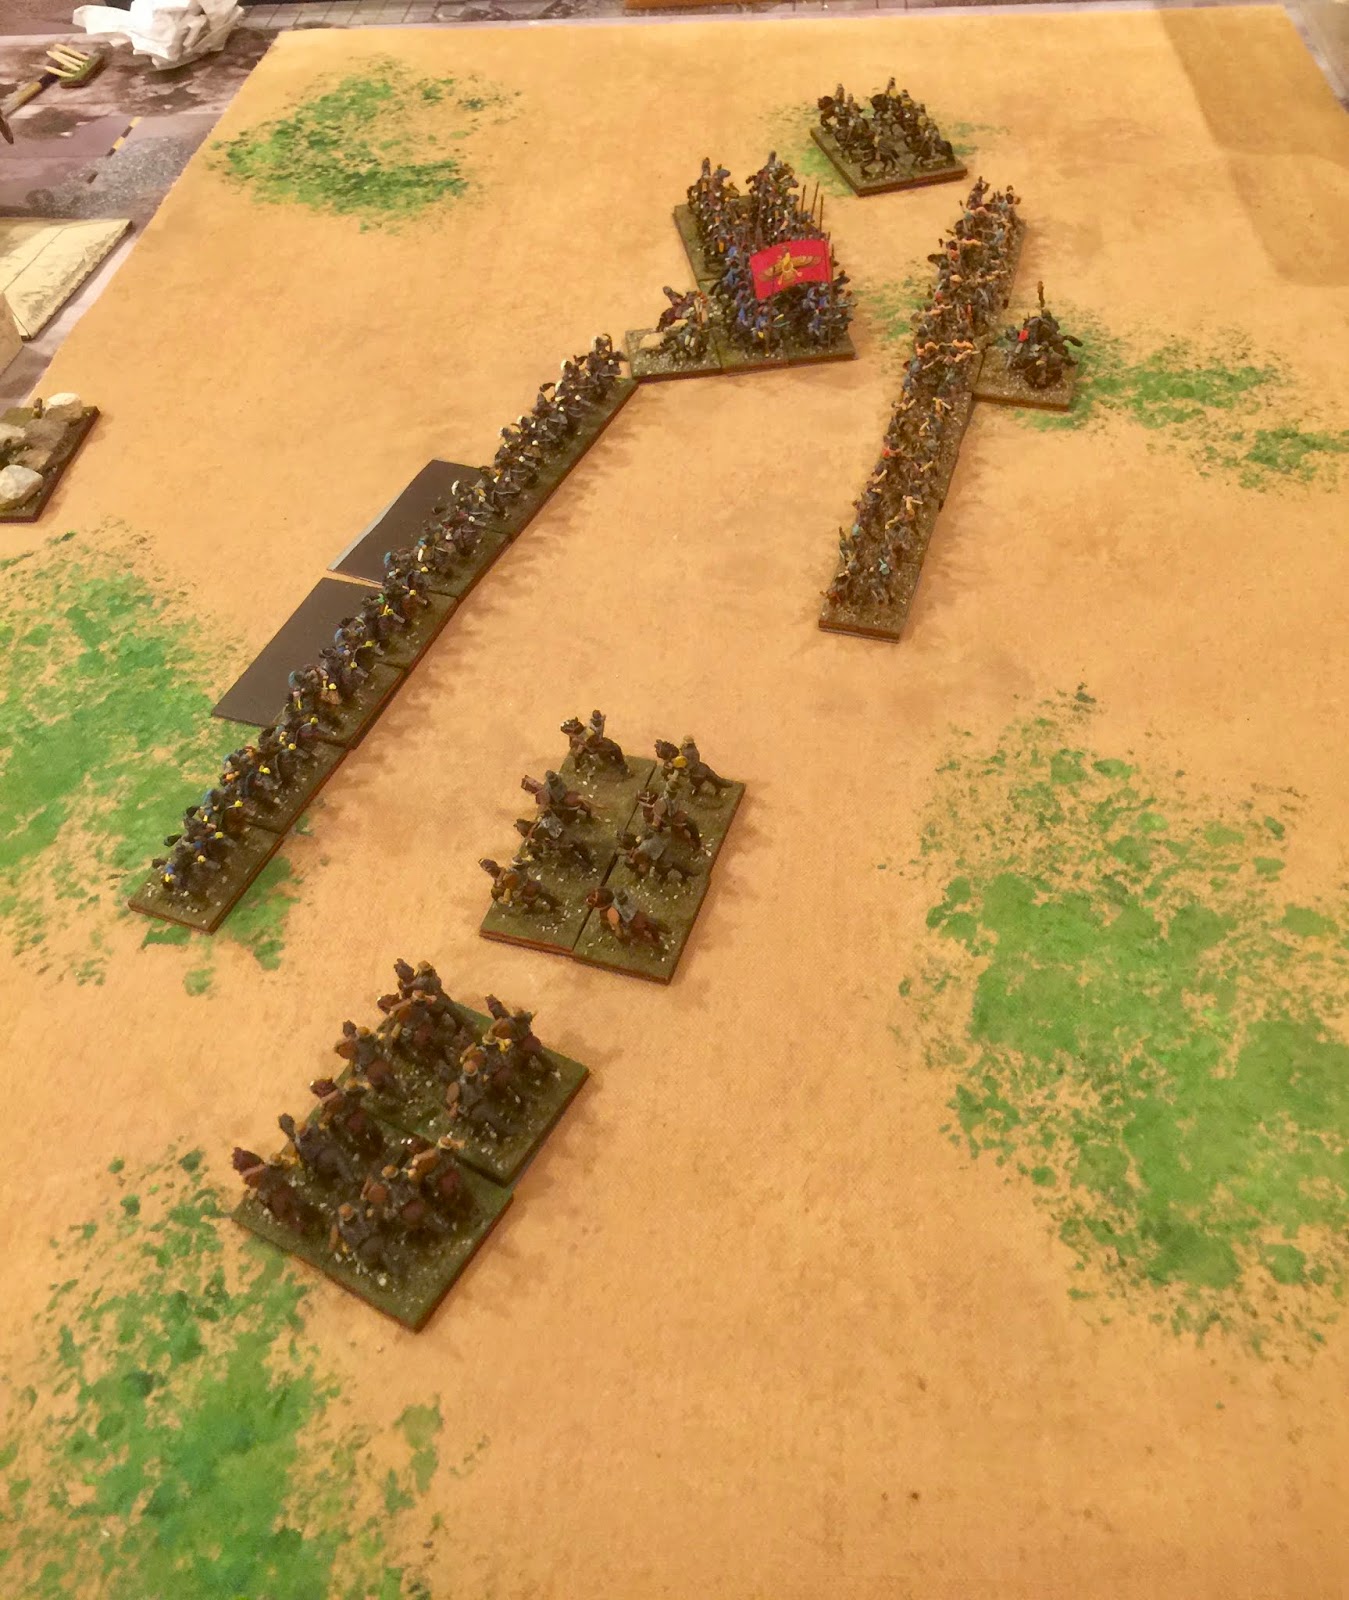
In the Sabir 2nd Turn, the Average Cavalry attempted a CMT to expand but failed.  The Superior Cavalry wheeled and advanced 5" towards the Sassanid dismounted cavalry.  The Light Horse moved to within 3" of the Sassanid Blue Cavalry while the foot battlegroups remained stationary.  In the Shooting Phase, the Light Horse managed only 1 hit to no effect while the Sassanid Medium Foot hit the Superior Cavalry 3 times who shrugged it off with no ill effects.  


The Sassanid 3rd turn began with no charges.  The Blue Cavalry wheeled to face the Sabir Light Horse.  The White Cavalry attempted a CMT to expand but failed.  The Cataphracts and Medium Foot opted to stay where they were this turn.  In the Shooting Phase, the Blue Cavalry and Sabir Light Horse traded meaningless puffs of air.  The Medium Foot, however, scored three more hits that the Superior Sabir Cavalry could not shrug off as they dropped to disrupted.


For the Sabir 3rd Turn, the Average Cavalry finally passed a CMT and expanded two bases.  The Superior Cavalry moved forward on line with the Average Cavalry.  The Light Horse attempted a CMT to fall back 2" facing the Sassanid Blue Cavalry but failed.  With the Light Horse in the way, the Foot Warriors opted to sit.  In the Shooting Phase, the Sabir Light Horse hit the Blue Sassanid Cavalry twice while taking 2 hits in return.  Both passed their subsequent cohesion tests with no ill effects.  The Sassanid Medium Foot scored two hits on the Sabir Average Cavalry who dropped to disrupted.

In the Sassanid 4th Turn, the White Cavalry passed a CMT to expand into line.  The Blue Cavalry advanced into the face of the Sabir Light Horse.  The Medium Foot and Cataphracts opted to stay put.  In the Shooting Phase, the Blue Cavalry scored two hits on the Sabir Light Horse who suffered no ill effects.  The return fire of the Light Horse had no effects as did the Sassanid Medium Foot shooting on the Sabir Average Cavalry.


To start the Sabir 4th Turn, the Light Horse attempted a CMT to fall back 2" and face the Sassanid Blue Cavalry but failed.  Instead, they turned 180 and completed a full move straight away.  The Sabir Heavy Foot battle line moved 3" straight ahead.  The Average Cavalry passed a CMT to withdraw 2" facing the Sassanids.  In the Shooting Phase, the combined fire of the Sassanid Blue and White Cavalry scored 3 hits to the leftmost Foot Warrior BG to no effect.  The White Cavalry scored 2 hits to the right-hand Foot Warrior BG to no effect.  The Medium Foot scored 2 hits to the Sabir Superior cavalry who passed cohesion. In the Joint Action Phase, the Sabir Chieftain rallied the Superior Cavalry back from disrupted.  The Sassanid leader moved to the Cataphracts.


To begin the Sassanid 5th Turn, the Cataphracts charged the Heavy Foot to their front.  The Sassanid General opted to lead from the front.  In Impact, the Sassanids managed only 1 hit to 2 and subsequently lost a base and disrupted.  In the Maneuver Phase and after the Cataphracts had conformed, the Sabir Foot shifted to cover the Cataphract file in overlap.  The Blue Cavalry wheeled to be parallel to the other Sabir Foot BG.  The White Cavalry rolled a CMT to fall back 2" facing the Sabir forces.  The Medium Foot failed a CMT to move short of the Superior Sabir Cavalry and remained in place.  In the Shooting Phase, all of the Sassanids appeared to be out of arrows as it was completed ineffectual.  In the Melee Phase, the the Cataphracts scored 2 hits to 3 from the Sabir Foot.  The Cataphracts managed to survive both the death roll and the cohesion test to end Melee.  In the Joint Action Phase, the Cataphracts broke off stopping in front of the White Cavalry.  The Hun Chieftain moved to the Average Cavalry and rallied them from disrupted.


To start the Hun 5th Turn, the Superior Cavalry charged the Sassanid Medium Foot in the open while the left most Foot Warrior BG charged the Blue Cavalry.  In the Impact Phase, the Hun Superior Cavalry scored 0 hits to 2 and proceeded to lose a base and disrupt.  The Sabir Foot Warriors fared better beating the Blue Cavalry 2 to 1.  The Blue Cavalry lost a base to hits and then disrupted.  In the Maneuver Phase, the Sassanid Medium Foot shifted a file to cover the Superior Sabir overlap.  The leftmost Sabir Foot Warriors shifted a file to cover the Blue Cavalry overlap as well.  The Sabir Average Cavalry passed a CMT to contract and move less than 3" forward.  The Sabir Light Horse, turned 180 and moved next to the left Sabir Foot Warrior but did not have enough movement to make it into overlap.  As there was no shooting to be had, into Melee the turn trundled.  Melee for the Blue Cavalry went poorly as the Sabir Foot scored 3 hits to 0.  The Blue Cavalry survived the death roll but dropped to Fragmented on cohesion.  On the other end the field, the Sassanid Medium Foot ripped the Superior Cavalry to their front apart scoring 5 hits to none.  The Superior Sabirs proceeded to lose a base and then double dropped to Broken.  The neighboring Average Cavalry were not pleased and disrupted.  The broken Sabirs moved short but the Medium Foot pursued shorter.  In Joint Action, the Superior Sabirs were removed from the table (50% and broken) while the Blue Sassanid Cavalry broke off 4" into the field behind them.  The Sassanid Cataphracts rallied back from disrupted.


To begin the Sassanid 6th Turn, the Cataphracts opted not to charge and passed a CMT to hold.  In the Maneuver Phase, the Sassanid General moved to the White Cavalry.  The White Cavalry passed a CMT to contract and moved to be in line with the Cataphracts.  The Blue Cavalry attempted a CMT but failed.  The Sassanid Medium Foot also attempted a CMT but failed.  In the Shooting Phase, the Sassanid Medium Foot scored 3 hits to 2 from the Average Sabir Cavalry.  The Sassanid Medium Foot failed their cohesion test and disrupted while the Average Cavalry passed both their death roll and cohesion test.  The White Cavalry's bow fire on the Foot Warriors to their front was to no effect.  In the Joint Action Phase, the Sassanid General moved to the Blue Cavalry and rallied them from Fragmented to disrupted.  The Sabir Average Cavalry also managed to rally back to fresh.


To start the Hun 6th Turn, the Sabir Average Cavalry with general attached charged the disrupted Sassanid Medium Foot while the Foot Warriors in the center charged to Cataphracts and the White Cavalry.  The Average Cavalry won the impact against the Sassanid Medium Foot 2 hits to 1 but the Sassanid Foot survived both the death roll and cohesion test.  In the center, the Sabir charge was a disaster.  The Sabir Foot scored 2 hits to 1 on the White Cavalry but the Cataphracts scored 5 to 1.  After losing a base, the Sabir Foot proceeded to disrupt.  The White Sassanid Cavalry passed their death roll but disrupted.  In the Maneuver Phase, the Sassanid Medium Foot shifted a file to cover the overlapping Average Cavalry file.  The middle Sabir Foot Warriors expanded a file to cover the overlapping file of the White Cavalry.  The remaining Sabir Foot Warriors advanced 3" to the edge of the field to face the Blue Sassanid Cavalry as the Sabir Light Horse moved up to be within 3" of the Blue Cavalry for shooting.  In the Shooting Phase, the Sabir Light Horse managed no hits.  In Melee, the Sassanid White Cavalry and Cataphracts managed 1 hit and 2 hits respectively taking the exact same in return from the Sabir Foot.  The Sabir Foot survived the death roll.  The Sassanid Medium Foot scored 2 hits to 1 on the Sabir Average Cavalry who survived the death roll and the attempt to kill the general but failed the cohesion test and dropped to disrupted.  In the Joint Action Phase, the Sassanid Blue Cavalry rallied from back from disrupted.
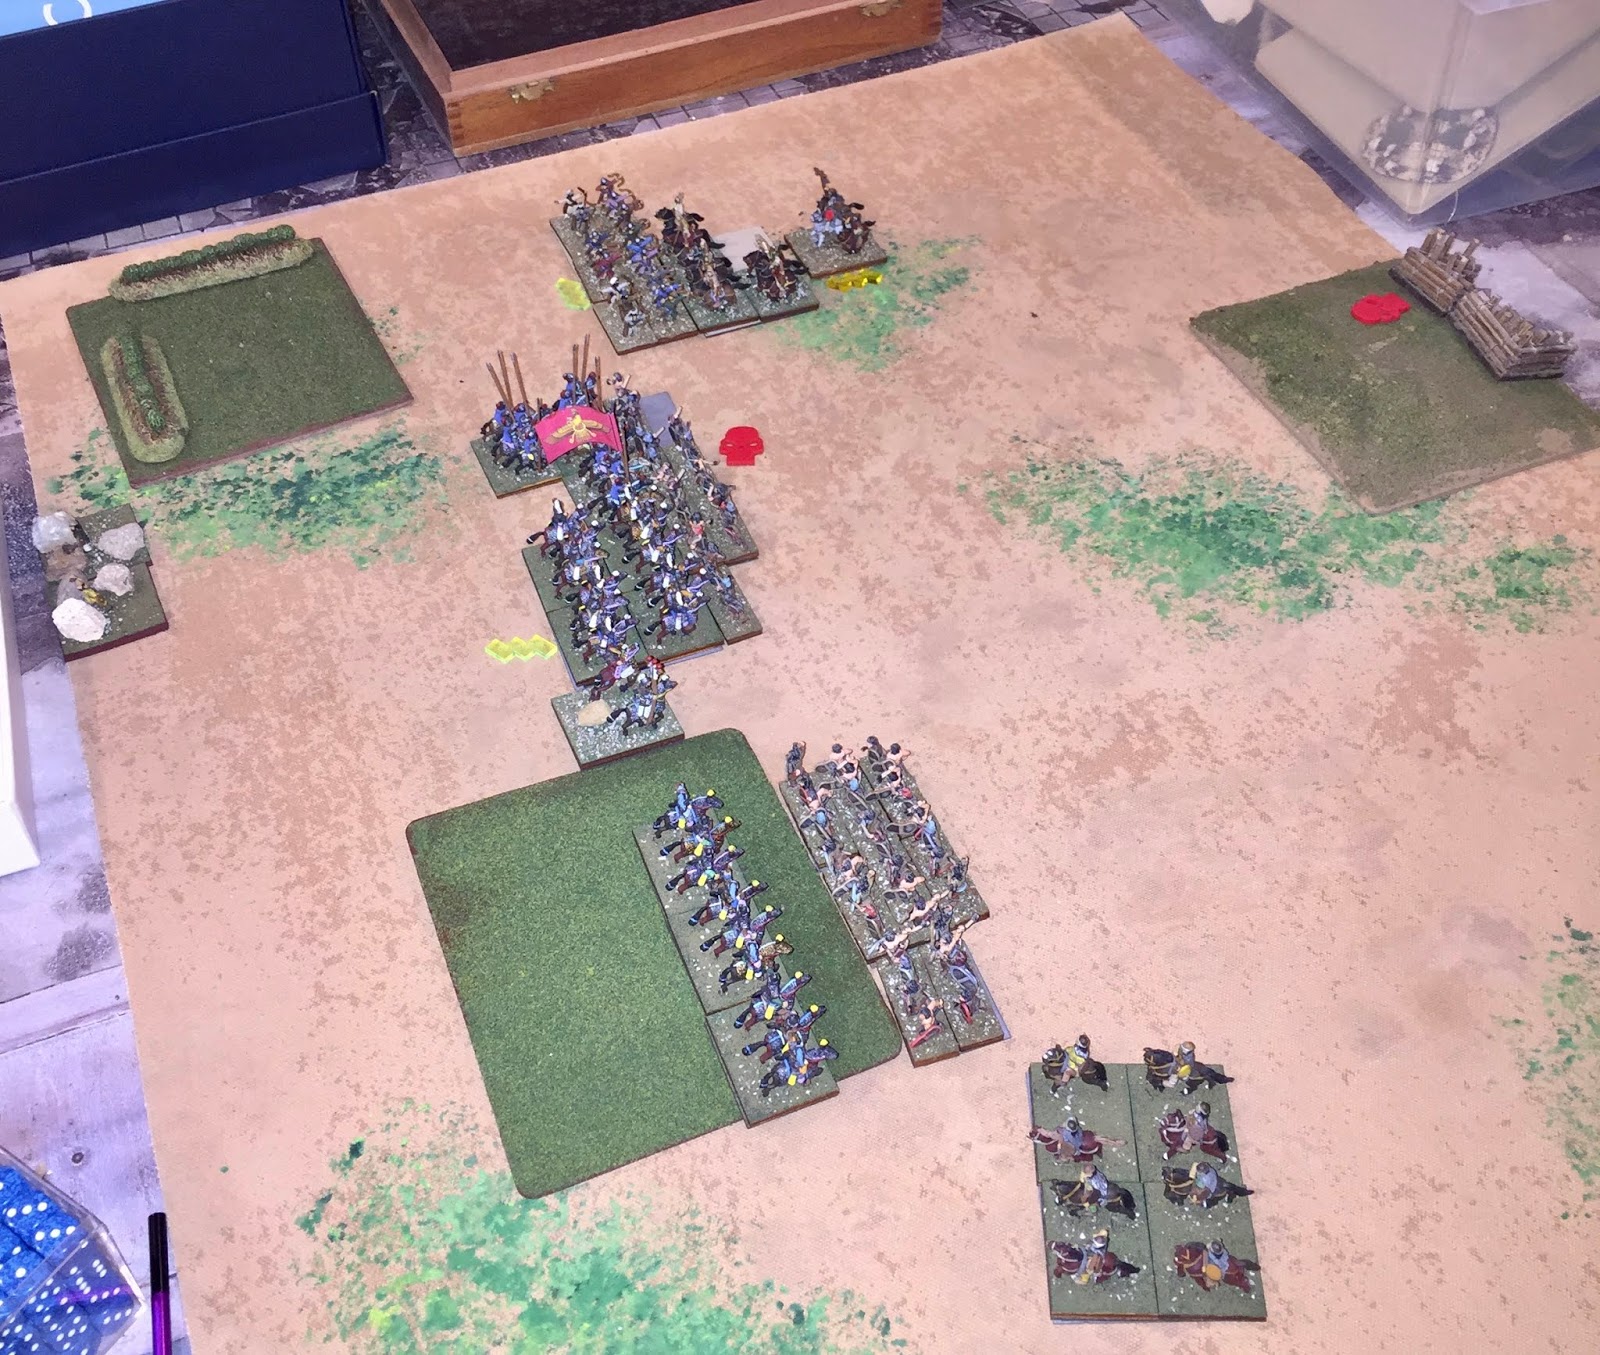


The Sassanid 7th Turn dawned with both sides knowing this would be the turn of decision.  There were no charges so into Maneuver the turn moved.  The Sassanid General moved to the White Cavalry.  The Blue Cavalry passed a CMT to expand while stationary.  In the Shooting Phase, the Sabir Light Horse scored 1 hit on the Blue Cavalry who passed their cohesion.  The Blue Cavalry fire on the Sabir Foot to their front was to no effect.  In Melee, the Sabir Average Cavalry managed 0 hits to 3 from the Sassanid Medium Foot, lost a base and dropped to Fragmented.  The Sabir Foot Warriors in the center scored 1 hit each against the Sassanid Cataphracts and White Cavalry but took 2 hits from each in return.  The following death roll and cohesion tests were not kind as the Foot Warriors lost a base and double dropped to Broken.  While the Sabir Average Cavalry survived seeing friends break the army did not as the Sabir Army dropped to 5 attrition points to 0 and broke.

Vahrez Timr, launched his remaining cavalry in hot pursuit of the broken Sabir Hun harrying them northward into the steppes for a brief while.  Wary of the cunning Huns, he pulled his forces back just short of nightfall.

This game seemed to take longer as there was quite a bit of movement back and forth.  The dismounting of the Sassanid 6-pack was something new and looks promising.


Sunday, June 17, 2018

Sabir Huns vs Sassanid Persians Circa 575 AD

In the reign of the Illustrious King of Kings, Shahanshah of all Aryans and Non-Aryans, Khusrow I, the loyal subjects of the Immortal Soul in the region of Darband petitioned the light of Mazda for relief from the depredations of the wicked huns who had crossed the Northern sea of grass and practices unspeakable acts against the loyal subjects of the eternal light.  In his grace, Khusrow I, the Immortal Soul, dispatched his most loyal servant, Vahrez Timr, brother of Vahrez Boes, with a small force of dedicated Asvarhan cavalry to bend the northern barbarians to the will of Mazda.

Sassanid List and Host:


Sabir List and Host:


The Sassanids won the initiative and opted to take Steppe from the Sabir terrain.  The Sabir took two opens and the Sassanid opted for a Brush.  The Sassanid Brush ended up being picked up so the table was an open plain.  


The Sassanid host deployed:  Blue Average Cavalry at bottom left followed by White Average Cavalry, the Cataphracts and the Orange Superior Cavalry.


The Sabir host deployed: Light Horse Archers at top left, the two Foot Warriors, the second Light Horse Archers and the Superior Cavalry Archers.


The Sassanids moved first and saw the Cataphracts and the Orange Cavalry move forward and slide 1 base left in their first move and then wheel slightly to the left and forward for the 2nd move stopping just outside of 5" from the Sabir line.  The Blue and White Cavalry expanded two stands while stationary.


The Sabir 1st turn saw the light horse and cavalry on the Sabir left move 5" forward with a 1 base shift left.  The two Sabir foot warrior BGs wheeled 3" to their right as a battle line.  The right end Light Horse wheeled right 4" and then wheeled left 3".  Shooting was ineffective and the turn ended. (No picture for this turn)

The Sassanid 2nd turn had the Sassanid Cataphracts and Orange Cavalry moving 2" forward.  The White and Blue Cavalry individually wheeled to their right staying in line to face the Sabir envelopment on their flank.  The Sabir shooting was more effective than the Sassanid as the Orange Cavalry suffered two hits but passed cohesion.  With nothing else happening, the Sassanid 2nd turn ended.


For the Sabir 2nd turn, the Light Horse on the Sabir left moved to within 3" of the Blue Cavalry.  The Superior Sabir Cavalry moved forward 4" and then wheeled 1" towards the Blue Cavalry.  On the Sabir right, the Light Horse failed a CMT to fall back 2" facing the enemy and opted to stay where they were.  The Foot Warrior line moved to within 1" of the Cataphracts.  In the shooting phase, the Sabir Light Horse on the right was ineffective while the Sassanid Orange Cavalry was split.  The Sassanid Blue Cavalry hit the light horse to their front and managed to disrupt them.  The Sabirs, meanwhile, hit the Blue Cavalry twice who dropped to Disrupted.  With no combat, the turn ended.  (No picture for this turn either)

To start the Sassanid 3rd turn, the Cataphracts and the Orange Cavalry charged.  The Sabir right flank light horse evaded 8" ending 3/4" from the table edge.  The Cataphracts and the Orange Cavalry plowed into the right end Sabir Foot Warrior BG.  The Sassanid General led the Cataphracts into the fray while the Sabir Chieftain led his foot warriors into the fight.  The Cataphracts and the Orange Cavalry both managed 2 hits to the Foot Warriors but took 3 each in return.  Both Sassanid cavalry BGs passed their death roll as the General narrowly dodged a thrown Sabir Axe but both also disrupted.  The Sabir Foot Warriors suffered a base loss from the death roll.  On the opposite end of the Sassanid line, the Blue Cavalry passed a CMT and charged.  The Sabir Light Horse evaded 9" while the Blue Cavalry charged into the Sabir Superior Cavalry.  In the ensuing impact, the Sabirs scored 2 hits to none.  The Blue Cavalry fragmented on their cohesion test after passing their death roll.  In the maneuver phase, the Sassanid Blue Cavalry shifted one stand to cover the existing overlap against the Sabir cavalry and the Sassanid White Cavalry moved to within 3" of the second Sabir Foot Warrior BG.  In the shooting phase, the White Cavalry only managed 2 hits to the Foot Warriors to their front to no effect.  In melee,  the Blue Cavalry scored 2 hits to 1.  The Sabir Cavalry suffered no loss from the death roll and passed their cohesion test.  On the other end of the line, both the Cataphracts and the Orange cavalry managed 2 hits each while the Sabir foot warriors only managed 2 to the Cataphracts in return.  The Sabir Foot passed their death roll and the Sabir Chieftain survived combat again.  However, the cohesion test was not kind as the Sabirs double dropped to fragmented.  Thus the turn ended.


To start the Sabir 3rd turn, there were no charges to be had.  So into maneuver, the turn shifted.  The unengaged Sabir Foot Warrior BG passed a CMT and advanced to 0.5" of the White Sassanid Cavalry.  The right wing Sabir Light Horse moved forward and wheeled onto the flank of the Orange Sassanid Cavalry.  The left wing Sabir Light Horse reversed direction and advanced to towards the fragmented Blue Cavalry.  In the shooting phase, the Sassanid White Cavalry scored 3 hits but the Sabir Foot emerged unscathed.  In the melee phase, the Blue Cavalry scored 1 hit to the 2, passed their death roll but broke cohesion.  In the initial pursuit, the broken Sassanids moved 5", were caught by the pursuing Huns and lost a base.  On the other end of the line, the Cataphracts scored 2 hits but the Orange Cavalry missed.  The Foot Warriors only managed two hits to the Cataphracts in return.  In Joint Action, the Hun Cavalry failed a CMT to stop pursuing the broken Sassanid cavalry who fled off the table while the Huns stopped an inch short of the edge.  The Cataphracts rallied from disrupted while the fragmented Sabir Foot rallied to disrupted.


To start the Sassanid 4th turn, no charges to be made so the Sassanid White Cavalry rolled a CMT and moved 2" back and turned to face the Foot Warriors to their front.  Sassanid shooting continued its run of ineffectiveness this turn.  In melee, the Cataphracts and Orange Cavalry scored 1 hit each but took 2 and 1, respectively, in return.  The Cataphracts survived their death roll and cohesion test to end the melee phase.  In Joint Action, the Sabir Foot Warriorsin the melee rallied from disrupted to fresh.


To begin the Sabir 4th turn, the Sabir Light Horse charged into the flank of the Orange Cavalry.  In the ensuing impact, the Light Horse scored 2 hits to 1 but the Orange Cavalry survived the death roll and passed cohesion.  In the movement phase, the center Sabir Foot Warrior BG failed a CMT to advance short on the White Cavalry and remained stationary.  The Sabir Cavalry turned 90 and waited.  The left wing Sabir Light Horse advanced to within 3" of the Sassanid White Cavalry.   In the shooting phase, neither the Sassanids nor the Sabir remembered what a bow was for.  In melee, the Cataphracts scored 2 hits but took 3 in return losing a base and disrupting.  The Orange Cavalry scored only 1 hit to the Foot to their front and failed to hit the light horse on their flank.  The Sabirs managed 1 from the Foot Warriors and 2 from the Light Horse.  The Orange Cavalry passed their death roll but dropped to fragmented on cohesion.  The Foot warriors lost 1 base from their death roll.  In the Joint Action Phase, the Cataphracts were compelled to break off 4".


Vahrez Timr recognized that things were getting desperate for his cavalry and charged back in with the Cataphracts to begin the Sassanid 5th turn.  However, impact continued the trend of poor results for the Sassanids as the Cataphracts scored only 1 hit to 3.  Luckily, the Cataphracts survived the death roll and the cohesion test.  The White Sassanid Cavalry attempted a CMT but failed.  In the shooting phase, the White Cavalry scored 3 hits on the Foot Warriors to their front who passed both their death roll and cohesion test.  The Sabir Light Horse, however, scored 2 hits on the White Cavalry who did not survive their cohesion test.  The shooting phase ended with the White Cavalry disrupted.  In melee, the Cataphracts scored 2 hits to 2, the Orange Cavalry scored 1 hit to each of the Foot Warriors and Light Horse.  However, the Orange Cavalry took 3 hits in return but luckily passed both the death roll and cohesion test.  The Sabir Foot Warriors however lost another base.  In Joint Action, the Cataphracts broke off and attempted to bolster once more but failed.


To begin the Sabir 5th turn, the middle Sabir Foot Warriors charged the White Cavalry as did the Sabir Light Horse.  The White Cavalry opted to stand.  In the impact, the White Cavalry scored 1 hit and 2 hits to the Light Horse and Foot Warriors respectively taking 3 total hits in return from the same.  A base was lost by the White Cavalry on their death roll.  In the maneuver phase, the Sabir Foot facing the Orange Cavalry shifted a base to cover the open file.  The Sabir Cavalry moved 5" to threaten the flank of the White Sassanid Cavalry.  As there was no shooting to be had, the turn moved into the melee phase.  The White Cavalry scored a single hit to the Light Horse but inflicted none to the Foot Warriors.  In return, they suffered 2 hits from the Sabir Light horse and none from the Foot Warriors.  The White Cavalry suffered a base lost on their death roll causing them to autobreak.  With the routing of the White Cavalry, Vahrez Timr, ordered his broken army from the field.

25-0 to the Huns in old money.


Sunday, June 3, 2018

Figure Update Weekend of June 2

Did not have time to get another game in this weekend but I did get around to flocking and basing some odds and ends that have been sitting around for a while.

First up, I finished a rebasing project of Hunnic Nobles that had been languishing on my desk for a while.  I started off working on these under V2 when most of the Hunnic Ally lists could have a battlegroup of Nobles.  Alas, under V3 that seems to have gone by the wayside so I guess I will have to expand the Huns into a full army (800 points or so) since I have two battlegroups of them.  The figures are all Old Glory.  Since the Nobles pack from Old Glory in the Hun range all come with lances, I added a horse archer to each stand to flesh them out.


Next up I have finished two battlegroups of Sabir Hunnic foot warriors.  The first battlegroup is Old Glory figures using the the Javelinmen from the Skythian Archers & Javelinmen pack along with the Maitotian Infantry pack found in the Sarmation range.  I hope to add a third battlegroup of these in the near future along with a light foot archer battlegroup using the left over Skythian archers.  I like the way these turned out.


The second battle group is made up of Forged in Battle Skythian Skirmishers and Skythian Light Infantry packs although the Sarmatian Alan Infantry and Black Sea Infantry packs could be also used.  Something to think about should I decide to add a fourth battlegroup.  They are noticeably slighter in build when compared to the Old Glory figures so I would not mix them in the same battlegroup.


I also added a Hunnic Command stand using Old Glory Figures.  I have another one I did some time ago using Black Hat miniatures.  I would most likely use that one as an ally and add two more of the Old Glory ones to round out the commanders needed for a full list.


Here is a few shots of the entire Hunnic host from this weekend together.


I am working on a full list for the Sabir Huns and have the basics down.  I need to finish up the source list as I have a few quibbles with the restrictions on the use of the Sabir Huns and Dilimnites in the Later Sassanid list that I want to bring up on the forum for discussion.  Hopefully the full Sabir List will be here sooner than later.

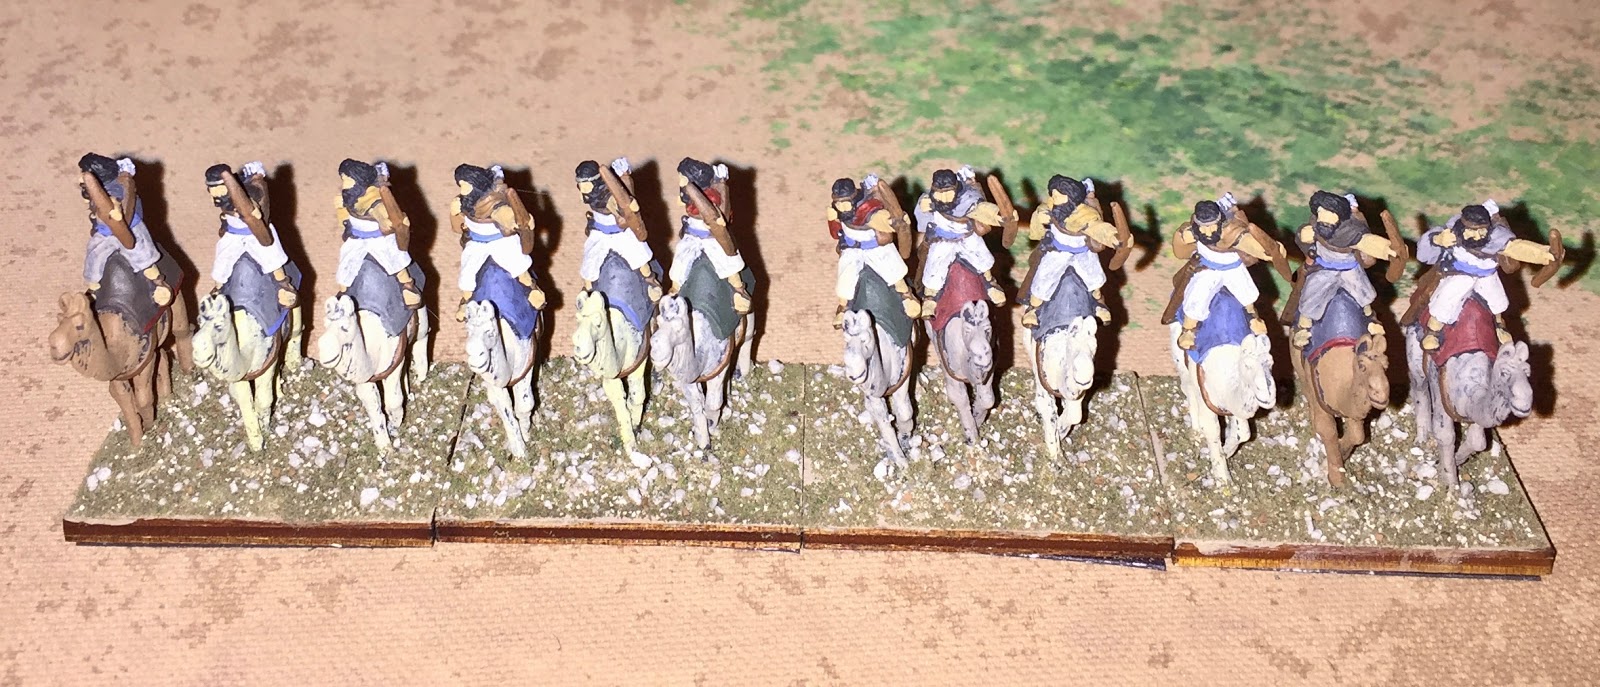
To round out the weekend is a 4-stand battlegroup of Arab Camelry with Bow.  These figures are the 15mm Forged in Battle.  The camels are truly tall when compared to Old Glory camels (unfortunately I did not do any comparison shots).  They are packed in  groups of 8 so to complete a 4 stand battlegroup two packs are needed.  The figures are split waist (grrr!) and do not fit snug.  There are two different upper body halves:  one head has a leather band around his head and the other has a full head of hair flowing free (almost like a fro).  To fill in the gaps on the waists I used a modeling adhesive I picked up at Hobby Lobby that dried clear.  I think they turned out fine.  BTW - along with hating split waste figures, I seem to hate painting camels too.  Not sure why.  Anyway, here are the pictures of the finished and based and will be joining my Pre-Islamic Arabian and Early Arab Conquest horde of troops.


Sunday, May 27, 2018

FOG 300 Later Sassanids vs Pre-Islamic Arabians circa 575 AD

In the reign of the Illustrious King of Kings, Shahanshah of all Aryans and Non-Aryans, Khosrow I, the loyal subjects of the  Immortal Soul in the southern regions of the Arabian Desert petitioned the light of Mazda for relief from the depredations of the wicked Axiumites who had crossed the Red Gulf and practiced unspeakable acts against the loyal subjects of the lord of all Aryans and Non-Aryans.  In his magnificence, Khusrow I, the Immortal Soul, dispatched his most loyal general Vahrez Boes with a small force of dedicated soldiers to his subjects' aid.  In a short campaign, Vahrez Boes confirmed the Immortal Soul's trust in him, cast the evil Axumites out and restored Sayf ibn Dhi-Yazan to his throne.  Vahrez Boes then returned to the land of Aryans.

A short time later, the Auximites returned and killed Sayf ibn Dhi-Yazan.  The great Khosrow I, incensed by the acts of the Auximites, dispatched Vahrez Boes with a larger force to expel the Auximites once and for all.  In a short time, Vahrez Boes did just that and remained in the Arabian South to ensure the eternal peace for the loyal subjects of the Immortal Soul.

Yet, Vahrez Boes' work was not at an end.  The Auximites (with Roman Gold) stirred unruly elements of the populace south of Najran to oppose the will of the Immortal Soul and rose in rebellion.  Sheik al-Hamil ibn Said cast out Vahrez Boes' loyal representatives and treated them most unjustly.

As a consequence, Vahrez Boes gathered his forces and marched to find the recalcitrant Sheik and bring his people back to fold of the Immortal Soul.

On the road between Sana'a and Najran, the Sassanid forces met the revolting Arabs...

The Sassanid List and Host:


The Pre-Islamic Arabian List and Host:


The rebels stood on the field as the Sassanid forces approached and opted for Developed.  The Sassanids took the compulsory enclosed field and the open.  The Arabs took the village and another enclosed field.  One enclosed field fell on the left of the Arab line (to the right in the picture below) while the village fell on the Arab right.  The other enclosed field fell on the Sassanid right.  The Arabs deployed between the enclosed field and the village (just off camera to the left).  The three Foot Warrior BGs deployed from the enclosed field towards the village.  The Bedouin light horse deployed on the left of the foot (in the picture) with the City Cavalry to the left of them.


The Sassanids deployed with the Superior Asvaran BG on the far left next to the enclosed field.  One of the average Asvaran deployed next to them.  The last average Asvaran BG deployed on the Sassanid right (in the picture) with the Cataphracts in the middle.


The Sassanids moved first.  The two Asvaran cavalry BGs on the Sassanid right moved a full 5" straight ahead to close the gap between the two armies.  The Cataphracts and the remaining Asvaran BG double moved forward shifting 1 single base to their right in their first move. With no shooting or melee, the Sassanid 1st turn ended.  


The Pre-Islamic Arabian 1st turn saw the Arabian foot move as a group straight ahead 3".  The Arabian cavalry opted to remained stationary.  There was no shooting at this point so the turn ended.
  

The Sassanid 2nd turn opened with the Cataphracts rolling not to charge - they held.  The Cataphracts and adjacent cavalry move to just short of 2" of the Arabian foot and just outside 5" of the City Cavalry.  The right flank Sassanid cavalry moved to within 3" of the Arabian foot.  The center Arabian foot took 3 hits in the shooting phase but shrugged off both the death roll and cohesion test.  All other shooting was forgetalble.  Thus the Sassanid 2nd turn ended.


The Arabian 2nd turn opened with the right most Arabian Foot (the reds and whites right to left respectively) charging the Sassanid cavalry line to chase them off.  Both cavalry evaded with the Superior Asvaran moving normal and the average to their left going 2" short.  The red Arabian foot went 5" in pursuit while the white Arabian foot went normal.  The last Arabian foot (the blacks) failed a CMT to move short in front of the cataphracts so opted to sit.  The Bedouin cavalry moved to within 1.5" of the Cataphracts and the City cavalry moved to stay on line.  The Sassanid shooting against the City cavalry had no effect so the Arabian 2nd turn ended.


To start the Sassanid 3rd turn, the Cataphracts charged straight ahead.  The Bedouins evaded, rolled normal move and stopped just short of going off the table.  The Cataphracts plowed into the black Arabian foot with one base making contact.  In Impact, the Cataphracts scored 2 hits to none which was catastrophic to the Arabs as the Arabian foot lost a base and double dropped to fragmented.  In the Movement Phase, the Cataphracts slid to their right to conform and the Arabs covered the 2nd file of the Cataphracts.  The two right flank Sassanid cavalry BGs turned around and sat.  The left flank cavalry BG made a CMT and backed up 2" and turned back around.  Sassanid shooting again had no effect.  In Melee, the Cataphracts scored 3 hits to 1.  The black Arab foot passed the death roll but failed cohesion and is caught in the pursuit after going 1" losing another base.  No-one cared about the broken Arab foot and in Joint Action the Cataphracts stopped pursuing while the broken Arabs went another 2".  The Sassanid 3rd turn ended at this point.


To begin the Arab 3rd turn, the City Cavalry charged the Sassanid cavalry to their front who evaded 3" back while the City Cavalry pursued forward 5.  The red and white Arab foot on the other end of the Arab line also charged and the Sassanid cavalry to their front evaded.  The right most Sassanid cavalry went 5" and the next one went 7".  The Arab foot lumbered along with the red Arab foot going 2" and the black Arab foot going 3".  In the Movement Phase, the Bedouin cavalry turned 90 and wheeled forward 4.5" to get out of the way of the fleeing Arab foot.  As there was no shooting or melee, the Joint Action quickly arrived and saw the broken Arab foot fleeing 3" to towards the table edge, ending the Arab 3rd turn.


The Sassanids 4th turn opened with no charges.  All three Asvaran BGs turned 180 in place to face the Arabs.  The Cataphracts turned 90 in place.  The Asvaran Bg facing the Arab City Cavalry was the only unit within shooting range but had no effect.  The Joint Action Phase saw the broken Arab foot exit the table ending the Sassanid 4th turn.


To start the Arab 4th turn, the City Cavalry charged the Sassanid cavalry to their front but rolled short on their VMD and only went 3".  The Sassanid cavalry went a full 5".  In movement, the red and white Arab foot on the Arab left moved 3" forward towards the Sassanid cavalry.  The Bedouin light horse moved to just in front of the Cataphracts at an angle.  In the shooting phase, the Sassanids scored 4 hits on the red Arab foot who passed both their death roll and cohesion test.   With nothing to do in the Joint Action Phase, the Arab 4th turn ended.


To begin the Sassanid 5th turn, the Cataphracts successfully rolled not to charge the Bedouins and instead wheeled towards the Arab City Cavalry.  The Sassanid cavalry in the middle of the table advanced to within 3" of the white Arab foot.  The Sassanid cavalry in front of the Arab City Cavalry turned to face.  The Sassanid cavalry threw a lot of dice in the shooting phase but nothing happened.  In the Joint Action Phase, the Arab Sheik moved to the red Arab foot BG thus ending the Sassanid 5th turn.


To start the Arab 5th turn, the Arabs charged across the board.  The three Sassanid cavalry BGs, with space running out behind them, all stood.  The Bedouin light horse charge into the Cataphract flank.  Vahrez Boes opted to lead the Cataphracts himself.  The Arab Sheik decided to lead the red Arab foot to counteract the superior morale of the Sassanid cavalry facing his men.  In Impact, the Cataphracts recieved 3 hits to 1, lost a base but survived the cohesion test and the Bedouin's attempts to kill Vahrez Boes.  The Sassanid cavalry facing the Arab City Cavalry scored 2 hits to 4, lost a base and disrupted.  The Sassanid cavalry facing the white Arab foot scored 2 hits to 3, lost a base and disrupted.  The Superior Sassanid cavalry facing the red Arab foot scored 4 hits to 4, survived the death roll and managed to kill the Arab general on a 12.  The red Arab foot consequently disrupted for seeing the CinC killed but the white Arab foot next to them did not care.  As everything on the table was in melee, there was no shooting.  In the melee phase, the Cataphracts scored 2 hits to 1 but the Bedouins emerged unscathed.  The Arab City cavalry scored 2 hits to 0.  The Asvaran cavalry lost a base and autobroke.  No one was close enough to care and they routed right off the table.  The Arab City Cavalry pursued to the table edge.  The white Arab foot scored 2 hits to 0 against the Sassanids to their front who passed the death roll but fragmented on cohesion.  The red Arab foot scored 2 hits but took 3 in return suffered no loss from the death roll and passed the cohesion test.  In the Joint Action Phase, the fragmented Sassanid cavalry broke off to the edge of the table.  At the end of the Arab 5th turn, the Arabs had lost 2 attrition points to the 3 lost by the Sassanids.  


The Sassanid 6th turn began with no charges.  The fragmented Sassanid cavalry moved to overlap the red Arab foot and hopefully swing the affair into the Sassanid favor.  In melee. the Cataphracts scores 3 hits to 0 on the Bedouins who lost 1 base and disrupted.  The red Arab foot managed 2 hits against the Sassanid cavalry but took 3 hits in return.  The red Arab foot survived the death roll but fragmented on cohesion.  With nothing to be done in Joint Action, the Sassanid 6th turn ended with the Sassanids at 3 attrition points to 3 for the Arabs.


To start the Arab 6th turn, the white Arab foot charged the fragmented Sassanid cavalry to their front who broke for being charged while fragmented.  The game ended at that point.  Total playing time 1.5 hours.


Vahrez Boes, seeing the Asvaran on the far right of his line giving way, orders the rest of the army to withdraw towards Sana'a.  The Arabs, leaderless, mill around the field stripping the dead Persians of all of their wealth.  None stop to think that maybe they should pursue the disorganized Persians to end the fight today.  Vahrez Boes swears to return and crush the rebellious Arabs, but that is another story...


Saturday, May 5, 2018

Reading Update

Just finished book 3 of Jack Ludlow's trilogy on Belisarius.  Personally I think his trilogy on the Normans in the South of Italy was better overall but as I have an interest in the Early Byzantines, I am googling up everything I can find.


I will be starting the Legend of Africanus trilogy about the illustrious general tonight by Matthew Jordan Storm as I anxiously await the third book in Paolo A. Belzoni's Belisarius series.  Nothing new Ludlow's book and he really just glossed over his later campaigns.  He did paint a vivid picture of the animosity Theodora held for our hero, though.

Updated FOG 300

Just finished going through the Army Book 2 and have updated Appendix A in the FOG 300 Supplement with terrain for each of the ally lists in the appendix of Book 2.  You can find the latest using the link below:

FOG 300 May 2018 Update

Could this be a new campaign scenario?

 69 AD was a busy year for the Romans.  Could this be an interesting scenario for a campaign? I have plenty of Early Germans, Gallic types, ...