Sassanid List and Host:

Sabir List and Host:

The Sabir Huns won the initiative and opted for Agriculture from the Sassanid terrain choices. The Sassanids took an open field (compulsory), a gentle hill and an enclosed field. The Sabir opted for the open and an open field. With the execution of the gentle hill, all of the terrain fell on the Sassanid side of the table. One open field was on the extreme right of the Sassanid long edge and would not play a part in the battle. Another open field fell in the center of the Sassanid deployment area 4" from the long edge. The enclosed field fell on the extreme left of the Sassanid line approximately 2" from the side and base line. The gentle hill ended up in the center of the Sabir base line touching the table edge.

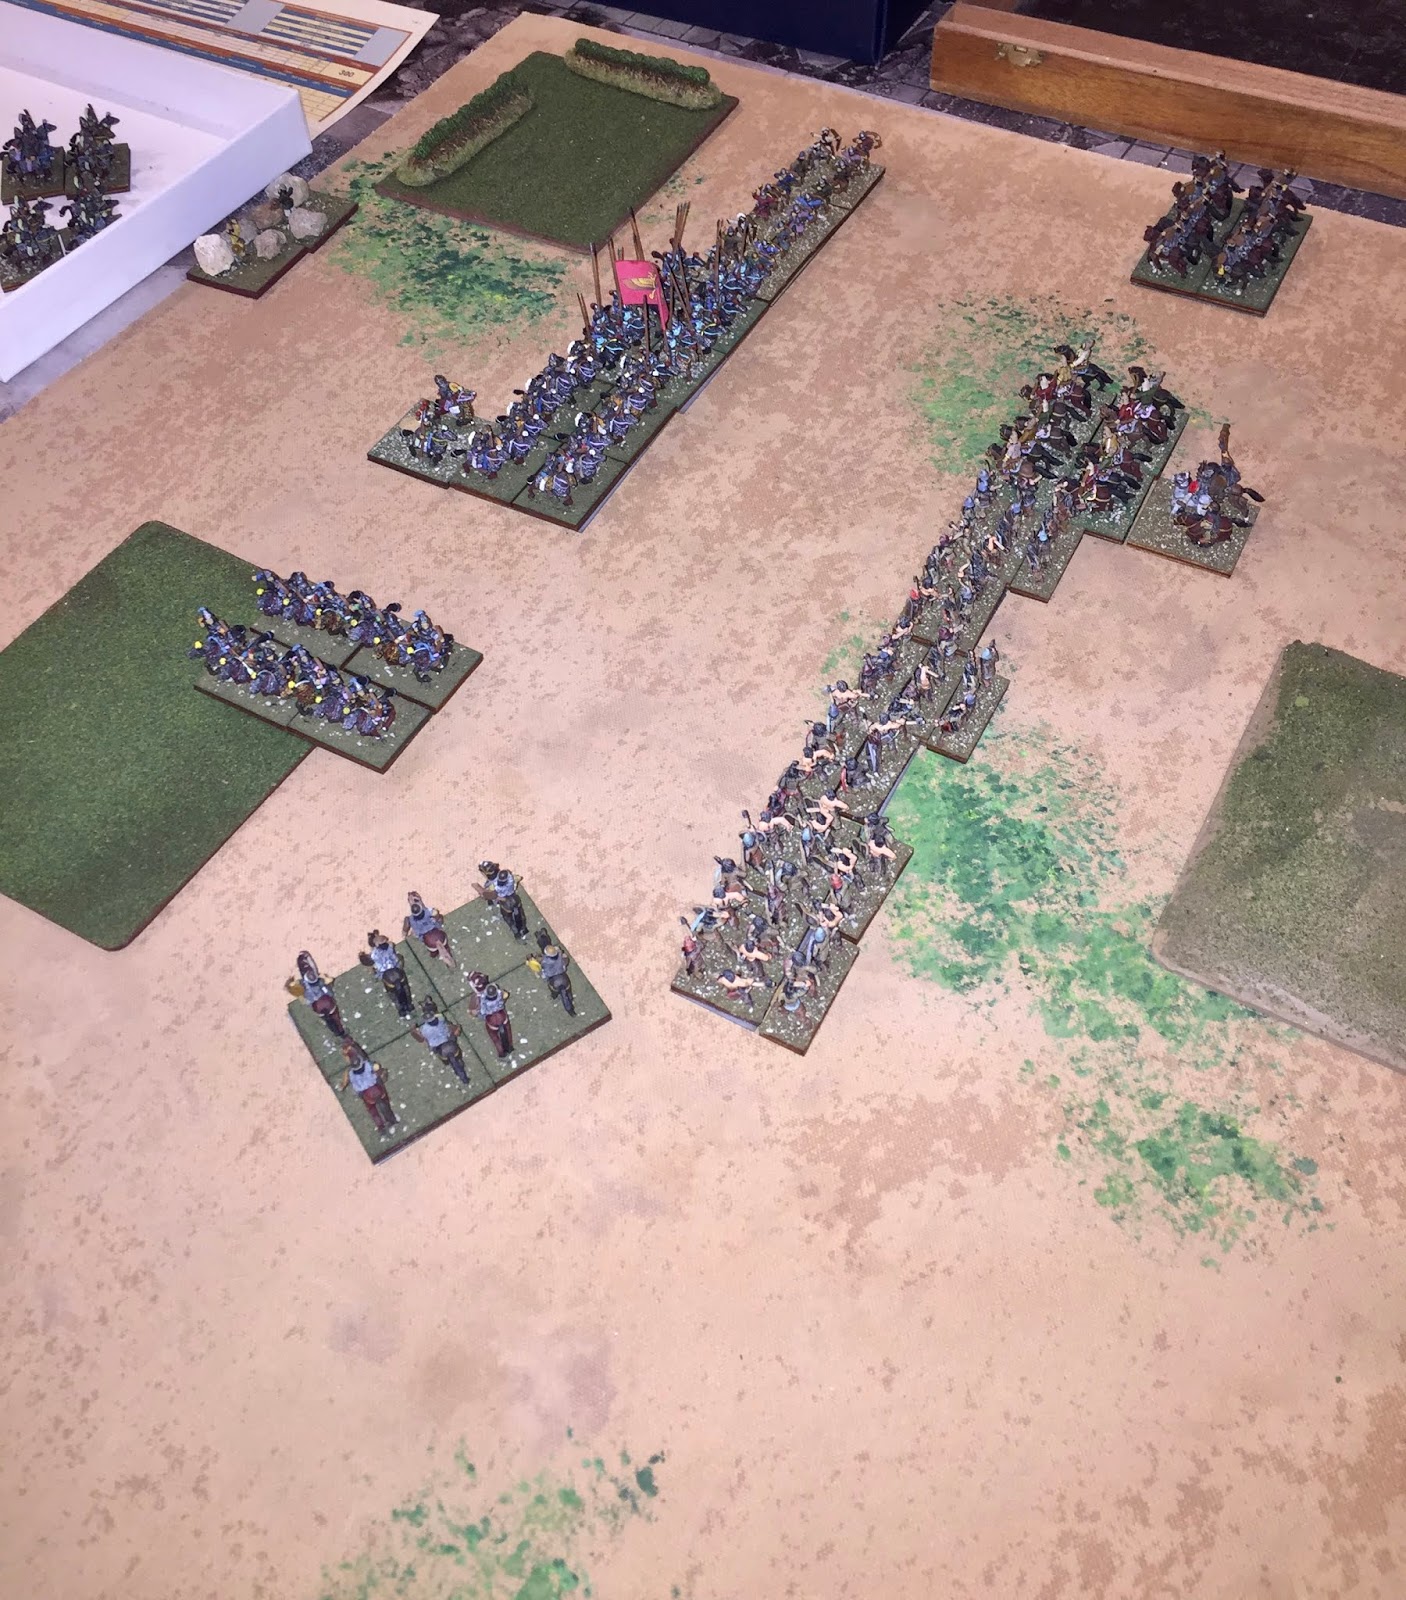
The Sassanid host deployed with the Blue Cavalry to the left followed by the White Cavalry then the Cataphracts and then the 6-pack of Cavalry deployed in the enclosed field (dismounted as Medium Foot, Armoured, Average, Undrilled, Bow, Swordsmen, of course). Vahrez Timr started attached to the Cataphracts with the Sassanid camp behind the junction between the Cataphracts and the White Cavalry.

The Sabir host deployed with the Superior Cavalry on the outside left followed by the Average Cavalry and then the two Foot Warrior battlegroups and then the Light Horse. The Sabir Chieftain started attached to the leftmost of the two foot battlegroups with the fortified camp deployed on the back side of the gentle hill.

The Sassanids moved first and in their first turn the entire host moved 4" forward. In Joint Action, the Sassanid general moved to the Blue Cavalry on the right end of the line.

In the Sabir first turn, the Light Horse moved 6" forward and wheeled 1" on an angle towards the Blue Sassanid Cavalry. The Foot Warrior Battlegroups moved a little over 4" forward stopping just outside of 5" of the Sassanid line. The Average Cavalry moved up next to the foot battlegroups. The Superior Cavalry passed a CMT to turn 90 and wheeled 3" towards their right. In the Joint Action, the Sabir Chieftain moved to the Average Cavalry.

In the Sassanid 2nd Turn, the Blue Cavalry passed a CMT to turn 90 and move 2". The Medium Foot attempted a CMT to move short but failed and remained in place. The other BGs opted to stay put and in Joint Action the Sassanid General moved to the White Cavalry.
In the Sabir 2nd Turn, the Average Cavalry attempted a CMT to expand but failed. The Superior Cavalry wheeled and advanced 5" towards the Sassanid dismounted cavalry. The Light Horse moved to within 3" of the Sassanid Blue Cavalry while the foot battlegroups remained stationary. In the Shooting Phase, the Light Horse managed only 1 hit to no effect while the Sassanid Medium Foot hit the Superior Cavalry 3 times who shrugged it off with no ill effects.

The Sassanid 3rd turn began with no charges. The Blue Cavalry wheeled to face the Sabir Light Horse. The White Cavalry attempted a CMT to expand but failed. The Cataphracts and Medium Foot opted to stay where they were this turn. In the Shooting Phase, the Blue Cavalry and Sabir Light Horse traded meaningless puffs of air. The Medium Foot, however, scored three more hits that the Superior Sabir Cavalry could not shrug off as they dropped to disrupted.

For the Sabir 3rd Turn, the Average Cavalry finally passed a CMT and expanded two bases. The Superior Cavalry moved forward on line with the Average Cavalry. The Light Horse attempted a CMT to fall back 2" facing the Sassanid Blue Cavalry but failed. With the Light Horse in the way, the Foot Warriors opted to sit. In the Shooting Phase, the Sabir Light Horse hit the Blue Sassanid Cavalry twice while taking 2 hits in return. Both passed their subsequent cohesion tests with no ill effects. The Sassanid Medium Foot scored two hits on the Sabir Average Cavalry who dropped to disrupted.

In the Sassanid 4th Turn, the White Cavalry passed a CMT to expand into line. The Blue Cavalry advanced into the face of the Sabir Light Horse. The Medium Foot and Cataphracts opted to stay put. In the Shooting Phase, the Blue Cavalry scored two hits on the Sabir Light Horse who suffered no ill effects. The return fire of the Light Horse had no effects as did the Sassanid Medium Foot shooting on the Sabir Average Cavalry.

To start the Sabir 4th Turn, the Light Horse attempted a CMT to fall back 2" and face the Sassanid Blue Cavalry but failed. Instead, they turned 180 and completed a full move straight away. The Sabir Heavy Foot battle line moved 3" straight ahead. The Average Cavalry passed a CMT to withdraw 2" facing the Sassanids. In the Shooting Phase, the combined fire of the Sassanid Blue and White Cavalry scored 3 hits to the leftmost Foot Warrior BG to no effect. The White Cavalry scored 2 hits to the right-hand Foot Warrior BG to no effect. The Medium Foot scored 2 hits to the Sabir Superior cavalry who passed cohesion. In the Joint Action Phase, the Sabir Chieftain rallied the Superior Cavalry back from disrupted. The Sassanid leader moved to the Cataphracts.

To begin the Sassanid 5th Turn, the Cataphracts charged the Heavy Foot to their front. The Sassanid General opted to lead from the front. In Impact, the Sassanids managed only 1 hit to 2 and subsequently lost a base and disrupted. In the Maneuver Phase and after the Cataphracts had conformed, the Sabir Foot shifted to cover the Cataphract file in overlap. The Blue Cavalry wheeled to be parallel to the other Sabir Foot BG. The White Cavalry rolled a CMT to fall back 2" facing the Sabir forces. The Medium Foot failed a CMT to move short of the Superior Sabir Cavalry and remained in place. In the Shooting Phase, all of the Sassanids appeared to be out of arrows as it was completed ineffectual. In the Melee Phase, the the Cataphracts scored 2 hits to 3 from the Sabir Foot. The Cataphracts managed to survive both the death roll and the cohesion test to end Melee. In the Joint Action Phase, the Cataphracts broke off stopping in front of the White Cavalry. The Hun Chieftain moved to the Average Cavalry and rallied them from disrupted.

To start the Hun 5th Turn, the Superior Cavalry charged the Sassanid Medium Foot in the open while the left most Foot Warrior BG charged the Blue Cavalry. In the Impact Phase, the Hun Superior Cavalry scored 0 hits to 2 and proceeded to lose a base and disrupt. The Sabir Foot Warriors fared better beating the Blue Cavalry 2 to 1. The Blue Cavalry lost a base to hits and then disrupted. In the Maneuver Phase, the Sassanid Medium Foot shifted a file to cover the Superior Sabir overlap. The leftmost Sabir Foot Warriors shifted a file to cover the Blue Cavalry overlap as well. The Sabir Average Cavalry passed a CMT to contract and move less than 3" forward. The Sabir Light Horse, turned 180 and moved next to the left Sabir Foot Warrior but did not have enough movement to make it into overlap. As there was no shooting to be had, into Melee the turn trundled. Melee for the Blue Cavalry went poorly as the Sabir Foot scored 3 hits to 0. The Blue Cavalry survived the death roll but dropped to Fragmented on cohesion. On the other end the field, the Sassanid Medium Foot ripped the Superior Cavalry to their front apart scoring 5 hits to none. The Superior Sabirs proceeded to lose a base and then double dropped to Broken. The neighboring Average Cavalry were not pleased and disrupted. The broken Sabirs moved short but the Medium Foot pursued shorter. In Joint Action, the Superior Sabirs were removed from the table (50% and broken) while the Blue Sassanid Cavalry broke off 4" into the field behind them. The Sassanid Cataphracts rallied back from disrupted.

To begin the Sassanid 6th Turn, the Cataphracts opted not to charge and passed a CMT to hold. In the Maneuver Phase, the Sassanid General moved to the White Cavalry. The White Cavalry passed a CMT to contract and moved to be in line with the Cataphracts. The Blue Cavalry attempted a CMT but failed. The Sassanid Medium Foot also attempted a CMT but failed. In the Shooting Phase, the Sassanid Medium Foot scored 3 hits to 2 from the Average Sabir Cavalry. The Sassanid Medium Foot failed their cohesion test and disrupted while the Average Cavalry passed both their death roll and cohesion test. The White Cavalry's bow fire on the Foot Warriors to their front was to no effect. In the Joint Action Phase, the Sassanid General moved to the Blue Cavalry and rallied them from Fragmented to disrupted. The Sabir Average Cavalry also managed to rally back to fresh.

To start the Hun 6th Turn, the Sabir Average Cavalry with general attached charged the disrupted Sassanid Medium Foot while the Foot Warriors in the center charged to Cataphracts and the White Cavalry. The Average Cavalry won the impact against the Sassanid Medium Foot 2 hits to 1 but the Sassanid Foot survived both the death roll and cohesion test. In the center, the Sabir charge was a disaster. The Sabir Foot scored 2 hits to 1 on the White Cavalry but the Cataphracts scored 5 to 1. After losing a base, the Sabir Foot proceeded to disrupt. The White Sassanid Cavalry passed their death roll but disrupted. In the Maneuver Phase, the Sassanid Medium Foot shifted a file to cover the overlapping Average Cavalry file. The middle Sabir Foot Warriors expanded a file to cover the overlapping file of the White Cavalry. The remaining Sabir Foot Warriors advanced 3" to the edge of the field to face the Blue Sassanid Cavalry as the Sabir Light Horse moved up to be within 3" of the Blue Cavalry for shooting. In the Shooting Phase, the Sabir Light Horse managed no hits. In Melee, the Sassanid White Cavalry and Cataphracts managed 1 hit and 2 hits respectively taking the exact same in return from the Sabir Foot. The Sabir Foot survived the death roll. The Sassanid Medium Foot scored 2 hits to 1 on the Sabir Average Cavalry who survived the death roll and the attempt to kill the general but failed the cohesion test and dropped to disrupted. In the Joint Action Phase, the Sassanid Blue Cavalry rallied from back from disrupted.

The Sassanid 7th Turn dawned with both sides knowing this would be the turn of decision. There were no charges so into Maneuver the turn moved. The Sassanid General moved to the White Cavalry. The Blue Cavalry passed a CMT to expand while stationary. In the Shooting Phase, the Sabir Light Horse scored 1 hit on the Blue Cavalry who passed their cohesion. The Blue Cavalry fire on the Sabir Foot to their front was to no effect. In Melee, the Sabir Average Cavalry managed 0 hits to 3 from the Sassanid Medium Foot, lost a base and dropped to Fragmented. The Sabir Foot Warriors in the center scored 1 hit each against the Sassanid Cataphracts and White Cavalry but took 2 hits from each in return. The following death roll and cohesion tests were not kind as the Foot Warriors lost a base and double dropped to Broken. While the Sabir Average Cavalry survived seeing friends break the army did not as the Sabir Army dropped to 5 attrition points to 0 and broke.
Vahrez Timr, launched his remaining cavalry in hot pursuit of the broken Sabir Hun harrying them northward into the steppes for a brief while. Wary of the cunning Huns, he pulled his forces back just short of nightfall.
This game seemed to take longer as there was quite a bit of movement back and forth. The dismounting of the Sassanid 6-pack was something new and looks promising.


No comments:
Post a Comment
Due to spambots making inappropriate comments, all comments are currently moderated. My apologies for the inconvenience.