
To set the tone, we have Ganesha burning incense to prepare us for the clash between the Kushan Hordes and the loyal Sassanid forces (or perhaps it is an omen of where Hormizd will turn next).
The Sassanid Host - Hormizd made some adjustments to Aspashir's list which is reflected in the inked in changes.


The Kushan list and Horde:


The Sassanids won the initiative and opted for Agricultural. The Kushan took the compulsory open field and an open. The Sassanid opted for a single open field. All terrain fell in the Kushan side of the table. The open would not fit at all and was discarded.
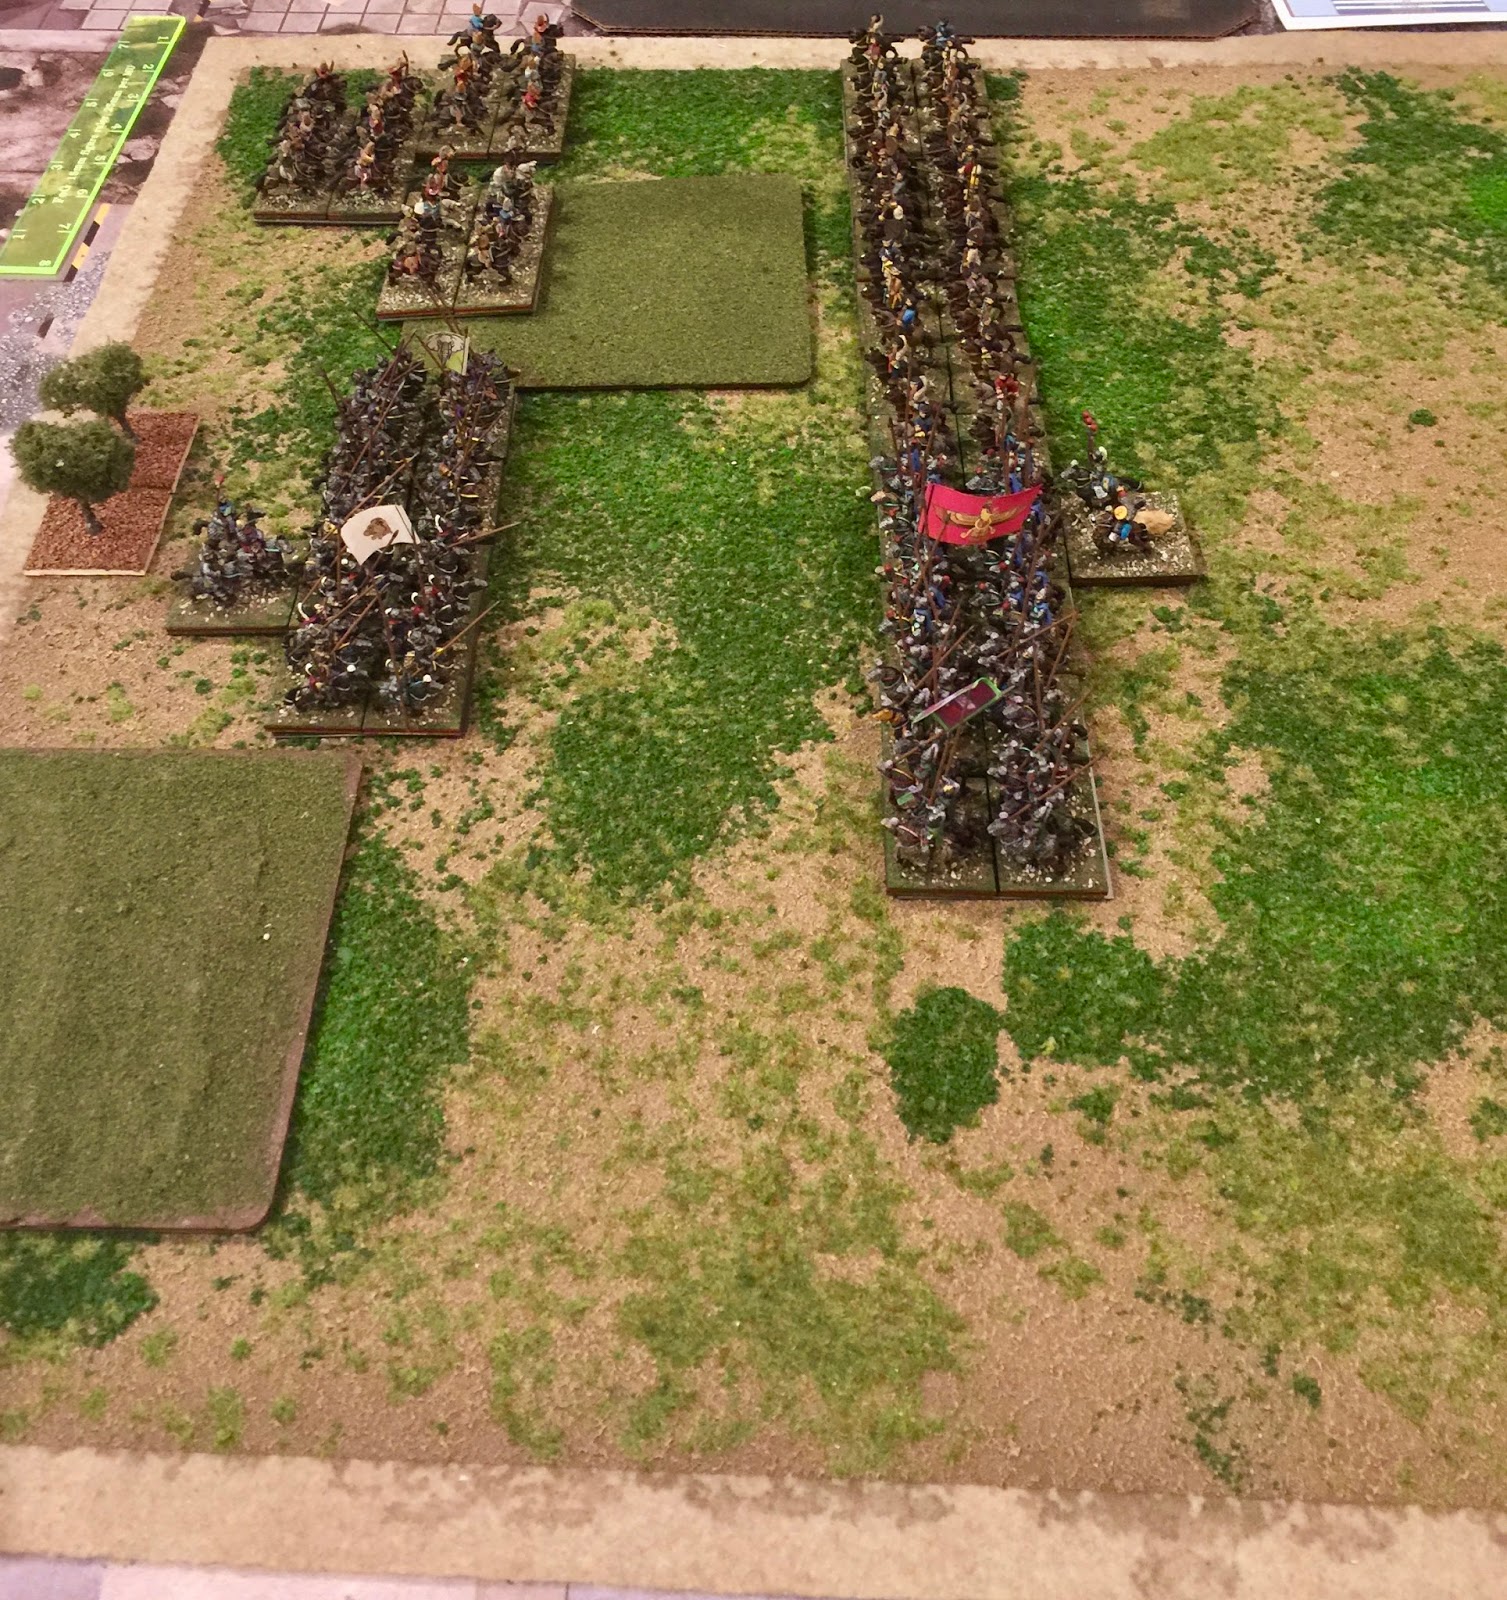
The Kushan horde deployed: the two Kushan cataphracts deployed in the gap between the open fields with the camp behind them, the two Kushan light horse in front of the Kushan cavalry on the right end of the Kushan line.

The Sassanid host arrayed for battle: the two cataphracts deployed on the right end of the Sassanid line (as you look at the picture), the 6 pack of light horse, the Sassanid cavalry, the 4 pack of Sassanid light horse.

The Sassanids rolled to move first and moved straight forward across the line to just outside 5" of the Kushans. There was no shooting so the Sassanid 1st turn ended.


In the Sassanid 2nd turn, the Sassanids successfully held the cataphracts and the cavalry in the impact phase. The Sassanid Cataphracts wheeled forward to line up with the Kushan cataphracts. In the shooting phase, the Kushans managed 1 hit on the Sassanid light horse on the far right end of the line who disrupted. Again, shooting was ineffective along the rest of the line. In the Joint Action Phase, the Kushan general relocated to the green Kushan Cataphracts.

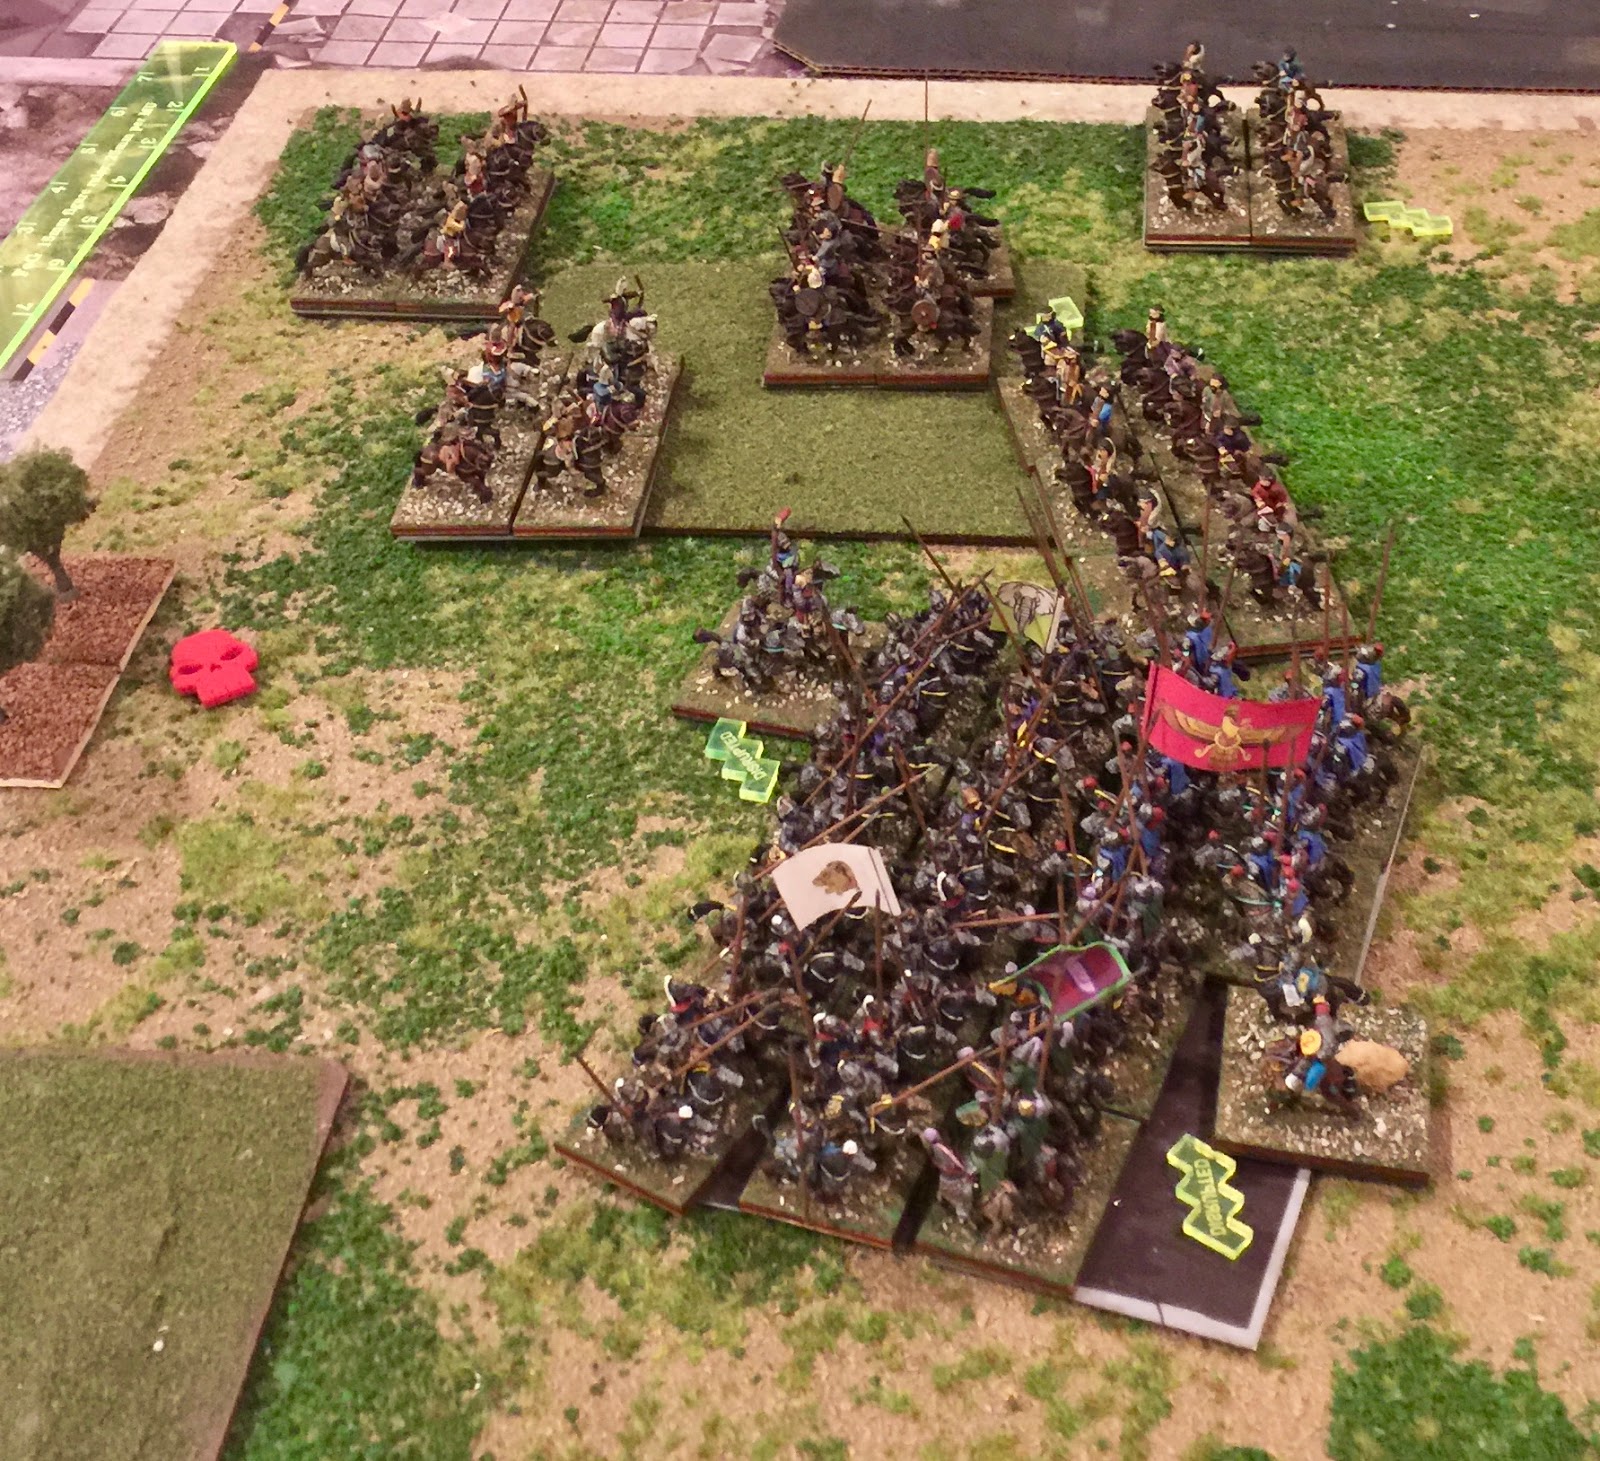
To start the Kushan 2nd turn, both Kushan Cataphracts charge. The center Sassanid light horse evaded 5" back. The center Kushan light horse wanted to charge but upon looking, it was pinned by the Sassanid cavalry in the middle and did not want to charge into it in the open. The Kushan Green Cataphracts scored 1 hit and took 2 in return from the Sassanid Red Cataphracts. The Kushan White Cataphracts scored 4 hits and took 2 in return from the Sassanid Purple Cataphracts. The Kushan Green Cataphracts passed both their death roll and cohesion test as did the Sassanid Purple Cataphracts. In the shooting phase, the Sassanid far right light horse took 2 hits but passed cohesion. The firing on the Sassanid cavalry was ineffective. The Kushan left flank light horse took 2 hits but passed its cohesion test. In the melee phase, the Kushan White Cataphracts scored 2 hits on the Sassanid Purple Cataphracts while taking 1 in return. The Kushan Green Cataphracts scored 2 hits on the Sassanid Red Cataphracts but took 4 in return. The Kushan Green Cataphracts survived both the death roll and cohesion test but the Sassanid Purple Cataphracts were not so lucky loosing 1 base and disrupting. There was nothing happening in joint action so the turn ended.

For the Sassanid 3rd turn, the Sassanid cavalry in the center failed a CMT not to charge and proceeded to go 4" into the open field. The Kushan center light horse opted not to stand and evaded 7" to its rear. In the maneuver phase, the Sassanid center light horse turned around and moved up onto the flank of the Kushan Green cataphracts. In the shooting phase, the Kushan cavalry was unable to score enough hits on the Sassanid cavalry in the center while the Sassanid right flank light horse scored enough hits to fragment the Kushan light horse opposite of them. In melee, the Kushan White Cataphracts scored 2 hits to 1 from the Sassanid Purple Cataphracts who lost another base and fragmented on their Cohesion test. The Kushan Green Cataphracts scored 3 hits to 1 from the Sassanid Red Cataphracts who passed both their death roll and their cohesion test. Their was no action in the Joint Action Phase so the Sassanid 3rd turn ended.

As their were no charges to be had to start the Kushan 3rd turn, the Kushans moved their middle light horse to in front of the Sassanid cavalry. In the shooting phase, the Kushan left flank light horse took 2 hits from the Sassanid light horse to its front and gave 1 in return. The Kushan light horse broke on its cohesion test and routed back towards its baseline. The Kushan cavalry and middle light horse scored 3 hits on the Sassanid cavalry in the field who passed its death roll but disrupted. In melee, the Kushan White Cataphracts scored 1 hit and took 1 in return from the Sassanid Purple Cataphracts for a draw. The Kushan Green Cataphracts scored 2 hits but suffered 4 in return from the Sassanid Red Cataphracts. The Greens subsequently passed their death roll but disrupted on the cohesion test. In Joint Action, the Sassanid leader moved to the Purple Cataphracts and rallied them back to disrupted. The broken Kushan light horse routed off the table.
To begin the Sassanid 4th turn, the Sassanid cavalry in the field failed its CMT and charged into the Kushan light horse who opted to stand. The Kushan cavalry intercepted so it would fight in the melee. The Sassanid center light horse charged into the flank of the Green Kushan Cataphracts. In the impact, the Kushan cavalry scored 1 hit to the Sassanid cavalry as did the Kushan light horse. The Sassanid cavalry scored 2 hits to the Kushan cavalry and 1 to the Kushan light horse. The Kushan cavalry subsequently lost 1 base and disrupted. The Sassanid light horse in the center scored 2 hits to 1 against the Kushan Green Cataphracts who lost 1 base and dropped to fragmented. In the maneuver phase the right flank Sassanid light horse attempted a CMT to form column but failed and opted to remain in place. As there was no shooting, melee ensued. The Sassanid cavalry scored 1 hit on the Kushan cavalry and 0 on the Kushan light horse but took 2 and 0 respectively. They passed the subsequent death roll and cohesion test. In the center, the Sassanid light horse scored 0 hits on the Green Kushan Cataphracts who managed 0 in return. However, the Red Sassanid Cataphracts scored 2 hits to none on the Green Kushan Cataphracts who passed their death roll but broke on the cohesion test. The Kushan White Cataphracts and the Sassanid Purple Cataphracts both managed 2 hits. The Kushan White Cataphracts disrupted for seeing a friend break. The Sassanid center light horse pursued the Green Kushan Cataphracts but failed to kill the general. The Sassanid Red Cataphracts moved as far forward as possible but were blocked by the Sassanid light horse. The Kushan host broke at this point.
Unfortunately, no picture survived of the final turn.
However, compensation, I offer up the following: the Shahbanu of teh house, She Who Must Be Obeyed herself, presented this nice meerschaum box to me for our 14th Wedding Anniversary this week.


No comments:
Post a Comment
Due to spambots making inappropriate comments, all comments are currently moderated. My apologies for the inconvenience.