 |
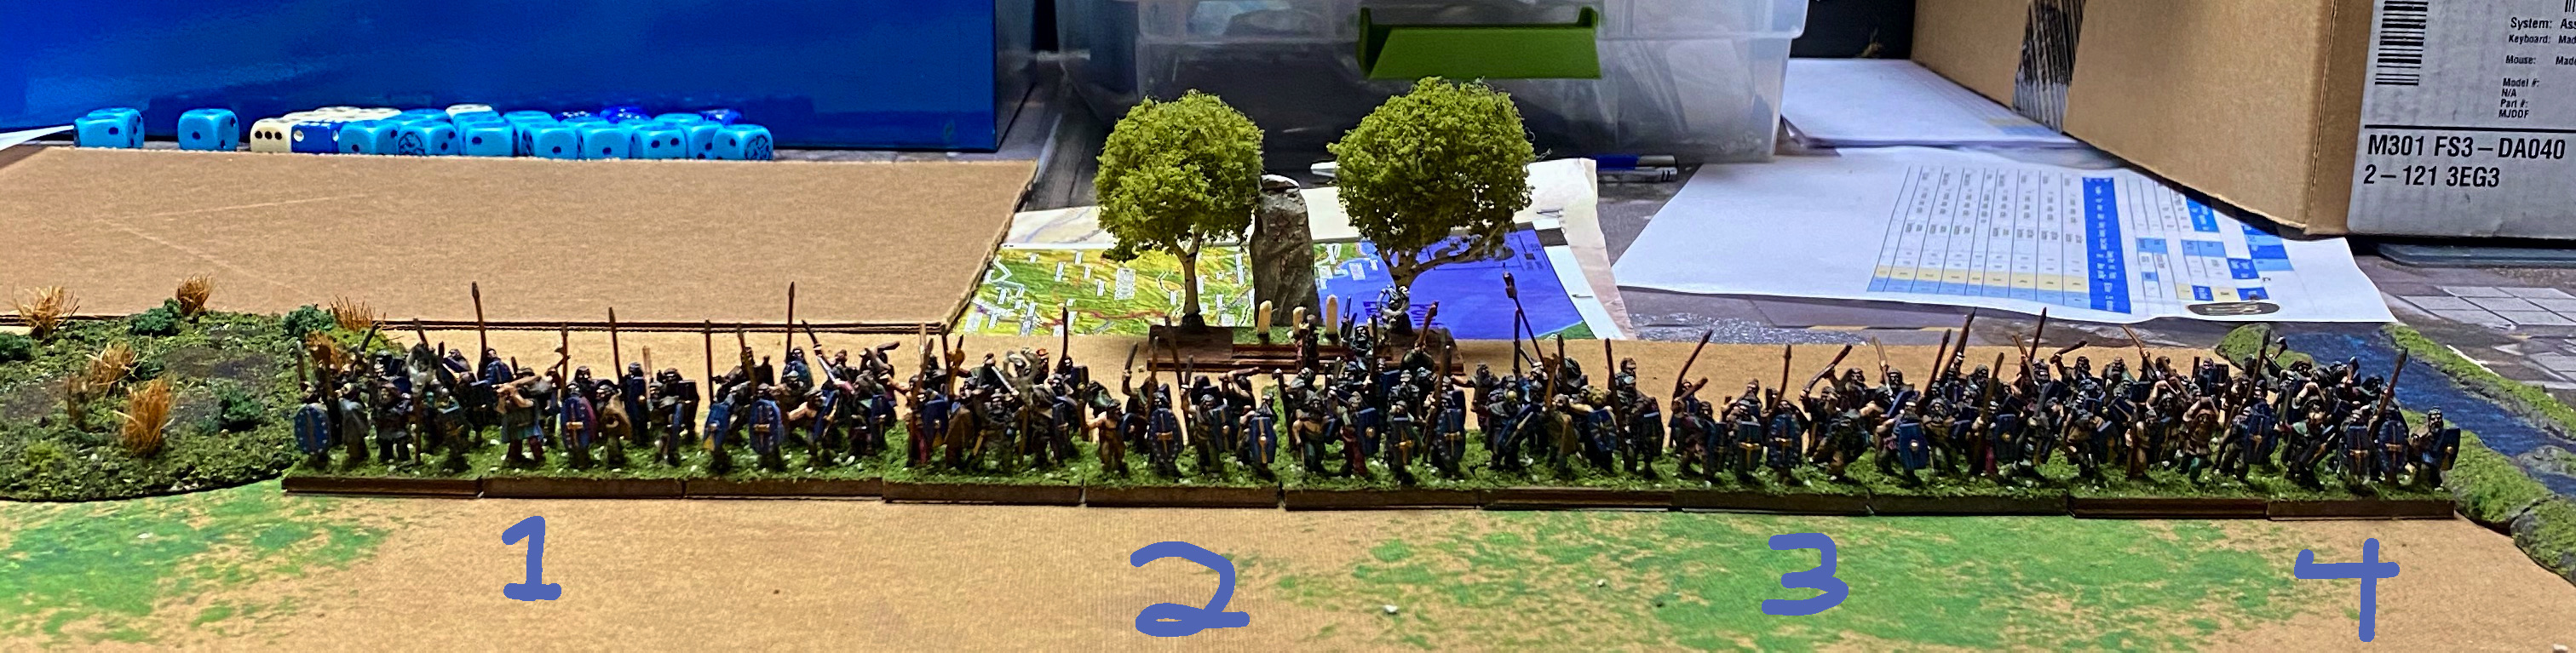
Sugambri List
|
 |
The Sugambri horde - Almost all of the figures are Forged in Battle with a few Essex thrown in. There might even be one or two OG15 Early Germans. Most of the figures were painted by Mark Kernan of the One Tree Painting Service. Although I painted a handful to fill out the ranks. The camp is a work in progress. Trees are from Hobby Lobby and the stone is from a Stonehenge kit I found on eBay years ago. The numbers correspond to the army list.
|
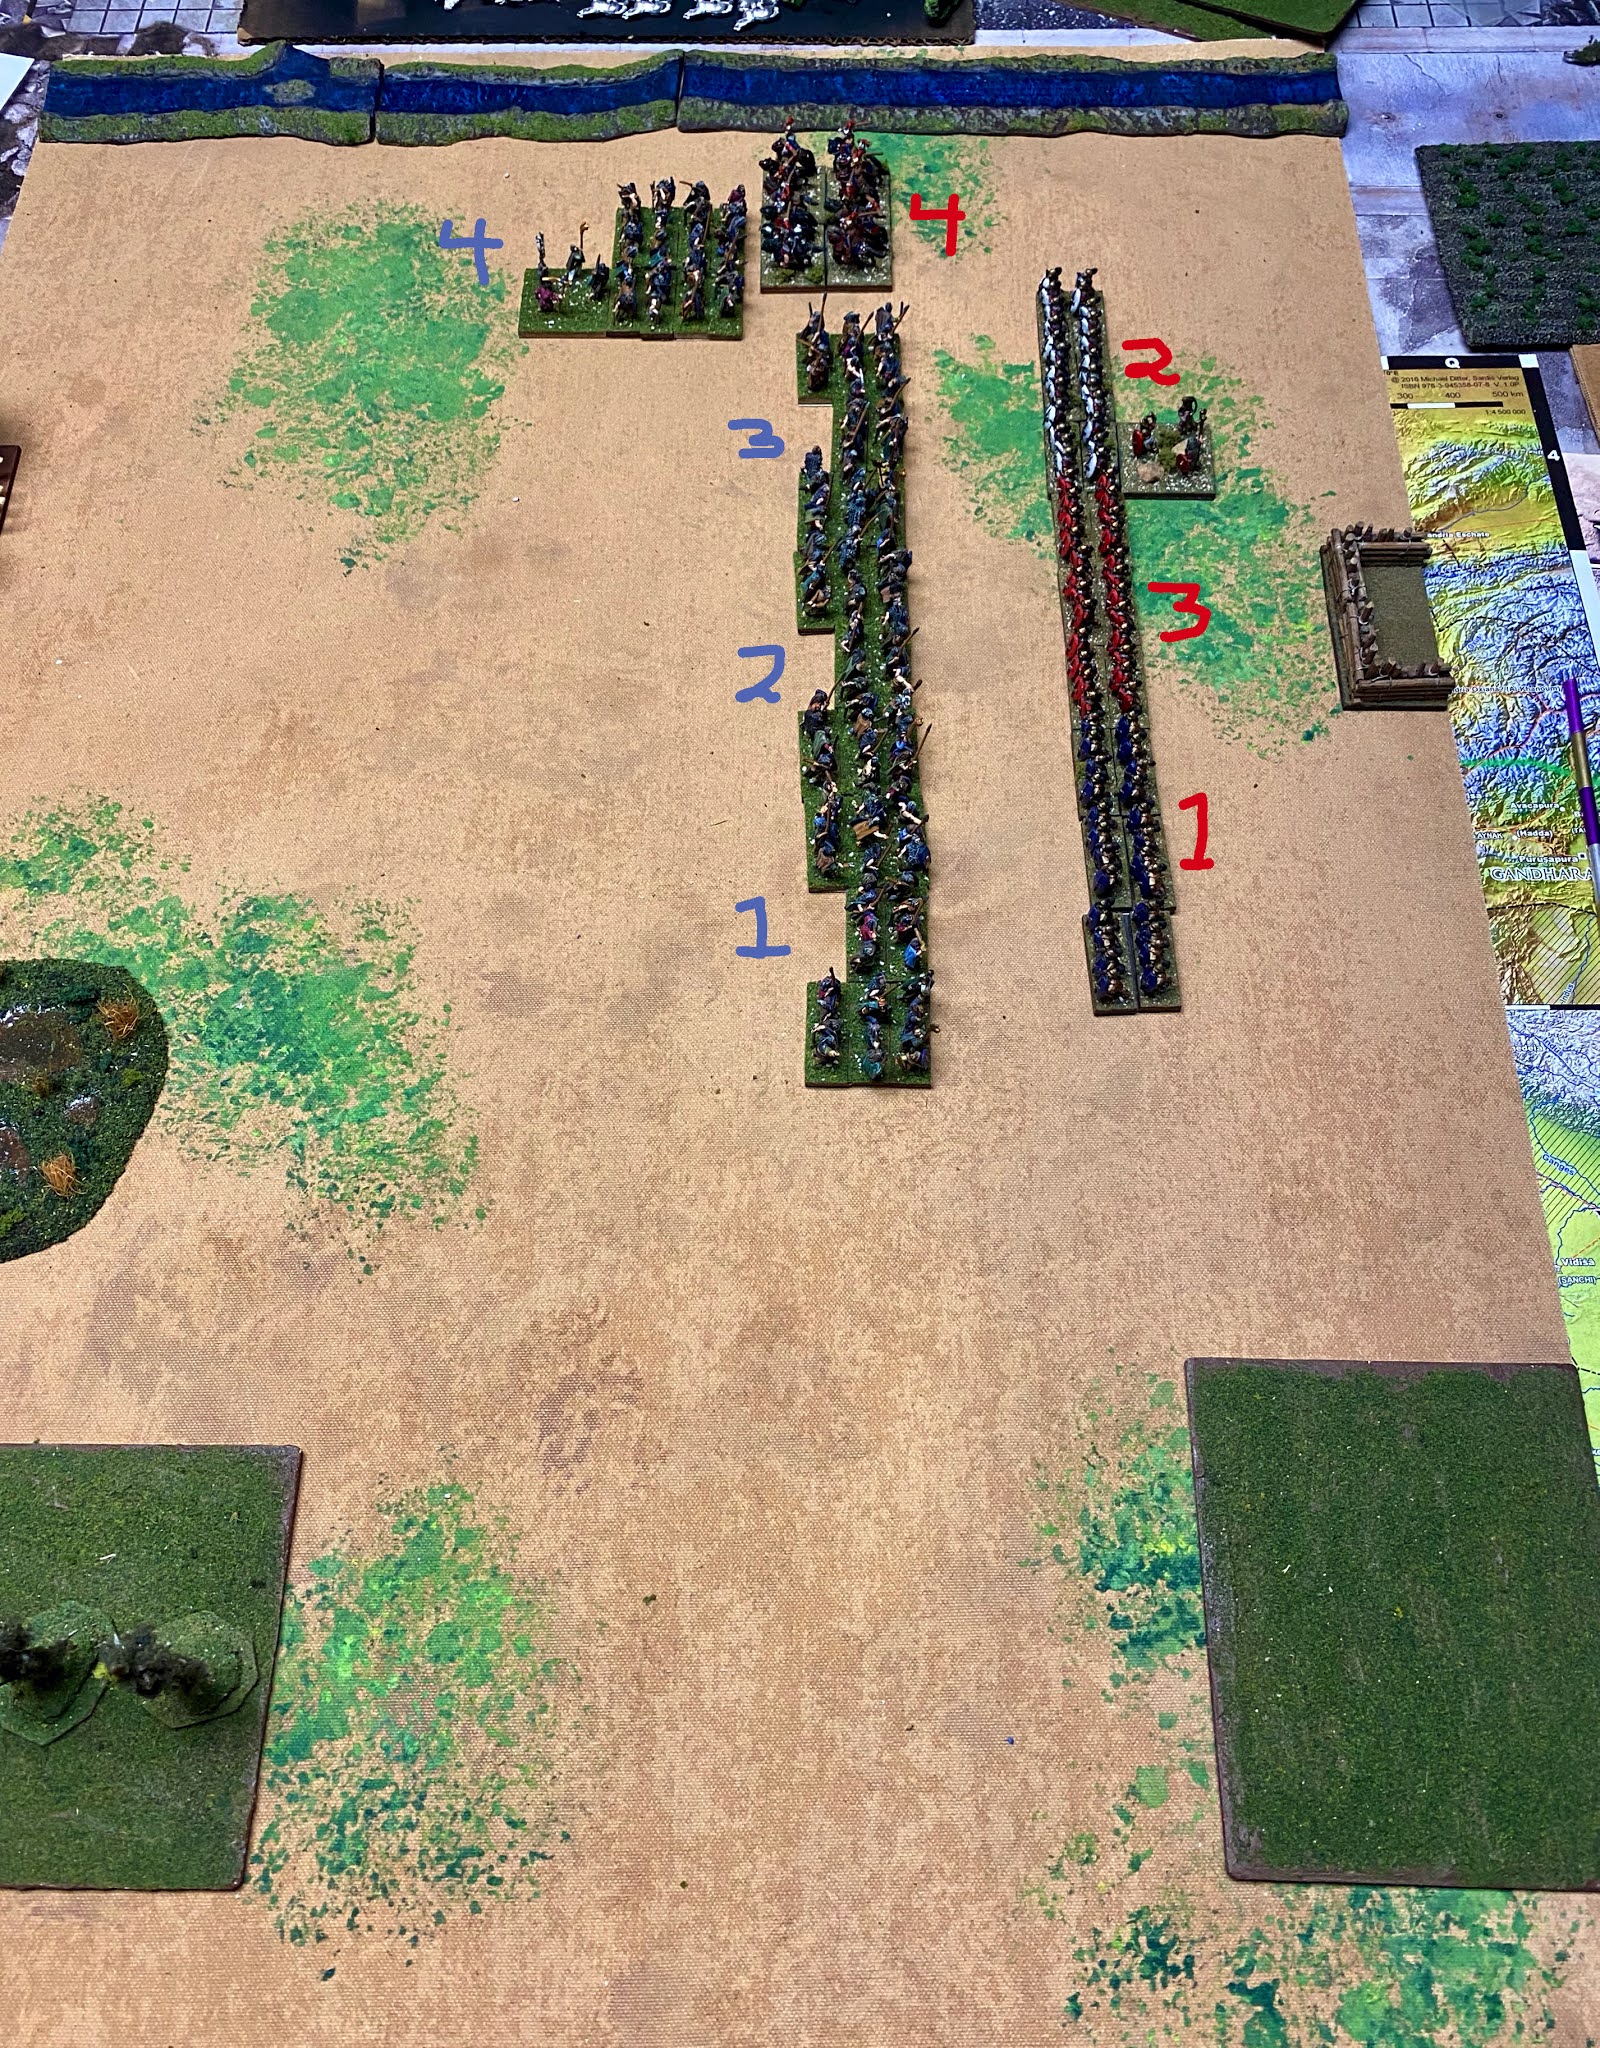
The Germans won the initiative and opted for Woodlands. The Romans took the compulsory brush and a marsh. The Germans took a river as required in the campaign scenario and a forest. The river was placed on the top edge of the table and ended up being difficult. The marsh and the forest fell on the German side of the table and the brush fell on the Roman board edge.
 |
| After deployment with the Germans on the left and Romans on the right. The Roman superiors (BG 3) were deployed in front of the camp. The Romans leader deployed with BG 2. The German select warriors were deployed by the river in a two stand wide column (BG 4). The German leader deployed with BG 2. |
 |
| A frontal view of the German line. |
 |
A frontal view of the Roman line.
|
The Germans moved first and opted to move straight ahead. At the end of their first 4" move, they shift one base towards the bottom of the table. The second move stopped 1/4" short of 4" ending up 5 1/4" from the Roman line.
 |
After the German 1st turn.
|
In the Romand 1st turn, the Roman legions opted to remain stationary. The Roman cavalry (BG 4) moved 5" forward to get in the face of the German Superior Warriors (BG 4). In the Joint Action Phase, the German leader moved to BG 4.
 |
After the Roman 1st turn.
|
In the German 2nd turn, the German BG 4 (the superiors) attempted to expand in place but failed their CMT. The other three German BGs moved 3" straight forward.
 |
After the German 2nd turn.
|
In the Roman 2nd turn, the Romans opted to hold the legions and not charge. Unfortunately, only the veteran BG 3 passed their CMT. Roman BGs 1 and 2 stormed forward in to the waiting German warbands. In the Impact, Roman BG 1 made contact with German BGs 1 and 2 scoring 3 and 1 hit respectively. The Germans managed 4 hits with BG 1 and 0 with BG 2. The Roman BG 1 survived its death roll as did both German BGs. German BG 2, however, failed its cohesion test and dropped to disrupted. At the other end of the line, the Roman leader decided to lead the charge. Roman BG 2 scored 4 hits to German BG 3 but took 6 in return. The Roman leader survived the carnage but both the Romans and the German BGs took a base loss from hits. The Romans also passed their cohesion test. In the Maneuver Phase, the Roman BG 3 double wheeled to move into the gap between Roman BGs 1 and 2. In the Melee Phase, Roman BG 1 scored 3 hits on German BG 1 and 0 on German BG 2. The Germans returned 1 and 2 respectively. Roman BG 1 survived his death roll but German BG 1 lost a base and then double dropped on cohesion. Roman BG 2 scored 3 hits to German BG 3's 2. The Roman leader survived another round of combat and the German BG survived its death roll. German BG 3 failed its cohesion test and dropped to disrupted.
 |
After the Roman 2nd turn.
|
In the German 3rd turn, the German Superior warband (BG 4) charged the Roman cavalry. The German leader decided to lead from the front. The German superiors scored 2 hits to the Roman cavalry's 1. The Romans served the death roll and passed their cohesion test. In the Maneuver phase, the German Superior BG expand a file towards the river. In the Melee Phase, the German BG 1 scored 0 hits to Roman BG 1 and took 4 in return. German BG 2 scored 1 hit and took 0 from Roman BG 1. German BG 1 managed to avoid losing a base to the hits but broke on its cohesion test. German BG 1 routed 4". German BG 2 just shrugged its shoulders as its friend routed away and kept swinging at the Romans. German BG 3 scored 1 hit to 0 vs Roman BG 2 who survived its death roll and passed its cohesion test. The German BG 4 (the superiors) scored 5 hits on the Roman cavalry (BG 4) who managed only 1 in return. The Roman cavalry lost a base to hits but survived its cohesion test. In Joint Action, German BG 1 routed another 3" and the Roman cavalry broke off 1 1/2" to end in front of Roman BG 2.
 |
| After German 3rd turn. |
In the Roman 3rd turn, Roman BG 3 held on a CMT. In the Maneuver Phase, Roman BG 1 expanded a file to cover another file of German BG 2 in the center. German BG 2 expanded to cover an existing overlap of Roman BG 1. In the Melee Phase, Roman BG 1 scored 5 hits to 2 against German BG 2 who lost a base and then fragmented on cohesion test. Roman BG 4 scored 4 hits to 1 against German BG 3 survived its death roll and passed its cohesion. In the Joint Action Phase, the German leader moved to German BG 3 and successfully bolstered the BG removing the disruption. Broken German BG 1 started wheeling to get passed the marsh.
 |
After the Roman 3rd turn.
|
In the German 4th turn, the German BG 4 charged the Roman cavalry (BG 4). In the Impact, the Germans scored 5 hits to 3. The German BG survived its death roll as did the Roman cavalry. The Roman cavalry did not pass its cohesion test and disrupted. In the Melee Phase, the German BG 4 (the superiors) scored 1 hit as did the Roman BG 4 (the cavalry) for a wash. German BG 3 scored 2 hits to Roman BG 2 but took 3 in return. The Roman leader survived the melee. German BG 3 rolled off the hits and passed its cohesion test. German BG 2 scored 2 hits to Roman BG 1 but took 4 in return. German BG 2 survived the death roll but failed its cohesion test dropping to broken. German BG 3 cared not for the routing BG 2 and passed its cohesion test. At the end of Melee, the German force was 4 attrition points down breaking the army.
 |
End Game
|
The Germans had some opportunities in impact and melee winning in a few places that could have changed the outcome if the Roman dice had not been so hot. Still playing around the campaign scenario so I suspect a similar battle will come appear on the blog in the future.


No comments:
Post a Comment
Due to spambots making inappropriate comments, all comments are currently moderated. My apologies for the inconvenience.