Monday, April 27, 2020

Isolation Week #? Update

Broken Rays of the Sun Campaign updates have slowed down as I need to add some reinforcements to the arsenal.  Having said that, the 5th edition of the Babylonian Sun Times is almost done and once these reinforcements are complete another battle will be in the offing.

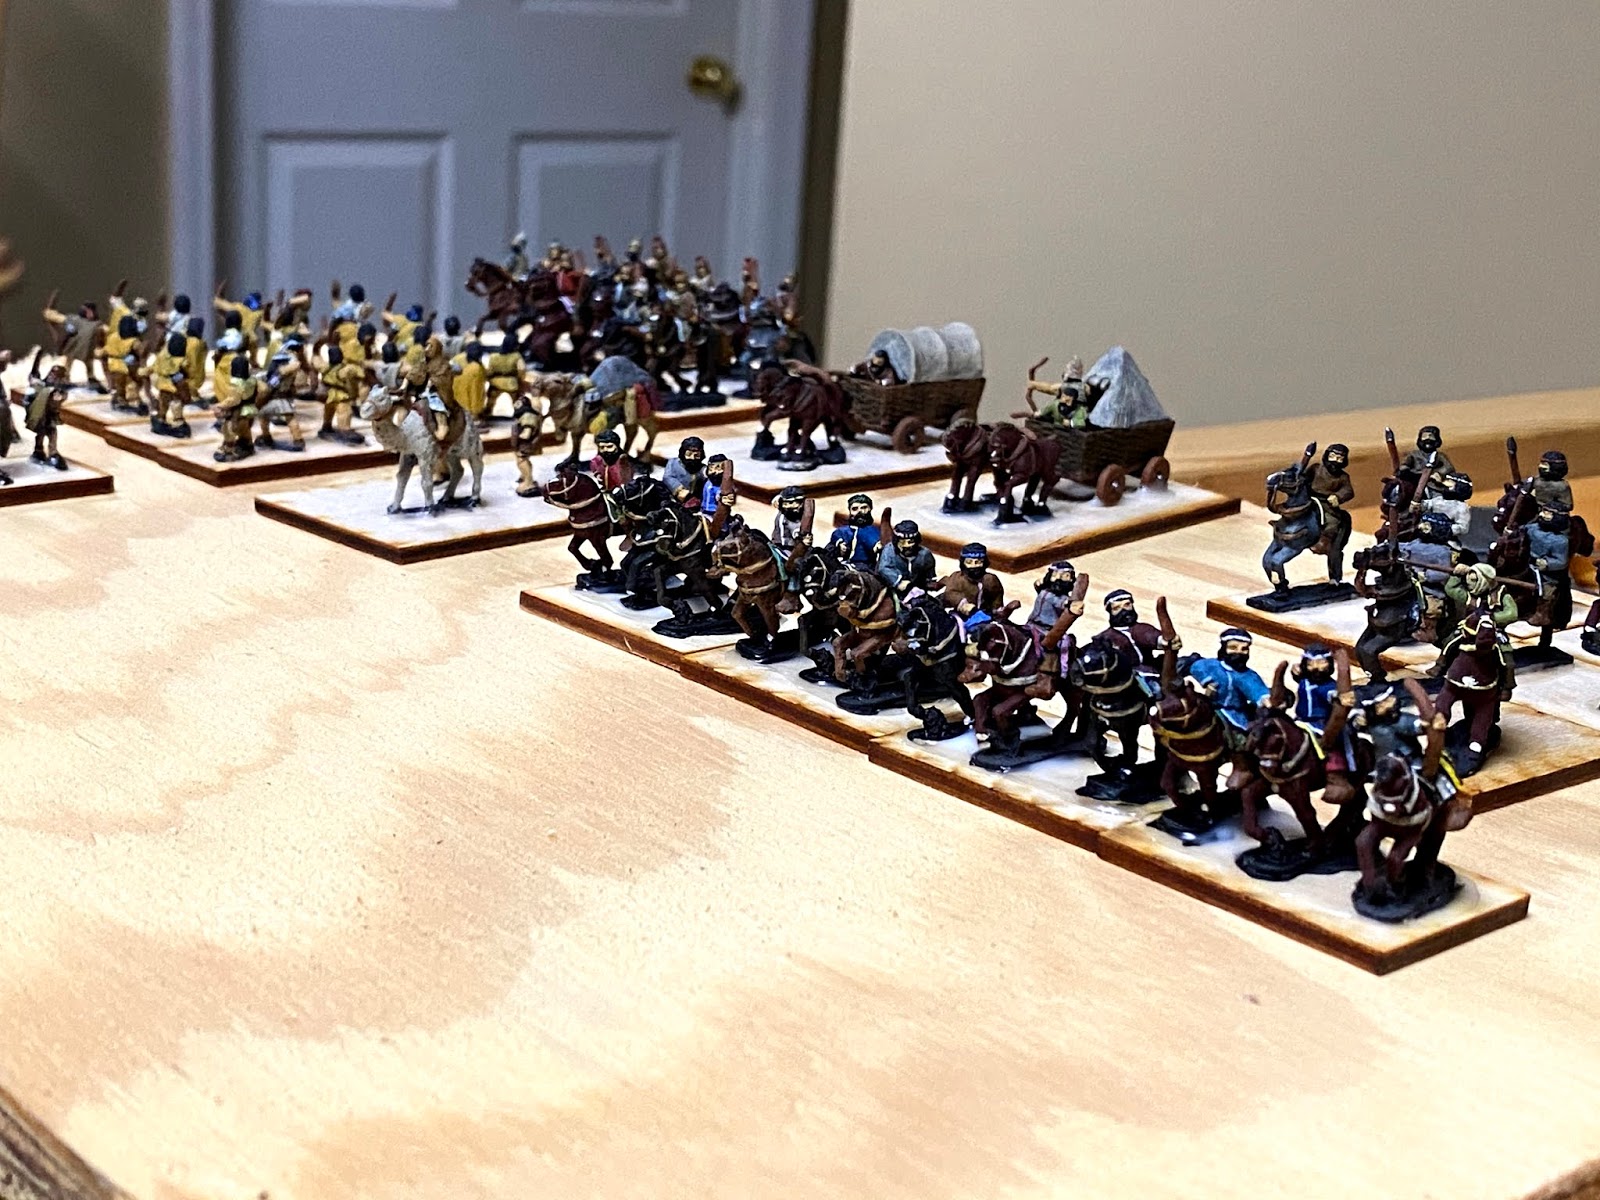
Any kind of campaign with the Parthians is going to need lots of horse archers.  This week I finished up two more BGs:  a Scythian cavalry group of four stands and a Parthian/Persian cavalry group of four stands.  I have had sixteen stands of Pre-Islamic Bedouin/Arab foot archers for my Hatrans, a Hatran camel camp, two Steppe Nomad wagons, a six-stand group of Mountain Indian light horse and a Mountain Indian general also waiting around for me to flock so today's goal was to get their bases painted and ready.

Skythian cavalry (Old Glory) to the left and the two battlegroups of Hatran foot archers (mainly Forged in Battle with a few OG and 1 Corvus Belli Numidian) in the foreground.  
Here is another view from the other side.  In the front are the Parthian Horse Archers (Old Glory) with the Mountain Indians (Old Glory Hippakantistai) behind them. To the left of the Parthian Horse Archers are three 40mm x 80mm camps:  one is a Hatran Camel Caravan (mix of Essex, Forged in Battle, Gladiator) and two Forged in Battle Steppe Wagons.
The bases have been painted a base color of brown.

Tomorrow, I will apply the flocking to give them a burnt grass look.

Note:  Almost all of the figures pictured have been painted by yours truly.  About 16 or 17 of the Arab Archers were painted by Thomas Demers of Mad Monkey Painting in Mississippi and I added some additional figures to get enough for 16 total stands (48 figures).

Friday, April 24, 2020

FOG 300: Battle of Ecbatana Spring 220 AD

Special Report of the Babylonian Sun Times by correspondent Máikl KéliZ.


The Battle of Ecbatana:

Brother Against Brother


Desperate times call for desperate measures and on this late Spring day the situation appeared very desperate to Artabanus IV, one of two brothers claiming the crown of Parthia.  His brother Vologases was on an almost unbroken streak of success as city and tribe fell sway to his influence while Artabanus had suffered rebuff after rebuff.  Gathering his forces, Artabanus organized two expeditions into the lands of his brother.  One force moved against the trade center of Hatra and another against the great city of Ecbatana.  Artabanus decided to lead the force against Ecbatana himself and as events would should show, it may not have been well advised.  Not wishing to give up Ecbatana and his access to the Iranian plateau, Vologases led his forces out onto the plain to oppose his brother.

Army of Artabanus:  List and Host


BG 1 - Bow Cavalry
BG 2 - Bow Cavalry
BG 3 - Purple Cataphracts
BG 4 - Red Cataphracts
LH BG

Army of Vologases:  List and Host:

BG 1 - Light Horse
BG 2 - Bw* Lance Cavalry
BG 3 - Light Horse
BG 4 - Green Cataphracts
BG 5 - White Cataphracts
 Vologases wins the initiative and opts for Steppe.  Artabanus takes the compulsory open, a broken and the 2nd open.  Vologases takes the gentle hill but it is picked up.

Artabanus' forces deployed (left to right - red numbers and letters):  Light Horse BG, Cavalry BG 1, Cataphract BG 4, Cataphract BG 3, Cavalry BG 2, Artabanus is with BG 4
Vologases' forces deployed (left to right - orange numbers):  Light Horse BG 3, Cataphract BG 5, Cataphract BG 4, Cavalry BG 2, Light Horse BG 1, Vologases is with BG 4
Artabanus moves first and sends the Red Light Horse BG ahead 7".  Red Cavalry BG 1 moves 5" straight ahead.  The cataphracts moves as a group 8" straight forward.  Red Cavalry BG 2 moves 5" straight ahead and shifts one base away from the cataphracts.  There is no shooting in this turn.  In joint action, Vologases moves to Orange Cavalry BG 2 ending the 1st turn of Artabanus.

After Artabanus' 1st turn.  The single piece of terrain (a broken) is at the bottom right of the field
In Vologases' 1st turn, Orange BGs 1 & 2 move 3.75" straight ahead stopping just outside of 4" from Artabanus' Red Cavalry BG 1.  Orange cataphract BGs 4 & 5 move 4" straight ahead.  Orange Light Horse BG 3 moves 7" straight forward.  In the shooting phase, Vologases Orange BGs 1 & 2 manage three total hits on Artabanus' Light Horse BG who shrug it off with no ill effects.  At the other end of the line, Vologases Light Horse BG 3 scores two hits on Artabanus' Cavalry BG 2 who score two in return.  Both BGs drop to disrupted on cohesion.  In the joint action phase, Artabanus moves to Red cataphract BG 3 whole Vologases moves to his own cataphract BG 4 to end the joint action.

After Vologases' 1st turn.  Red are Artabanus' BGs and Orange are Vologases' BGs.
To begin Artabanus' 2nd turn, he opts not to launch his cataphracts just yet and rolls CMTs to hold them.  In the maneuver phase, Red Cavalry BG 1 moves to be even with the Red Light Horse BG.  No other movement is made.  In the shooting phase, the Red Light Horse BG split its fire and scores two hits on Orange Light Horse BG 1 and one on Orange Cavalry BG 2.  The Red Cavalry BG 1 scores three hits on Orange Cavalry BG 2.  Orange Light Horse BG 1only scores one hit in return to the Red Light Horse and Orange Cavalry BG 2 scores one on Red Cavalry BG 1.  Orange Light Horse BG 1 survives the cohesion test.  Orange Cavalry BG 2 survives his death roll but drops to disrupted on cohesion.  On the other end of the table, Red Cavalry BG 2 scores one hit on the Orange Light Horse BG 3 and takes two in return.  Red Cavalry BG 2 fails its cohesion test and drops to fragmented.  In the joint action phase, Vologases moves to his disrupted light horse and attempts to rally the unit but fails.  Artabanus holds with Red cataphract BG 4 ending his 2nd turn.

After Artabanus' 2nd turn
To begin Vologases 2nd turn, Orange Cavalry BG 2 and Light Horse BG 1 declare charges.  The disrupted Orange Light Horse BG 2 also declares a charge against the fragmented cavalry to its front.  Both of Vologases cataphract BGs opt not to charge and successfully pass a CMT to hold.  Orange Cavalry BG 2 fails its CMT and refuses to charge.  Orange Light Horse BG 3 passes its CMT and charges. The fragmented Red Cavalry BG passes its cohesion test and stands.  The Red Light Horse BG opts to stand against the charging light cavalry.  In the impact phase, the fragmented Red Cavalry BG 2  score a single hit.  The Orange Light Horse BG 3 fails to hit.  It passes its death roll but fragments on cohesion.  Orange Light Horse BG 1 scores three hits on the Red Light Horse BG and takes three in return.  The Orange Light Horse loses a base on the death roll while the Red Light Horse emerges unscathed.  In the maneuver phase, Vologases moves to Orange cataphract BG 5. In the shooting phase, no one can hit enough to matter.  In the melee phase, Orange Light Horse BG 1 scores two hits and takes two in return for a draw.  Orange Light Horse BG 3 fails to hit the fragmented Red Cavalry BG 2 but takes one in return.  The Orange Light Horse BG 3 survives its death roll but breaks on cohesion and flees 8".  Red Cavalry BG 2 pursues 3".  In joint action,  Artabanus moves to the fragmented Red Cavalry BG 2 and attempts a rally but fails.  Vologases moves to Orange Cavalry BG 2 and attempts a rally and also fails.  The broken Orange Light Horse routes off the table.

After Vologases 2nd turn.  The black marked by Vologases' camp is the 1 attrition point lost for the broken light horse BG.
To begin Artabanus' 3rd turn, both Red cataphracts opt to try and hold and not charge.  Red cataphract BG 4 holds but Red cataphract BG 3 charges straight ahead.  In impact, Red cataphract BG 3 scores three hits and Orange cataphract BG 4 scores two.  The Orange cataphracts lose a base to the death roll and then disrupts on cohesion.  In the maneuver phase, the Red Cavalry BG 2 moves 2" forward and then wheels 2" towards the Orange cataphract BG 5.  In the shooting phase, Red Cavalry BG 2 makes no hits on Orange cataphract BG 5 while Red Cavalry BG 1 scores two hits on Orange Cavalry 2 who score one in return.  Orange Cavalry BG 1 fragments on its cohesion test.  In melee, the Red Light Horse BG score six hits on Orange Light Horse BG 1 and take one in return.  The Orange Light Horse automatically lose a base to hits and autobreak.  Orange Light Horse BG 1 flees 7" while the Red Light Horse BG pursues 8" and opts to charge into the fragmented Orange Cavalry BG 2.  The Orange Cavalry BG 2 passes its cohesion test and stands.  In the center, Red Cataphracts 3 scores two hits to Orange cataphract BG 4 but takes two from the Orange cataphract BG 4 and two more from the overlapping Orange cataphract BG 5.  Red cataphract BG 3 loses a base on the death roll and then drops to disrupted.  In the joint action phase, Vologases attempts to rally Orange Cavalry BG 2 but fails.  Artabanus successfully rallies Red Cavalry BG 2 back to disrupted.  The broken Orange Light horse flees off the table ending the turn.

At the end of Artabanus 3rd turn.  The two black markers in front of Vologases' camp represent the two attrition points for the two broken light horse BGs.  He is one attrition point away from breaking. 

To begin Vologases 3rd turn, the Orange cataphract BG 5 opts to try and hold to finish off the Red cataphract BG 3 but fails its CMT not to charge.  Red Cavalry BG 2 intercepts and strikes the rear stand of Orange cataphract BG 5 canceling its charge and dropping it to disrupted.  Artabanus, smelling victory, jumps into the frey and leads the Red Cavalry from the front.  In the impact, the Red Cavalry BG 2 scores only one hit while the cataphracts give a backhand of two hits.  Artabanus forgets to zig and is crushed by an enraged cataphract.  The Red Cavalry BG 2 also loses a base from its hits.  In cohesion, the Red Cavalry BG dissolves as it breaks from the impact.  Both Red cataphract BGs pass their cohesion tests for seeing Artabanus' death.  The Red Cavalry BG 2 flees 6" and the pursuing Orange cataphracts plow into Red cataphracts 4.  As this was still in the impact phase, this impact is resolved and both score two hits for a wash.  On the other end of the field, the Red Light Horse BG misses completely while the Orange Cavalry BG 2 scores a single hit.  The Red Light Horse emerges unscathed.  In the maneuver phase, Red Cavalry BG 1 forgets to move and as there is no shooting to be had into melee the turn progresses.  Red cataphract BG 4 and Orange cataphract BG 5 both again score two hits each for a draw.  Red cataphract BG 3 and Orange cataphract BG 4 score one hit each and also draw.  Red Light Horse BG scores three hits on the Orange Cavalry BG 2 who manages only two in return.  Although the Orange Cavalry survives its death roll, it fails its cohesion test and breaks.  In the route move, the cavalry flees 5" and the Red Light Horse pursues into them taking a base.  Vologases manages to survive.  This ends the melee phase and the game as Vologases' army breaks fleeing from the field.

After Vologases 3rd and final turn.


Wednesday, April 22, 2020

Test Run of Broken Rays of the Sun


During this time of Isolation, I have begun a test run of the Broken Rays of the Sun Campaign.  Only three factions are active at this time:  Artabanus IV, Vologases VI, Ardashir I.  I hope to keep a campaign newspaper up so people can read of the action.  When battles occur, I will do an AAR separate from the newspaper.


Babylonian Sun Times Spring 220 AD Vol 1

Here is the map from the newspaper as it came out blurry in the pdf:


Friday, April 17, 2020

FOG 300 - Parthians vs Principate Romans circa 220 ADR

At the instigation of the Imperial Legate in Coele Syria, the governor of Osroene in Edessa has dispatched elements of Legio III Parthica east.  Anicetus Caecus, Tribunus Militum, has been tasked with pushing the frontier into the lands of the Parthians. Slipping across the border from Amida in the early hours, his column surprised the Armenian town of Salmas.  Leaving a small garrison, the advance turned south towards Arbela where Artabanus IV, one of the two claimants to the Parthian throne was holding court.  News sped ahead of Anicetus Caecus and Artabanus had time to gather his forces to meet the Romans on the road north.

Parthian List and Host:

White Cataphracts have the white flag.  Green cataphracts have the green and white flag.  All mounted figures are Old Glory 15s.  Cataphracts are a mixture of PA02, SA02 & ES03.  Light Horse are from LA10.  Camp figures are all from Xyston (Camels - ANC20282, Holders - ANC20282 & ANC20056).


Principate Roman List and Host:

These are actual Marian Romans but hey its what I've got.  All figures are Old Glory 15s.  Legionaires are from  MR02 Legionaires Advancing.  The cavalry are from MR04.  The Auxiliary are actually the Javelinmen from the Thracian pack TH03.  They were originally painted to be the Greek City Militia for my Parthians but they will work as Thureophori too.  The camp is a scratch built affair I picked up at Bayou Wars years ago.  All of the legionaries, cavalry and leaders were painted by Thomas Demers of SMAC.

The Parthians ended up winning the initiative and chose Agricultural from the Roman terrain choices.  The Romans wanted to clog up the field as much as possible and chose the compulsory open field, an enclosed field and a gully.  The Parthians wanted minimal terrain and chose the Open.  The open field ended up on the right flank of the Roman line while the enclosed field ended up on the opposite side of the table on the Parthian flank.  The gully was picked up.

The view of the Roman line from atop on of the Parthian camels in the camp.  Romans deployed with the White Legionaires on the left, Tan Legionaires in the center, the cavalry next to them and the auxiliary on the right end of the line with the Roman leader.
Parthian light horse on the left next to the enclosed field followed by the Green flagged cataphracts then the White flagged cataphracts with general.  The right side of the Parthian line has another light horse on the outside and a BG of bow cavalry on the inside.
The Parthians won the roll to move first and opted to go straight ahead.  The cataphracts with general in tow moved 8" forward with a one base shift shift to their right.  The light horse next to them shifted 1 base right and advanced 5" into the enclosed field.  The Parthian bow cavalry moved 5" forward and shifted 1 base towards the Parthian center.  The light horse next to them moved 7" forward and shifted 1 base towards the center.  There was no shooting and no melee so the turn ended.

After the Parthian 1st turn.
The Roman 1st turn saw the auxiliary move 4" forward towards the enclosed field.  The two legionaries moved 3" forward and the cavalry moved with them to stay on line.  Again there was no shooting.  In the joint action phase, the Roman leader moved to the Tan legionaires in the center of the Roman line while the Parthian leader moved to the Green cataphracts thus ending the Roman 1st turn.

After the Roman 1st turn.
To begin the Parthian 2nd turn, both cataphracts charged forward slightly angered towards the center. The Roman leader attached to the Tan legionaries while the Parthian leader jumped in with the Green cataphracts.  In impact, the Green cataphracts scored 2 hits on the cavalry and 2 on the Tan legionaries.  The White cataphracts managed a total of 2 hits on the White legionaries.  The Roman cavalry scored 1 hit on the Green cataphracts while the Tan legionnaires scored 1 hit on the Green cataphracts and 4 on the White cataphracts.  Both generals survived the impact.  The Roman cavalry lost a base to the death roll and then disrupted.  The White cataphracts survived the 4 hits but dropped to disrupted on the cohesion test.  In the maneuver phase, the Parthian light horse in the enclosed field moved 4" forward towards the auxiliary.  The Parthian bow cavalry attempted a CMT to expand but failed and instead advanced to 4" of the White legionnaires.  The remaining Parthian light horse moved 5" into the open field and turned 90 degrees to shoot at the White legionnaires.  In the shooting phase, the Parthians scored 1 hit on each flank for no effect.  In the melee phase, the White cataphracts scored 1 hit on the Tan legionnaires who gave 1 in return.  The White legionnaires in overlap failed to hit.  The Green cataphracts scored 2 hits on the Tan Legionnaires (who missed completely) and 2 hits on the Roman cavalry (who also missed completely).  The Romans did not score enough hits to scratch the armour of the Parthian general and the Parthians were not able to hit the Roman general either.  The Tan legionnaires lost a base to hits and the disrupted on their cohesion test.  The Roman cavalry also lost a base to hits and fragmented on their cohesion test.  Both generals were tied up in combat and the disrupted legionnaires kept both cataphracts stuck in.

After the Parthian 2nd turn.
To begin the Roman 2nd turn, the auxiliary charged the Parthian light horse to their front.  The Parthians evaded 6" back and the auxiliary pursued 2".  In the shooting phase, the Parthians at the other end of the table scored 1 hit to the White Legionnaires to no effect.  In melee, the White Legionnaires scored 1 hit on the White cataphracts from overlap while the Tan legionnaires also scored 1 hit.  The White cataphracts scored 3 hits in return on the Tan legionnaires.  The Tan legionnaires scored 1 hit to the Green cataphracts as did the Roman cavalry.  However, the Green cataphracts came back with 1 hit on the Tan legionnaires and 2 on the Roman cavalry.  The Parthian leader survived combat yet again but the Roman leader was bashed into a bleeding lump by the mace of a Parthian cataphract who punched through.  The Tan legionnaires lost a base to the death roll and then double dropped to broken on their cohesion test.  The Roman cavalry survived their death roll but the death of the CinC pushed their cohesion test modifiers to -6 dropping them to broken.  The White legionnaires did not like the tribune anyway and emerged unscathed.  The auxiliary dropped to disrupted when the Roman cavalry broke.  The end of the melee phase saw the Roman army break ending the game.

After the end of the melee phase in the Romand 2nd turn.
Armoured Romans are expensive, hence the use of average legionaries in the list.  I will have to play with the list to find a way to get some superior ones.

Monday, March 30, 2020

FOG 300: Parthians v Later Pre-Islamic Bedouin circa 220 AD

Started back working on my Broken Rays of the Sun Campaign this week and have finished an update to the campaign mechanism.  The new update has been uploaded to the Broken Rays of the Sun page and is listed under the Spring 2020 Broken Rays of the Sun tab.  I will try out a few turns this week for grins and giggles and plan on having a few posts that track the progress of the campaign.

Title Page of the New Update

Current Map of the Broken Rays Campaign

To kick things off I trotted out my Later Pre-Islamic Bedouins to face off against Parthians circa 220 AD in more FOG 300 action.

Parthian List - Initiative should have been a 1 and the Army Break is 5.
Parthian host on the army board:  Bow Cavalry BG 1 at the top left, Light horse top center, Bow Cavalry BG 2 top right,  Green Cataphracts bottom left, General in front of camp, Red Cataphracts bottom right.

LPIB List:  Army Break should have been a 6.

The LPIB army on the army board.
The Parthians won the initiative and opted for Steppe out of the Bedouin terrain options.  The Bedouins took the compulsory open and then took the other open as their one terrain piece.  The Parthians chose the broken and the gentle hill and hoped to put a few obstacles in the way of the mounted Bedouins.  All in all their hopes were in vain as the table ended up very open.


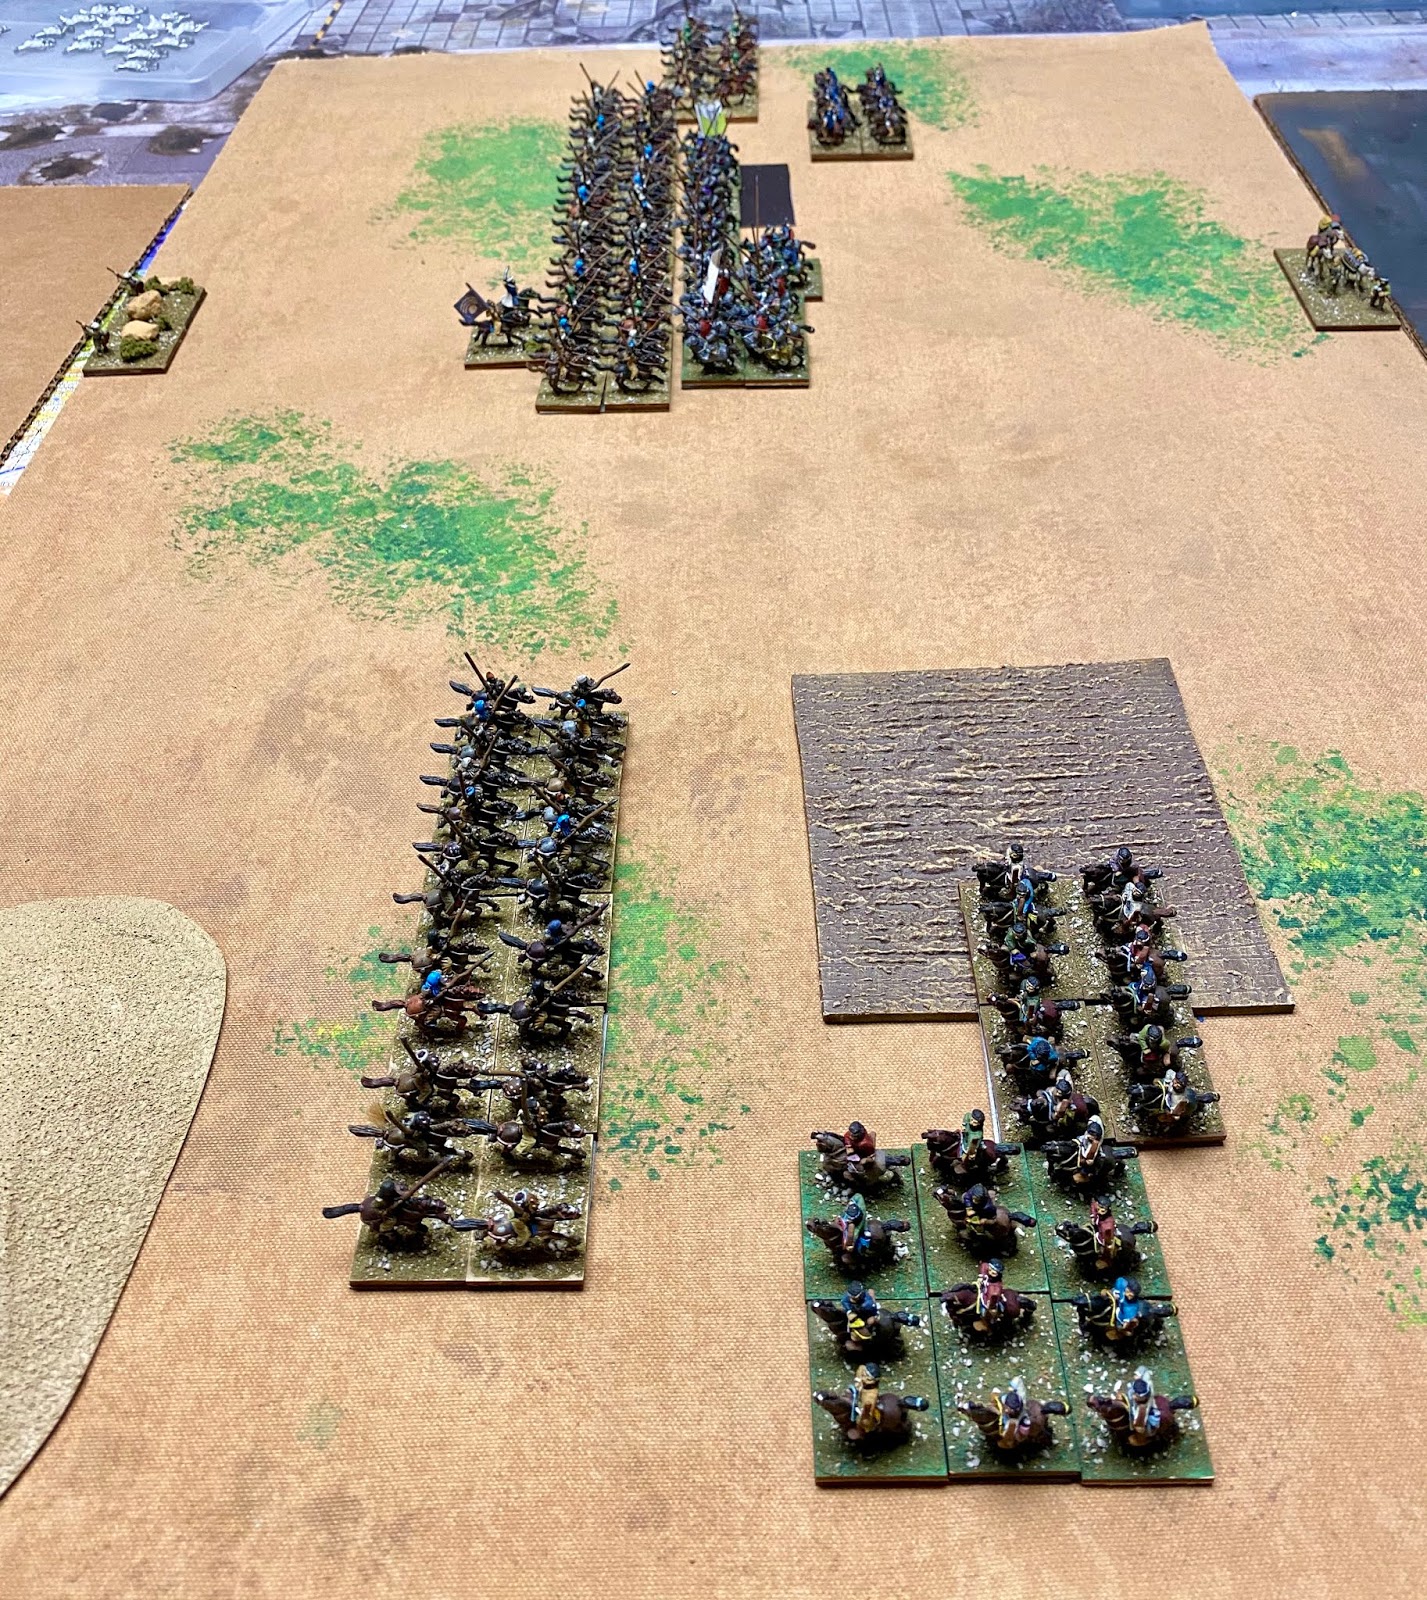
The Parthian host is deployed in the distance.  Bow cavalry BG 2 is on the left end of the Parthian line.  The Green cataphracts are deployed in line in the center of the Parthian host with the Red cataphracts and the Parthian leader attached to the Green cataphracts in front of the Parthian camp.  On the far right of the Parthian table side, the Bow cavalry BG 1 and the 6-pack of light horse are deployed in and beside the broken.


The Bedouin army is deployed in the distance.  The Blue light horse are deployed on the hill on the left end of the Bedouin line with the Bedouin  cavalry 1 next to them.  The remainder of the Bedouin force deployed towards the right end of the table covering their camp.  There are 5 more Bedouin cavalry BGs all with blue turbans that are deployed and numbered from left to right Bedouin cavalry BG 2 -5 with the Green light horse on the far right of the Bedouin line. The numbering will come into play later in this AAR.  The Bedouin leader is deployed with Bedouin cavalry BG 1.

The Parthians went first and started with the light horse BG contracting 1 file and advancing forward stopping just outside of 7" of the Blue Bedouin light horse.  Bow cavalry BG 1 moved 4" forward into the broken and did a 1 base shift to their left to come alongside the light horse.  The two cataphract BGs moved a group 4" forward and shifted 1 base to their left in their first move and then moved to just outside of 5" of the Bedouin line for their 2nd move.  The Bow cavalry BG 2 on the right end of the Parthian line moved 5" forward and shifted 1 base to their left to still be in line with the end of the cataphract line.  There was no shooting this turn and in the Joint action phase the Bedouin general moved towards the main Bedouin line from Bedouin cavalry BG 1.

After the Parthian 1st turn
In the Bedouin 1st turn, the Bedouins had no charges.  In the Maneuver phase, the Bedouin cavalry BG 1 moved forward 5" while the Green Bedouin light horse BG moved short to stay in line with them ( in the foreground of the picture below).   The remaining Bedouin cavalry BGs moved 5" straight ahead ending up less than 1/4" away from the Parthian line.  The Green Bedouin light horse BG (at the top of the picture below) moved 7"  straight forward.  The Bedouin leader moved 7" to the second file of Bedouin cavalry BG 2.  The Parthian bow fire from Parthian Bow cavalry BG 2 (at the top of the picture) was split so had no effect.  The Parthian bow fire from the Parthian light horse (at the bottom of the picture) managed only 1 hit for no effect.  Neither side had anything to do in Joint action so the turn ended.

After the Bedouin 1st turn
The Parthian 2nd turn started off with both cataphract BGs and Bow cavalry BG 2 charging.  The Bedouin Green light horse BG chose to evade.  The light horse BG evaded 7".  The Parthian leader committed to the front rank with the Green cataphracts.  In impact, the Red cataphracts inflicted 4 hots to 2 on Bedouin cavalry BG 2; the Green cataphracts scored 3 hits to Bedouin cavalry BG 3 and 1 hit to Bedouin cavalry BG 4 while taking 4 from Bedouin cavalry BG 3 and 2 from Bedouin cavalry BG 4;  and the Parthian Bow Cavalry BG 2 scored 5 hits to Bedouin cavalry BG 5 while taking 3.  The Red cataphracts survived their death roll as did the Bedouin cavalry BG 2.  The Green cataphracts suffered a base loss for taking 6 hits in a losing fight.  Bedouin attempts to kill the Parthian leader were for nought.  Bedouin cavalry BG 3 also survived their death roll.  The Parthian Bow cavalry BG 2 survived their death roll but the Bedouin cavalry BG 5 lost a base.  The Bedouin cavalry BG 2 dropped to disrupted as did the Green cataphracts.  Bedouin cavalry BG 5 managed to roll an adjusted 2 on their cohesion test and dropped to fragmented.  In the Maneuver phase, the BGs in melee conformed.  The Parthian light horse BG expanded a file and wheeled towards the Bedouin Blue light horse BG stopping when they came to 1".  The Parthian Bow cavalry BG 1 also wheeled 1" to come on line with the Parthian light horse. In the Shooting phase, the Parthian horse archers combined for 2 hits on the Bedouin Blue light horse but it was for no effect.  In the Melee phase, the Red cataphracts scored 4 hits to 1 against Bedouin cavalry BG 2; the Green cataphracts scored 1 hit to each of the Bedouin cavalry BGs (3 & 4) facing it while taking 1 from each in return; and the Parthian Bow cavalry BG 2 scored 0 and took 0 from Bedouin cavalry BG 5.  The Parthian general survived combat once more while the Bedouin cavalry 2 BG lost a base to hits but passed cohesion.  In Joint action, the Bedouin leader moved to the fragmented Bedouin cavalry BG 5 ending the Parthian 2nd turn.

After the Parthian 2nd turn
For the Bedouin 2nd turn, the Bedouins opted not to charge with Bedouin cavalry BG 1 and passed a CMT to hold.  In the Maneuver phase, the Bedouin Blue light horse BG passed a CMT to back up 2".   The Bedouin Green light horse BG turned around.  In the Shooting phase, the Parthian bow fire was ineffective.  In the Melee phase, the Red cataphracts scored 2 hits and took 1 from Bedouin cavalry BG 2; the Green cataphracts managed 1 hit to each of the Bedouin cavalry BGs facing him ( 3 & 4) but took 2 from each in return;  and the Parthian Bow cavalry BG 2 and Bedouin cavalry BG 5 both managed another round of 0 hits.  The Bedouin cavalry BG 2 lost a base on the death roll and auto broke.  The Green cataphracts survived their death roll and the general fighting but fragmented on cohesion.  Bedouin cavalry BG 3 did not care that a friend broke beside him and carried on fighting. The broken Bedouins fled 6" while the Red cataphracts only followed 4"  In the Joint action phase, the broken Bedouin cavalry fled off the table.  The Bedouin leader attempted to rally Bedouin cavalry BG 5 but failed.

After Bedouin 2nd turn
To begin the Parthian 3rd turn, there were no charges to declare.  The Red cataphracts made a CMT and turned 90 degrees to tun into the flank of the Bedouin cavalry 3 BG.  The Parthian light horse and the Parthian Bow cavalry BG 1 both maneuvered 3" forward towards their Bedouin opponents.  In the Shooting phase, the Parthian bow fire was again ineffective.  In the Melee phase, the Red cataphracts scored 1 hit to the Bedouin cavalry 3 BG and took none in return, the Green cataphracts scored 1 hit on the Bedouin cavalry BG 3 and 1 on Bedouin cavalry BG 4 taking one from each of the Bedouin BGs in return, the Parthian Bow cavalry BG 2 scored 1 hit on the Bedouin cavalry BG 5 and took 2 in return.  The Bedouin cavalry BG 3 rolled out of its death roll and passed its cohesion test.  The Parthian general survived another round of combat.  The Parthian Bow cavalry BG 2 lost a base to the death roll and then disrupted.  In the Joint action phase, The Green cataphracts rallied from fragmented to disrupted.  The Bedouin attempt to rally BG 5 failed ending the Parthian 3rd turn.

After Parthian 3rd turn
In the Bedouin 3rd turn,  the Bedouin Blue light horse BG and the Bedouin cavalry BG 1 declared charges.  The Bedouin Blue light horse, however, failed a CMT to charge and the Bedouin cavalry charged alone.  At Impact, the Parthian Bow cavalry BG 1 scored 2 hits to 1 from the Bedouins.  The Bedouins lost a base to hits but passed cohesion.  In the Maneuver phase, the Bedouin Green light horse BG moved into overlap on the flank of the Parthian Bow cavalry BG 2.  The Bedouin Blue light horse BG wheeled to be parallel to the Parthian light horse.  In the Shooting phase, the Parthian light horse scored 2 hits on the Bedouin Blue light horse who disrupted.  In the Melee phase, the Parthian Bow cavalry BG 1 and the Bedouin cavalry BG 1 both scored a single hit for a draw.  In the center, the Red cataphracts scored 4 hits on the Bedouin cavalry BG 3 taking none in return while the Green cataphracts scored 0 hits on the Bedouin cavalry BG 3 and 1 on Bedouin cavalry BG 4 taking one hit in return from Bedouin cavalry BG 3.  The Parthian Bow cavalry BG 2 scored 0 hits and took 2 from Bedouin cavalry BG 5 and 1 from the Bedouin Green light horse BG.  The Bedouin cavalry BG 3 survived the death roll but fragmented on cohesion.  The Parthian Bow cavalry BG 2 survived the death roll but broke on cohesion running 7" in route.  The Green cataphracts did not care about the bow cavalry breaking.  The Bedouin cavalry BG 5 pursued into the broken Parthian bow cavalry as did the Bedouin Green light horse BG taking another 2 bases.  In Joint action, the Bedouin cavalry BG 5 rolled a successful CMT and stopped pursuing.  The broken Parthian cavalry fled off the table.  The Bedouin Green light horse rolled short and stopped 2" from the table edge.  The Green cataphracts rallied once more to fresh status.  The Bedouin leader attempted to rally the fragmented Bedouin cavalry BG 5 but failed ending the turn.

After Bedouin 3rd turn
In the Parthian 4th turn, there were no Parthian charges.  The Parthians opted to stand pat with their light horse to continue shooting.  In the shooting phase, The Parthian light horse managed no hits.  In the Melee phase, the Parthian Bow cavalry BG 1 scored 0 hits and took 1 in return but passed both the death roll and cohesion test.  In the center, the Red cataphracts scored 2 hits against 0 on the Bedouin cavalry BG 3 while the Green cataphracts scored 1 to 0 to the same.  The Green cataphracts also score 1 hit to 3 from the Bedouin cavalry BG 4.  The Green cataphracts survived their death roll, the general in combat and their cohesion test.  The Bedouin cavalry BG 3 suffered a base loss on the death roll and broke on cohesion.  The broken Bedouin BG had to collapse down into a column to try and get away and ran 5" but were caught by the Red cataphracts and lost yet another base.  In the Joint action phase, the Bedouin leader attempted to rally Bedouin cavalry BG 5 and failed yet again.  The broken Bedouins routed 7" again and managed to elude the pursuing Red cataphracts who slammed into the side of Bedouin cavalry BG 4 dropping them to disrupted.  The broken Bedouin cavalry BG 3 was picked up at the end of the turn as they were at 50%.

Unfortunately, the Buzzard cam apparently went down in this turn and no picture survives.

To start the Bedouin 4th turn, the Bedouin Blue light horse BG attempted a CMT to charge while disrupted and failed.  The Red cataphracts only managed 1 hit to the Bedouin cavalry BG 4 and took 0 in return.  The Bedouin cavalry subsequently lost a base on the death roll and then dropped to fragmented.  In the Maneuver phase, Bedouin cavalry BG 5 turn 180 hopping to get another turn in so they could possibly charge the Green cataphracts in the rear.  The Bedouin Green light horse BG passed a CMT, turned 90 and moved 5" towards the Parthian camel train.  The Bedouin Blue light horse BG moved to the table edge on their side stopping just outside of 7" from the Parthian light horse.  There was no shooting this phase so into Melee the turn proceeded.  The Bedouin cavalry BG 1 scored 2 hits to the Parthian Bow cavalry BG 1 who rolled high on their death roll and survived cohesion.  In the center, the fragmented Bedouin cavalry BG 4 scored only a single hit to the Red cataphracts and whiffed against the Green cataphracts taking 3 from each cataphract BG in return.  This loss of a base auto broke the Bedouins breaking the Bedouin army.

After Bedouin 4th turn

I am going to have to play with the editing software on my computer as the total number of similar BGs on the table made it difficult to keep up with which BG was which.  I hope you enjoyed this report and will return for the continuing story of the Broken Rays of the Sun.  Until next time, stay safe and keep your distance.

Sunday, March 29, 2020

Social Isolation Week 2

Been working on updating the Broken Rays of the Sun Campaign scenario this week.  Christopher Parker of Day of Battle Games has developed a very interesting vehicle for doing campaigns and the Spring 2020 version of the Broken Rays of the Sun Campaign has incorporated some of his thoughts while combining parts of the original design.  I hope some of you find it of interest.

Spring 2020 Broken Rays of the Sun

Painting continues this week.  Last week I updated everyone on the Mountain Indian Light Horse I completed.  This week I have been working on odds and ends while fleshing out my Scythian Horse Archers and finishing a few odd figures for my Classical Indians.


On the left, we have the Mountain Indian Cavalry from last week (my son added the palm tree).  In the back, the beginnings of two 4-stand BGs of Old Glory Skythian Horse Archers (OG pack SK03).  The two horses in front of the Skythians will be part of a steppe army camp using the FIB SK06 Skythian 2 horse Wagons.  In front of them, is a single base of cattle.  I am sometimes induced to play ADLG with the Birmingham Bunnies and my other friends in the GCC and the Classical Indians are allowed a stand of stampeding cattle.  These work as a scythe chariot of sorts in ADLG.  The cattle are from Khurasan (from their West Sudanese Range - no pack #) and the two herders are Essex.  In front of the cattle, there are 8 bases laid out with the first few figures painted of the FIB WEPS09 Daylami Hillmen.  I have another pack of these waiting to be primed as well.  I think these will work well as generic hillmen for anywhere in the Persian East.  Down front on the right, you see 4 stands of Classical Indians.  The two stands on the left are a mix of foot from OG IN04 & IN05 with an extra officer from IN01A thrown in.  The two stands on the right have figures from the OG IN06.  In the far right you can see a single finger from a Skythian foot archer BG I am working on.

I hope to have some finished stands to roll out for next week and maybe even an AAR.

Until next time, keep rolling high (unless you need low).

Friday, March 20, 2020

Gateway to the Ganges II

During this time of Social Isolation, I have also had some time to complete a map for a campaign spanning Northern India.  It is not drawn to scale nor is it 100% historically accurate but it serves my needs.  Originally, my goal was for a map to be used primarily for the Into-Greek period but I think it will also work for the Mauryan Empire through the Kushan Empire.

FOG Update

 FOG version 3.3 has dropped.  See the FOG 3.3 resources page.  I have added links to the rules and the books plus the ReadMe doc.  I will a...